PREPARATION
Selecting the date and time
![]() You can record the date and time with the image data in the CF CARD when you take an image. You will need to check and select the correct Date / Time when :
You can record the date and time with the image data in the CF CARD when you take an image. You will need to check and select the correct Date / Time when :
The camera is used for the first time.
The batteries have been removed for a period longer than 1 hour.
1
2
3
4
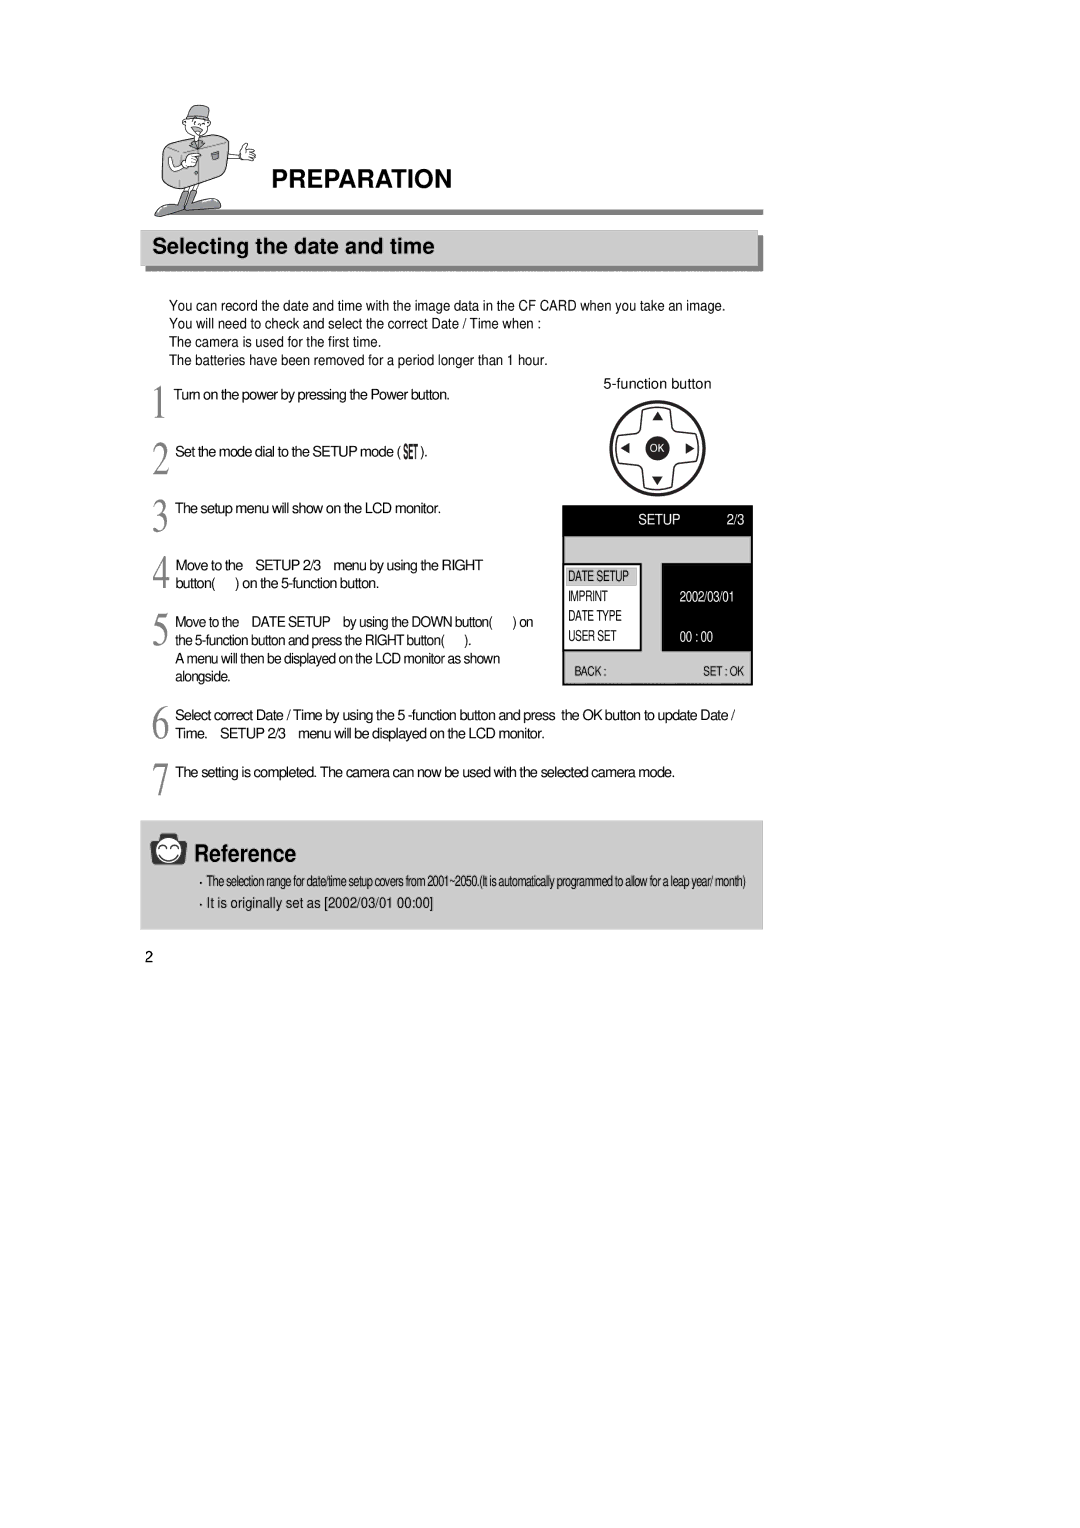
5 Move to the DATE SETUP by using the DOWN button( ![]() ) on the
) on the ![]() ).
).
A menu will then be displayed on the LCD monitor as shown alongside.
![]()
![]()
|
| SETUP | 2/3 | ||
|
|
|
|
|
|
|
|
|
|
|
|
| DATE SETUP |
|
|
|
|
| IMPRINT |
|
| 2002/03/01 | |
| DATE TYPE |
|
|
|
|
| USER SET |
|
| 00 : 00 | |
|
|
|
|
|
|
| BACK : |
|
|
| SET : OK |
|
|
|
|
|
|
6
7
Select correct Date / Time by using the 5
The setting is completed. The camera can now be used with the selected camera mode.
![]() Reference
Reference
![]() The selection range for date/time setup covers from 2001~2050.(It is automatically programmed to allow for a leap year/ month)
The selection range for date/time setup covers from 2001~2050.(It is automatically programmed to allow for a leap year/ month) ![]() It is originally set as [2002/03/01 00:00]
It is originally set as [2002/03/01 00:00]