Black Level | Alt Video Out |
Parental
The Black Level feature adjusts the reference level of black in the video signal to one of two choices:
•Off - Standard NTSC black level. Yields consistent contrast through all sources.
•On - Enhanced black level, for increased contrast during DVD playback.
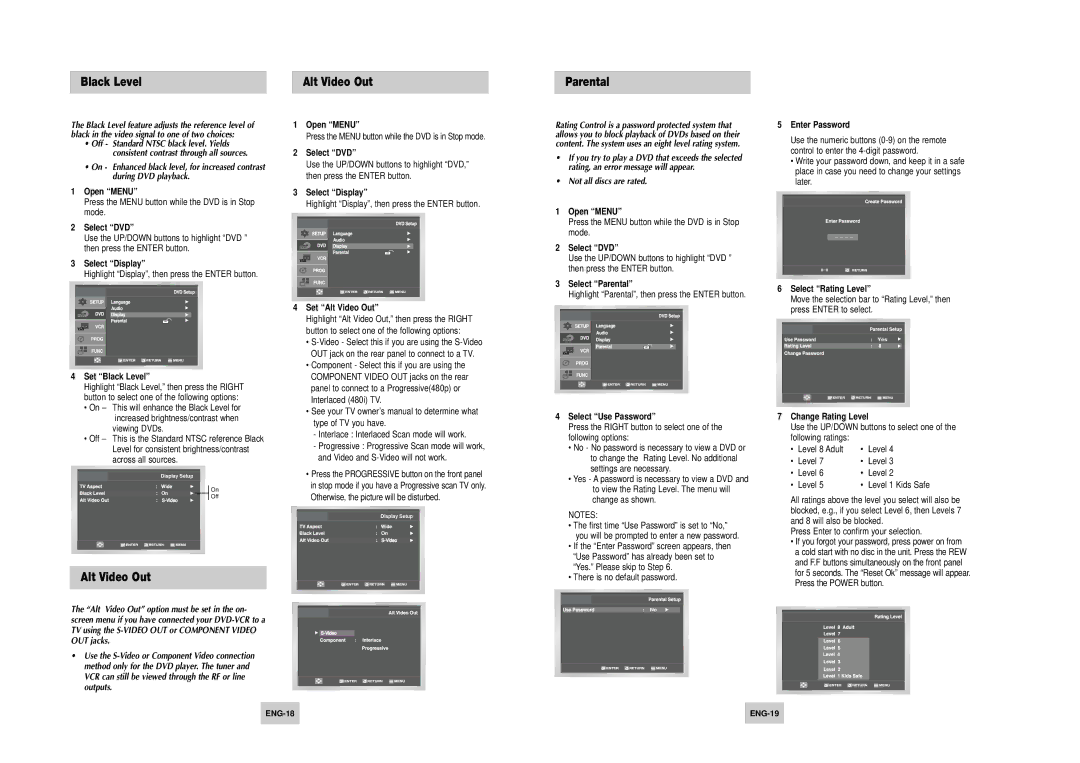
1Open “MENU”
Press the MENU button while the DVD is in Stop mode.
2Select “DVD”
Use the UP/DOWN buttons to highlight “DVD ” then press the ENTER button.
3Select “Display”
Highlight “Display”, then press the ENTER button.
4Set “Black Level”
Highlight “Black Level,” then press the RIGHT button to select one of the following options:
• On – This will enhance the Black Level for
increased brightness/contrast when viewing DVDs.
•Off – This is the Standard NTSC reference Black Level for consistent brightness/contrast across all sources.
Display Setup
On | On | |
Off | ||
|
Alt Video Out
The “Alt Video Out” option must be set in the on- screen menu if you have connected your
•Use the
1Open “MENU”
Press the MENU button while the DVD is in Stop mode.
2Select “DVD”
Use the UP/DOWN buttons to highlight “DVD,” then press the ENTER button.
3Select “Display”
Highlight “Display”, then press the ENTER button.
4Set “Alt Video Out”
Highlight “Alt Video Out,” then press the RIGHT button to select one of the following options:
•
•Component - Select this if you are using the COMPONENT VIDEO OUT jacks on the rear panel to connect to a Progressive(480p) or Interlaced (480i) TV.
•See your TV owner’s manual to determine what type of TV you have.
-Interlace : Interlaced Scan mode will work.
-Progressive : Progressive Scan mode will work, and Video and
•Press the PROGRESSIVE button on the front panel in stop mode if you have a Progressive scan TV only. Otherwise, the picture will be disturbed.
Display Setup
On
Rating Control is a password protected system that allows you to block playback of DVDs based on their content. The system uses an eight level rating system.
•If you try to play a DVD that exceeds the selected rating, an error message will appear.
•Not all discs are rated.
1Open “MENU”
Press the MENU button while the DVD is in Stop mode.
2Select “DVD”
Use the UP/DOWN buttons to highlight “DVD ” then press the ENTER button.
3Select “Parental”
Highlight “Parental”, then press the ENTER button.
4Select “Use Password”
Press the RIGHT button to select one of the following options:
•No - No password is necessary to view a DVD or to change the Rating Level. No additional settings are necessary.
•Yes - A password is necessary to view a DVD and to view the Rating Level. The menu will change as shown.
NOTES:
•The first time “Use Password” is set to “No,” you will be prompted to enter a new password.
•If the “Enter Password” screen appears, then “Use Password” has already been set to “Yes.” Please skip to Step 6.
•There is no default password.
No
5Enter Password
Use the numeric buttons
•Write your password down, and keep it in a safe place in case you need to change your settings later.
0~9
6Select “Rating Level”
Move the selection bar to “Rating Level,” then press ENTER to select.
Yes
7Change Rating Level
Use the UP/DOWN buttons to select one of the following ratings:
• | Level 8 Adult | • | Level 4 |
• | Level 7 | • | Level 3 |
• | Level 6 | • | Level 2 |
• | Level 5 | • | Level 1 Kids Safe |
All ratings above the level you select will also be blocked, e.g., if you select Level 6, then Levels 7 and 8 will also be blocked.
Press Enter to confirm your selection.
•If you forgot your password, press power on from a cold start with no disc in the unit. Press the REW and F.F buttons simultaneously on the front panel for 5 seconds. The “Reset Ok” message will appear. Press the POWER button.