Monitor TV Connections
Connecting Other Video Equipment
A/V Receiver Connections | Deck Control Buttons |
NOTE: A monitor television is not the same as a computer monitor.
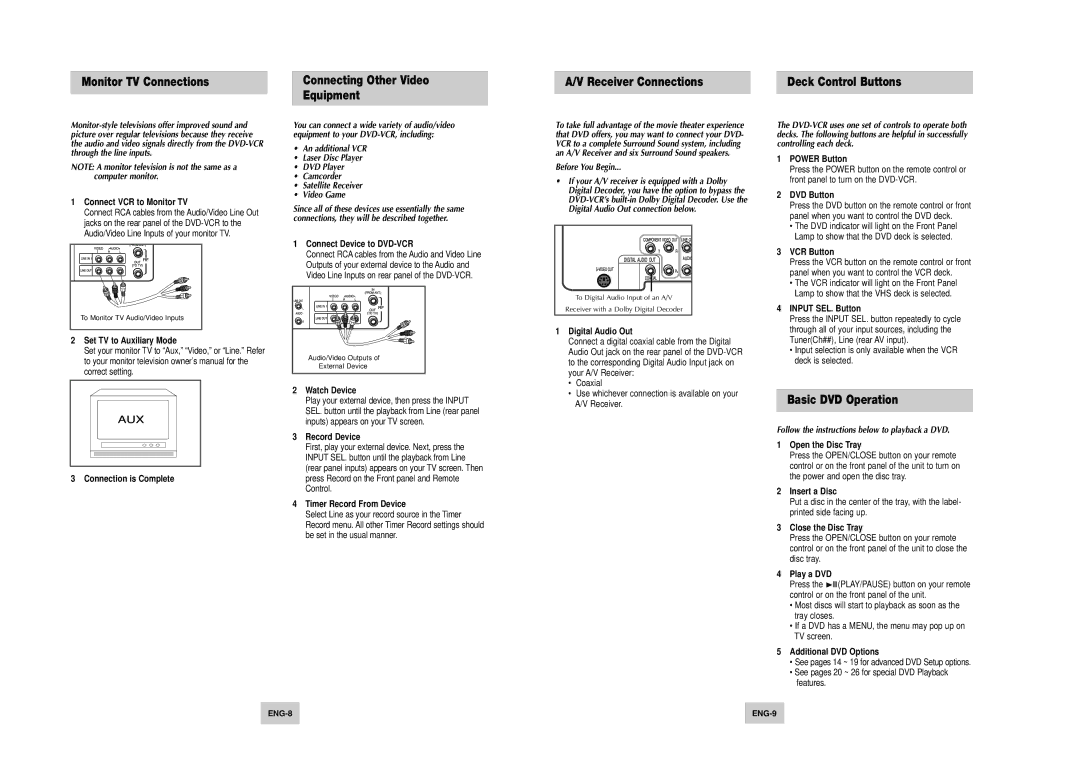
1Connect VCR to Monitor TV
Connect RCA cables from the Audio/Video Line Out jacks on the rear panel of the
To Monitor TV Audio/Video Inputs |
2Set TV to Auxiliary Mode
Set your monitor TV to “Aux,” “Video,” or “Line.” Refer to your monitor television owner’s manual for the correct setting.
3 Connection is Complete
You can connect a wide variety of audio/video equipment to your
•An additional VCR
•Laser Disc Player
•DVD Player
•Camcorder
•Satellite Receiver
•Video Game
Since all of these devices use essentially the same connections, they will be described together.
1Connect Device to DVD-VCR
Connect RCA cables from the Audio and Video Line Outputs of your external device to the Audio and Video Line Inputs on rear panel of the
Audio/Video Outputs of |
External Device |
2Watch Device
Play your external device, then press the INPUT SEL. button until the playback from Line (rear panel inputs) appears on your TV screen.
3Record Device
First, play your external device. Next, press the INPUT SEL. button until the playback from Line (rear panel inputs) appears on your TV screen. Then press Record on the Front panel and Remote Control.
4Timer Record From Device
Select Line as your record source in the Timer Record menu. All other Timer Record settings should be set in the usual manner.
To take full advantage of the movie theater experience that DVD offers, you may want to connect your DVD- VCR to a complete Surround Sound system, including an A/V Receiver and six Surround Sound speakers.
Before You Begin...
•If your A/V receiver is equipped with a Dolby Digital Decoder, you have the option to bypass the
To Digital Audio Input of an A/V |
Receiver with a Dolby Digital Decoder |
1Digital Audio Out
Connect a digital coaxial cable from the Digital Audio Out jack on the rear panel of the
•Coaxial
•Use whichever connection is available on your A/V Receiver.
The
1POWER Button
Press the POWER button on the remote control or front panel to turn on the
2DVD Button
Press the DVD button on the remote control or front panel when you want to control the DVD deck.
•The DVD indicator will light on the Front Panel Lamp to show that the DVD deck is selected.
3VCR Button
Press the VCR button on the remote control or front panel when you want to control the VCR deck.
•The VCR indicator will light on the Front Panel Lamp to show that the VHS deck is selected.
4INPUT SEL. Button
Press the INPUT SEL. button repeatedly to cycle through all of your input sources, including the Tuner(Ch##), Line (rear AV input).
•Input selection is only available when the VCR deck is selected.
Basic DVD Operation
Follow the instructions below to playback a DVD.
1Open the Disc Tray
Press the OPEN/CLOSE button on your remote control or on the front panel of the unit to turn on the power and open the disc tray.
2Insert a Disc
Put a disc in the center of the tray, with the label- printed side facing up.
3Close the Disc Tray
Press the OPEN/CLOSE button on your remote control or on the front panel of the unit to close the disc tray.
4Play a DVD
Press the ❿ll(PLAY/PAUSE) button on your remote control or on the front panel of the unit.
•Most discs will start to playback as soon as the tray closes.
•If a DVD has a MENU, the menu may pop up on TV screen.
5Additional DVD Options
•See pages 14 ~ 19 for advanced DVD Setup options.
•See pages 20 ~ 26 for special DVD Playback features.