Basic VCR Operation | Basic TV Tuner Operations |
Menu Language | Manual Clock Set |
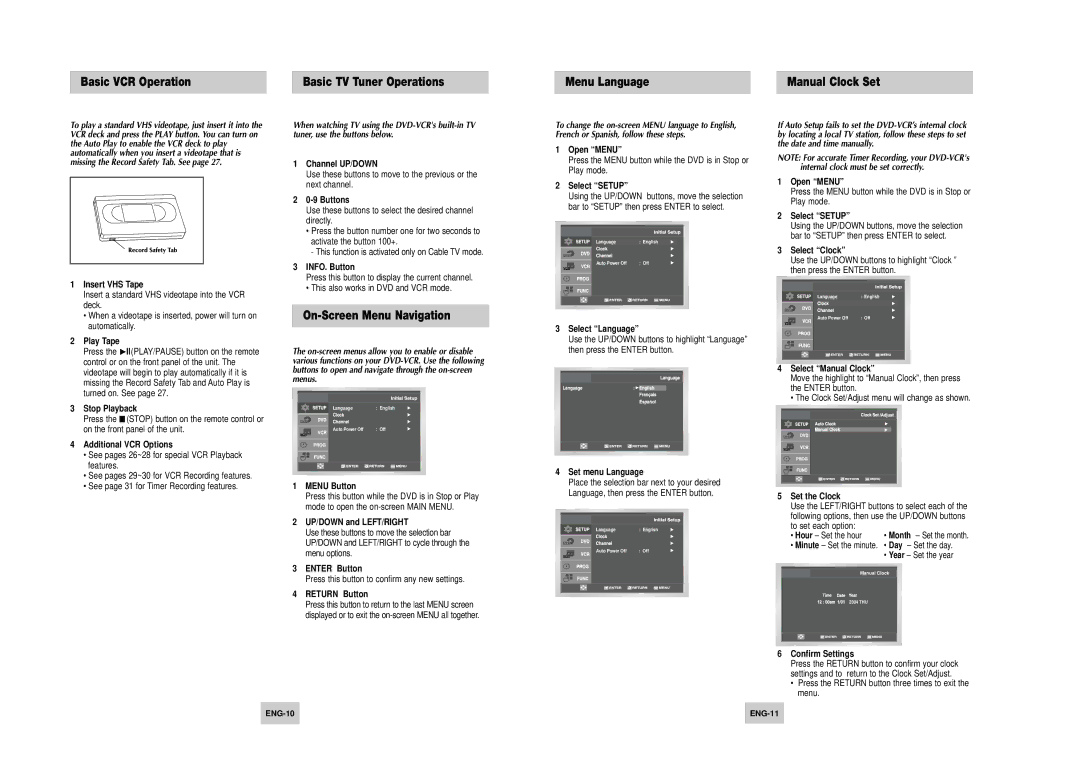
To play a standard VHS videotape, just insert it into the VCR deck and press the PLAY button. You can turn on the Auto Play to enable the VCR deck to play automatically when you insert a videotape that is missing the Record Safety Tab. See page 27.
When watching TV using the
1 | Channel UP/DOWN |
| Use these buttons to move to the previous or the |
| next channel. |
2 |
|
| Use these buttons to select the desired channel |
| directly. |
| • Press the button number one for two seconds to |
| activate the button 100+. |
| - This function is activated only on Cable TV mode. |
3 | INFO. Button |
| Press this button to display the current channel. |
To change the
1Open “MENU”
Press the MENU button while the DVD is in Stop or Play mode.
2Select “SETUP”
Using the UP/DOWN buttons, move the selection bar to “SETUP” then press ENTER to select.
Language | : | English |
Auto Power Off | : | Off |
If Auto Setup fails to set the
NOTE: For accurate Timer Recording, your
1Open “MENU”
Press the MENU button while the DVD is in Stop or Play mode.
2Select “SETUP”
Using the UP/DOWN buttons, move the selection bar to “SETUP” then press ENTER to select.
3Select “Clock”
Use the UP/DOWN buttons to highlight “Clock ” then press the ENTER button.
1 | Insert VHS Tape |
| Insert a standard VHS videotape into the VCR |
| deck. |
| • When a videotape is inserted, power will turn on |
| automatically. |
2 | Play Tape |
| Press the ❿ll(PLAY/PAUSE) button on the remote |
| control or on the front panel of the unit. The |
• This also works in DVD and VCR mode. |
On-Screen Menu Navigation
The
Language | : | English |
Auto Power Off | : | Off |
3 Select “Language”
Use the UP/DOWN buttons to highlight “Language” then press the ENTER button.
| videotape will begin to play automatically if it is |
| missing the Record Safety Tab and Auto Play is |
| turned on. See page 27. |
3 | Stop Playback |
| Press the ■ (STOP) button on the remote control or |
| on the front panel of the unit. |
4 | Additional VCR Options |
| • See pages 26~28 for special VCR Playback |
| features. |
| • See pages 29~30 for VCR Recording features. |
| • See page 31 for Timer Recording features. |
buttons to open and navigate through the on-screen menus.
Language | : | English |
Auto Power Off | : | Off |
1MENU Button
Press this button while the DVD is in Stop or Play mode to open the
2UP/DOWN and LEFT/RIGHT
Use these buttons to move the selection bar UP/DOWN and LEFT/RIGHT to cycle through the menu options.
3ENTER Button
Press this button to confirm any new settings.
4RETURN Button
4Set menu Language
Place the selection bar next to your desired Language, then press the ENTER button.
Language | : | English |
Auto Power Off | : | Off |
4Select “Manual Clock”
Move the highlight to “Manual Clock”, then press the ENTER button.
• The Clock Set/Adjust menu will change as shown.
5Set the Clock
Use the LEFT/RIGHT buttons to select each of the following options, then use the UP/DOWN buttons
to set each option:
• Hour – Set the hour | • Month – Set the month. |
•Minute – Set the minute. • Day – Set the day.
•Year – Set the year
Manual Clock
Press this button to return to the last MENU screen displayed or to exit the
2004 THU
6Confirm Settings
Press the RETURN button to confirm your clock settings and to return to the Clock Set/Adjust.
•Press the RETURN button three times to exit the menu.
