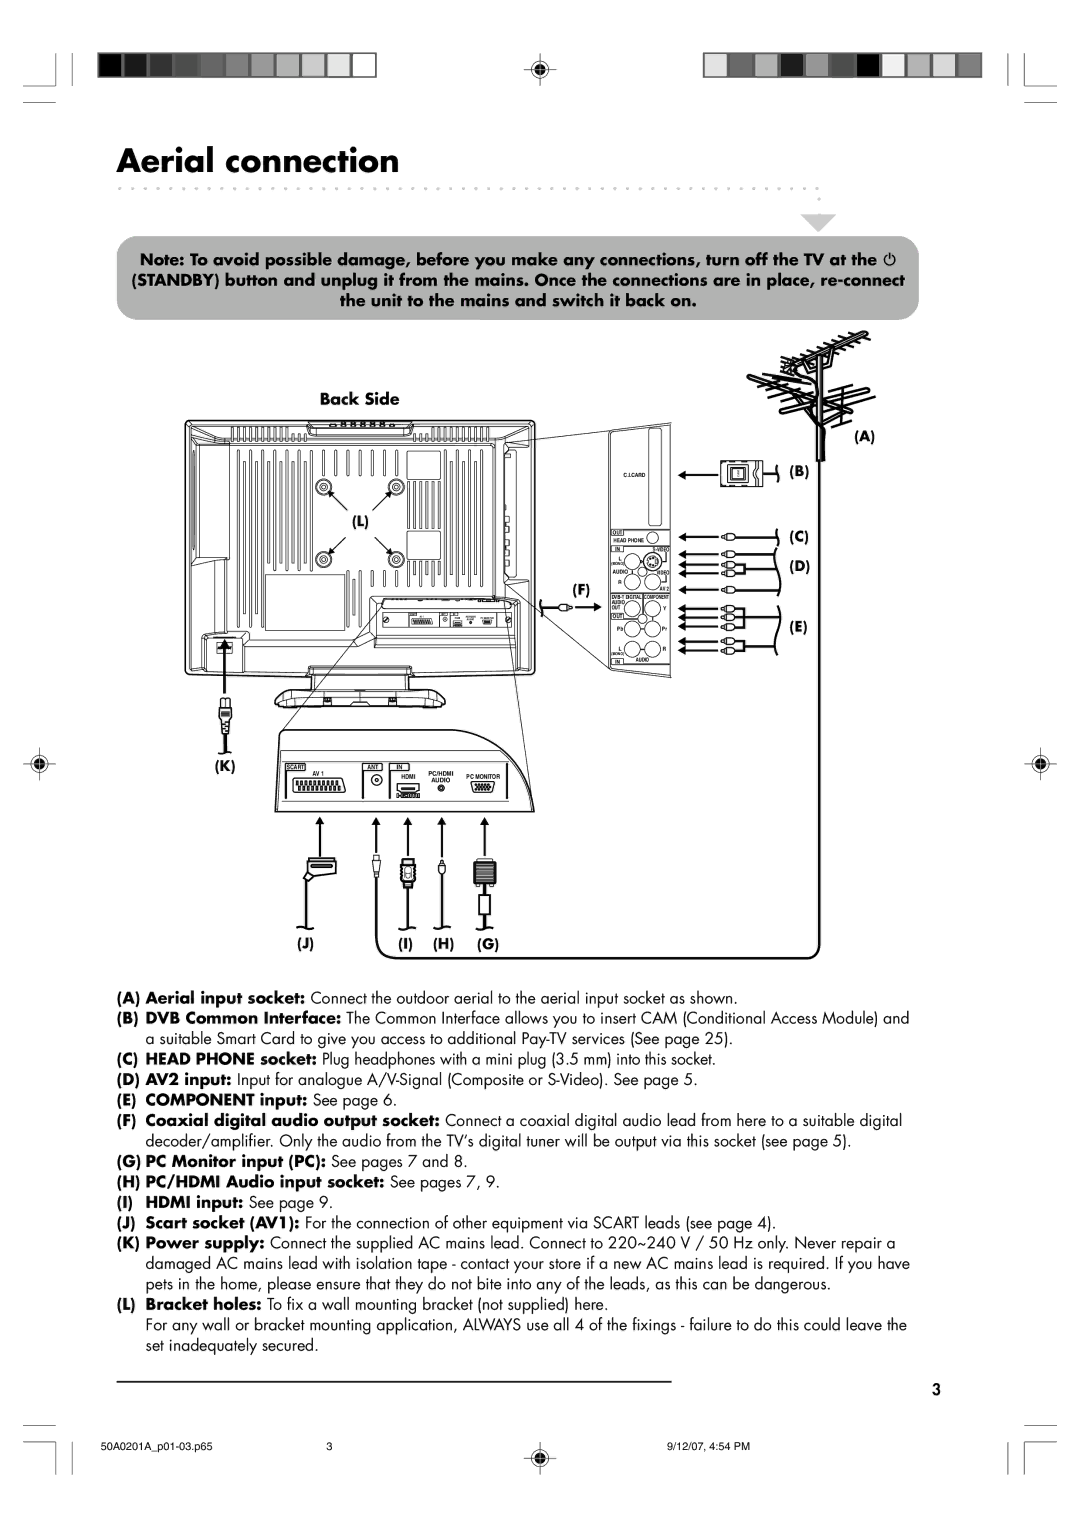
Aerial connection
Note: To avoid possible damage, before you make any connections, turn off the TV at the w (STANDBY) button and unplug it from the mains. Once the connections are in place,
Back Side
|
|
|
| C.I.CARD |
|
(L) |
|
|
| OUT |
|
|
|
|
|
| |
|
|
|
| HEAD PHONE |
|
|
|
|
| IN | |
|
|
|
| L |
|
|
|
|
| (MONO) |
|
|
|
|
| AUDIO | VIDEO |
|
|
| (F) | R |
|
|
|
|
| AV 2 | |
|
|
| |||
|
|
|
| AUDIO |
|
|
|
|
| OUT | Y |
SCART | ANT IN |
|
| OUT |
|
AV 1 | HDMI | PC/HDMI | PC MONITOR |
| |
| AUDIO |
| |||
|
|
|
| Pb | Pr |
|
|
|
| L | R |
|
|
|
| (MONO) |
|
![]() IN
IN ![]() AUDIO
AUDIO
(K) | SCART | ANT IN |
AV 1 | HDMI | PC/HDMI | PC MONITOR |
| AUDIO | ||
|
|
|
CAM
(A)
(B)
(C)
(D)
(E)
(J)(I) (H) (G)
(A)Aerial input socket: Connect the outdoor aerial to the aerial input socket as shown.
(B)DVB Common Interface: The Common Interface allows you to insert CAM (Conditional Access Module) and a suitable Smart Card to give you access to additional
(C)HEAD PHONE socket: Plug headphones with a mini plug (3.5 mm) into this socket.
(D)AV2 input: Input for analogue
(E)COMPONENT input: See page 6.
(F)Coaxial digital audio output socket: Connect a coaxial digital audio lead from here to a suitable digital decoder/amplifier. Only the audio from the TVÕs digital tuner will be output via this socket (see page 5).
(G)PC Monitor input (PC): See pages 7 and 8.
(H)PC/HDMI Audio input socket: See pages 7, 9.
(I)HDMI input: See page 9.
(J)Scart socket (AV1): For the connection of other equipment via SCART leads (see page 4).
(K)Power supply: Connect the supplied AC mains lead. Connect to 220~240 V / 50 Hz only. Never repair a damaged AC mains lead with isolation tape - contact your store if a new AC mains lead is required. If you have pets in the home, please ensure that they do not bite into any of the leads, as this can be dangerous.
(L)Bracket holes: To fix a wall mounting bracket (not supplied) here.
For any wall or bracket mounting application, ALWAYS use all 4 of the fixings - failure to do this could leave the set inadequately secured.
3
3 | 9/12/07, 4:54 PM |