![[4] Control by the computer with USB memory](/images/new-backgrounds/106382/106382185x1.webp)
Using the real time capture
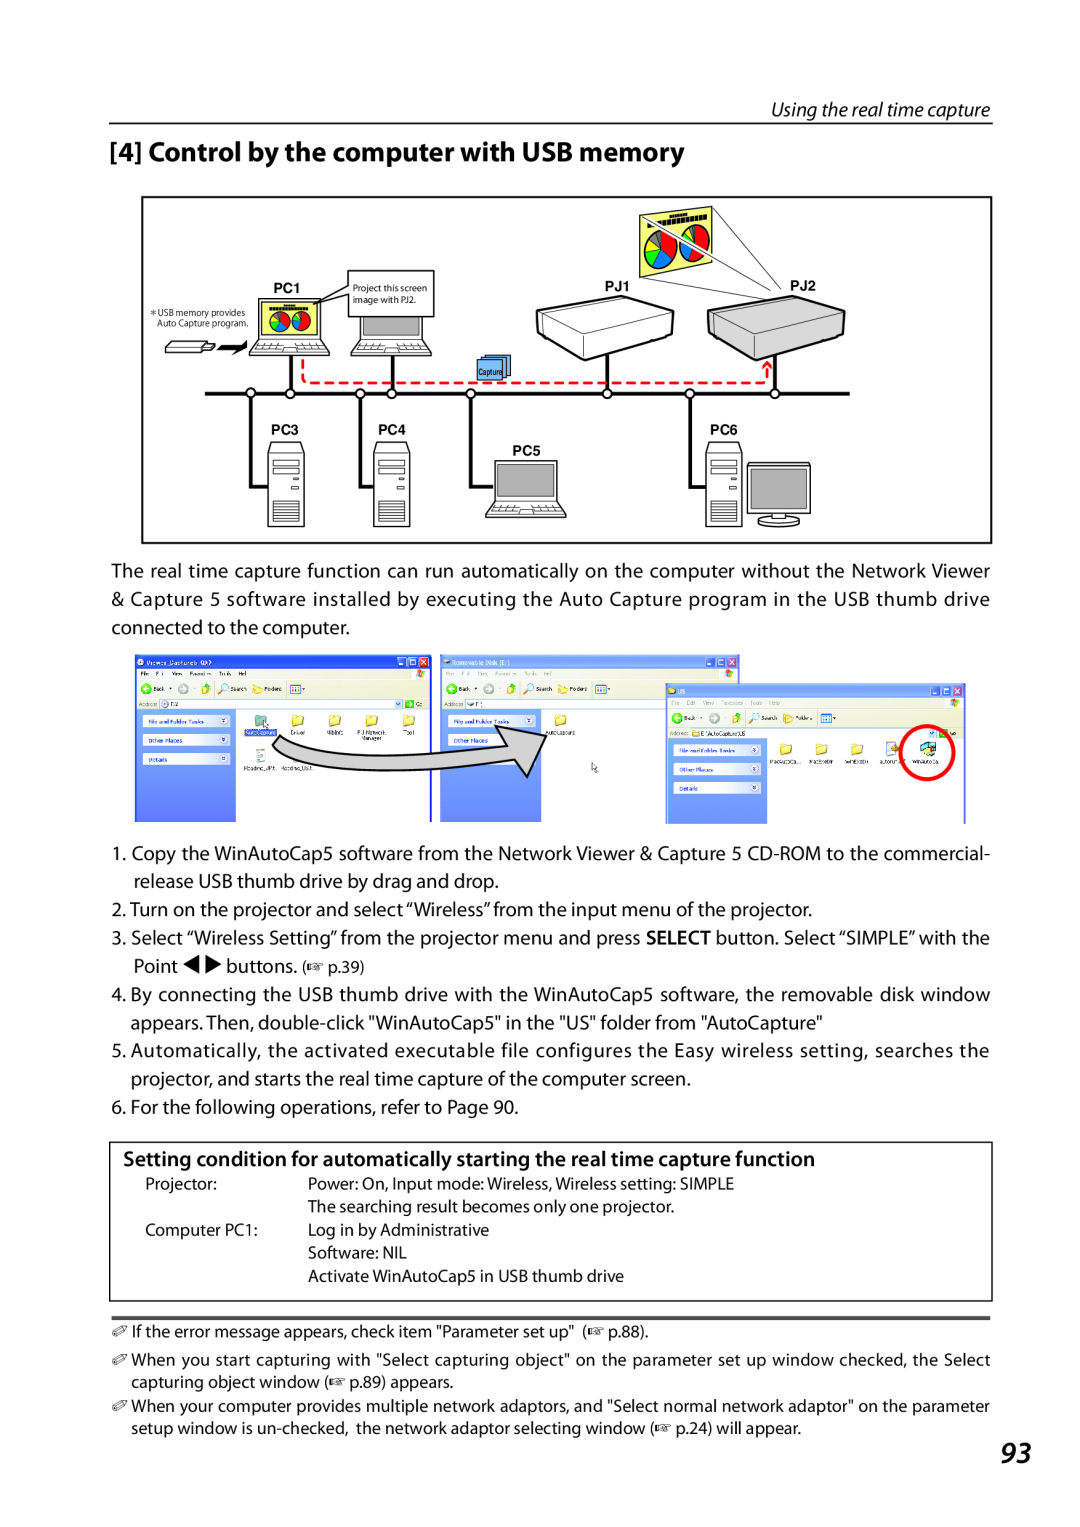
[4] Control by the computer with USB memory
PC1
*USB memory provides Auto Capture program.
Project this screen image with PJ2.
PJ1PJ2
Capture |
PC3
PC4
PC6
PC5
The real time capture function can run automatically on the computer without the Network Viewer
&Capture 5 software installed by executing the Auto Capture program in the USB thumb drive connected to the computer.
1.Copy the WinAutoCap5 software from the Network Viewer & Capture 5
2.Turn on the projector and select “Wireless” from the input menu of the projector.
3.Select “Wireless Setting” from the projector menu and press SELECT button. Select “SIMPLE” with the Point 7 8 buttons. (☞ p.39)
4.By connecting the USB thumb drive with the WinAutoCap5 software, the removable disk window appears. Then,
5.Automatically, the activated executable file configures the Easy wireless setting, searches the projector, and starts the real time capture of the computer screen.
6.For the following operations, refer to Page 90.
Setting condition for automatically starting the real time capture function
Projector: | Power: On, Input mode: Wireless, Wireless setting: SIMPLE |
| The searching result becomes only one projector. |
Computer PC1: | Log in by Administrative |
| Software: NIL |
| Activate WinAutoCap5 in USB thumb drive |
✐ If the error message appears, check item "Parameter set up" (+ p.88).
✐ When you start capturing with "Select capturing object" on the parameter set up window checked, the Select capturing object window (+ p.89) appears.
✐ When your computer provides multiple network adaptors, and "Select normal network adaptor" on the parameter setup window is
93