Network Capture 5 window
Network Capture 5 window
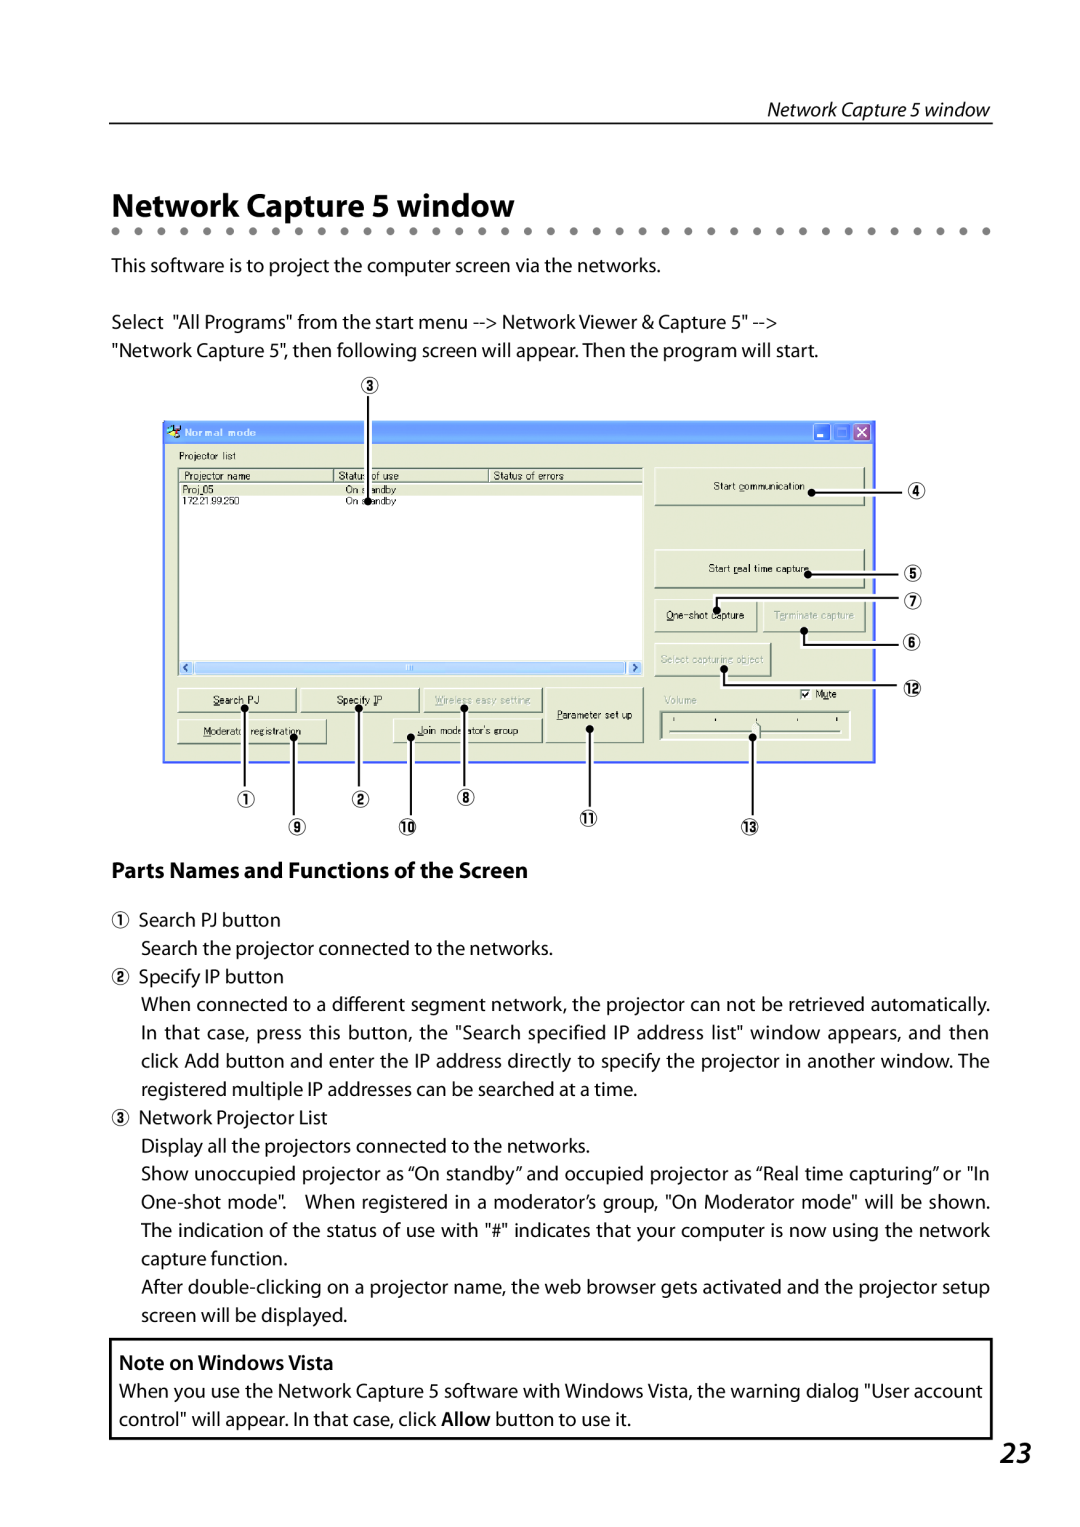
This software is to project the computer screen via the networks.
Select "All Programs" from the start menu
e
r
t u
y
!2
|
|
|
|
|
|
|
|
|
|
|
|
|
|
|
|
|
|
|
|
|
|
|
|
|
|
|
|
|
|
|
|
|
|
|
|
|
|
|
|
|
|
|
|
|
|
|
|
|
|
|
|
|
|
|
|
|
q |
|
| w |
|
|
|
| i |
|
|
|
|
|
| ||||
|
|
|
|
|
|
|
|
|
|
|
|
|
| !1 |
|
|
| |
|
| o |
|
|
|
| !0 |
|
|
| !3 | |||||||
|
|
|
|
|
|
| ||||||||||||
|
|
|
|
|
|
|
|
|
|
|
| |||||||
|
|
|
|
|
|
|
|
|
|
|
|
|
|
|
|
|
|
|
Parts Names and Functions of the Screen
qSearch PJ button
Search the projector connected to the networks.
wSpecify IP button
When connected to a different segment network, the projector can not be retrieved automatically. In that case, press this button, the "Search specified IP address list" window appears, and then click Add button and enter the IP address directly to specify the projector in another window. The registered multiple IP addresses can be searched at a time.
eNetwork Projector List
Display all the projectors connected to the networks.
Show unoccupied projector as “On standby” and occupied projector as “Real time capturing” or "In
After
Note on Windows Vista
When you use the Network Capture 5 software with Windows Vista, the warning dialog "User account control" will appear. In that case, click Allow button to use it.
23
