Chapter 6 Basic setting and operation
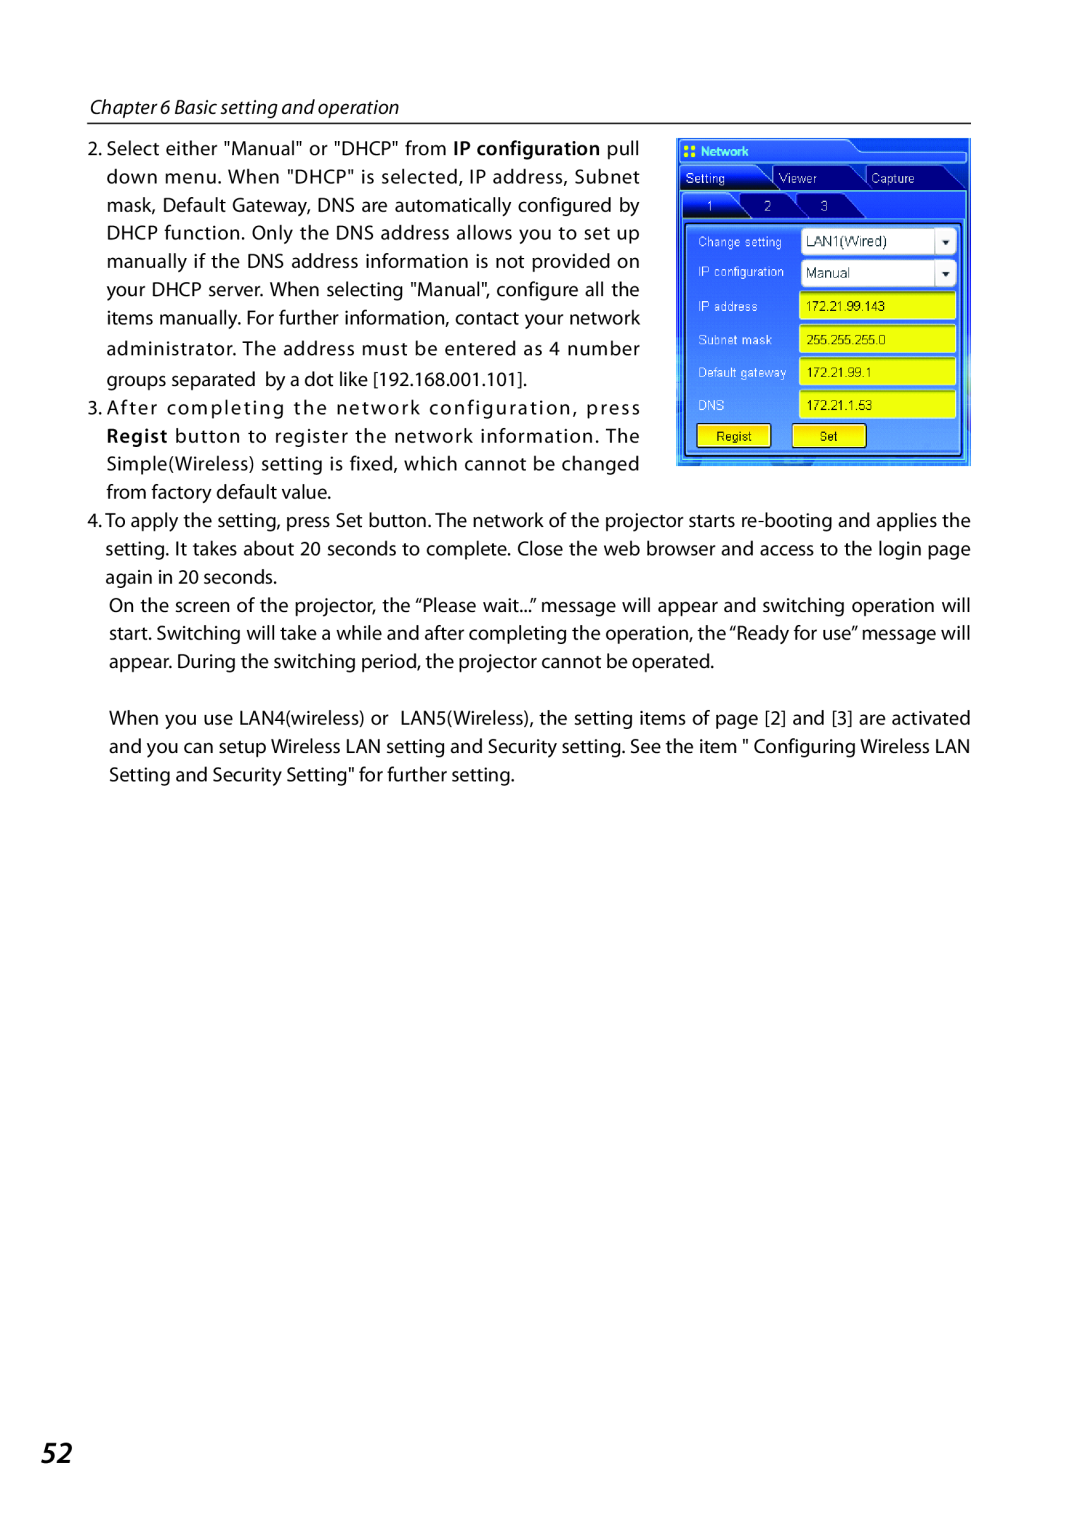
2.Select either "Manual" or "DHCP" from IP configuration pull down menu. When "DHCP" is selected, IP address, Subnet mask, Default Gateway, DNS are automatically configured by DHCP function. Only the DNS address allows you to set up manually if the DNS address information is not provided on your DHCP server. When selecting "Manual", configure all the items manually. For further information, contact your network administrator. The address must be entered as 4 number groups separated by a dot like [192.168.001.101].
3.After completing the network configuration, press Regist button to register the network information. The Simple(Wireless) setting is fixed, which cannot be changed from factory default value.
4.To apply the setting, press Set button. The network of the projector starts
On the screen of the projector, the “Please wait...” message will appear and switching operation will start. Switching will take a while and after completing the operation, the “Ready for use” message will appear. During the switching period, the projector cannot be operated.
When you use LAN4(wireless) or LAN5(Wireless), the setting items of page [2] and [3] are activated and you can setup Wireless LAN setting and Security setting. See the item " Configuring Wireless LAN Setting and Security Setting" for further setting.
52