Chapter 5 Network Capture
[2] Control by the web browser
* PC provides the Network Capture. | MONITOR 2 | MONITOR 1 |
PC1 PC2
Capture |
PC3
PC4
| PC5 | Project a screen | |
|
|
| image of PC1 with |
|
|
| PC2. |
|
|
|
|
PC6
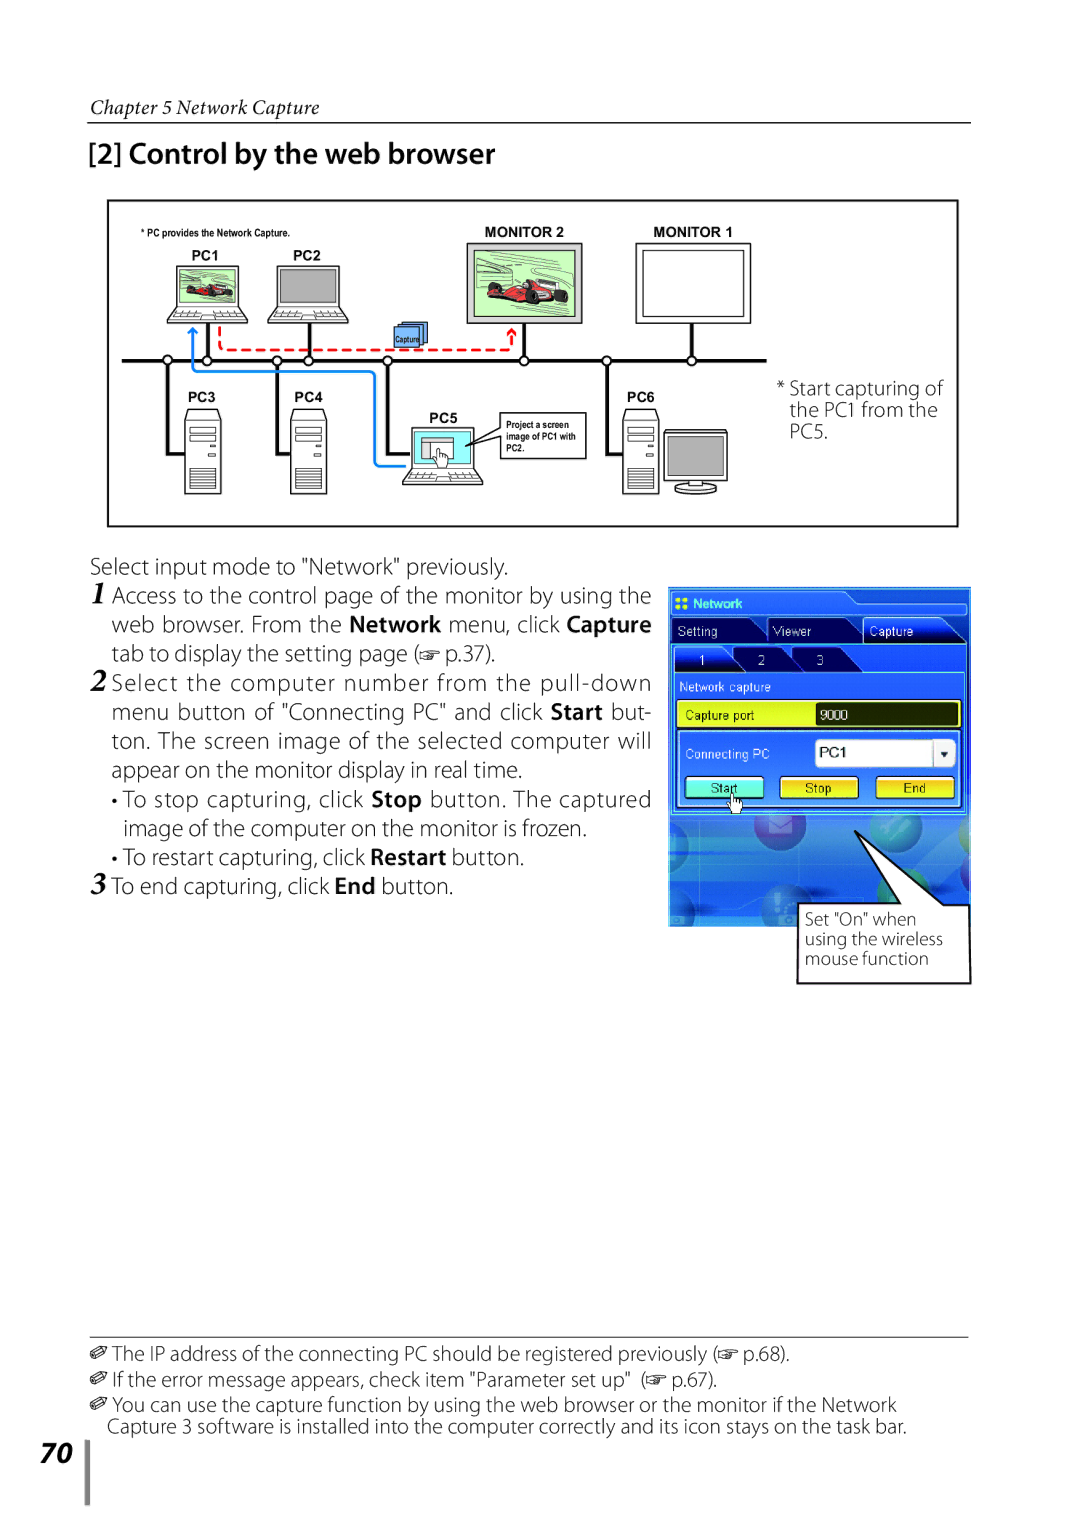
*Start capturing of the PC1 from the PC5.
70
Select input mode to "Network" previously.
1 Access to the control page of the monitor by using the web browser. From the Network menu, click Capture tab to display the setting page (![]() p.37).
p.37).
2 Select the computer number from the
•To stop capturing, click Stop button. The captured image of the computer on the monitor is frozen.
•To restart capturing, click Restart button.
3 To end capturing, click End button.
Set "On" when using the wireless mouse function
![]() The IP address of the connecting PC should be registered previously (
The IP address of the connecting PC should be registered previously (![]() p.68).
p.68).
![]() If the error message appears, check item "Parameter set up" (
If the error message appears, check item "Parameter set up" (![]() p.67).
p.67).
![]() You can use the capture function by using the web browser or the monitor if the Network Capture 3 software is installed into the computer correctly and its icon stays on the task bar.
You can use the capture function by using the web browser or the monitor if the Network Capture 3 software is installed into the computer correctly and its icon stays on the task bar.
