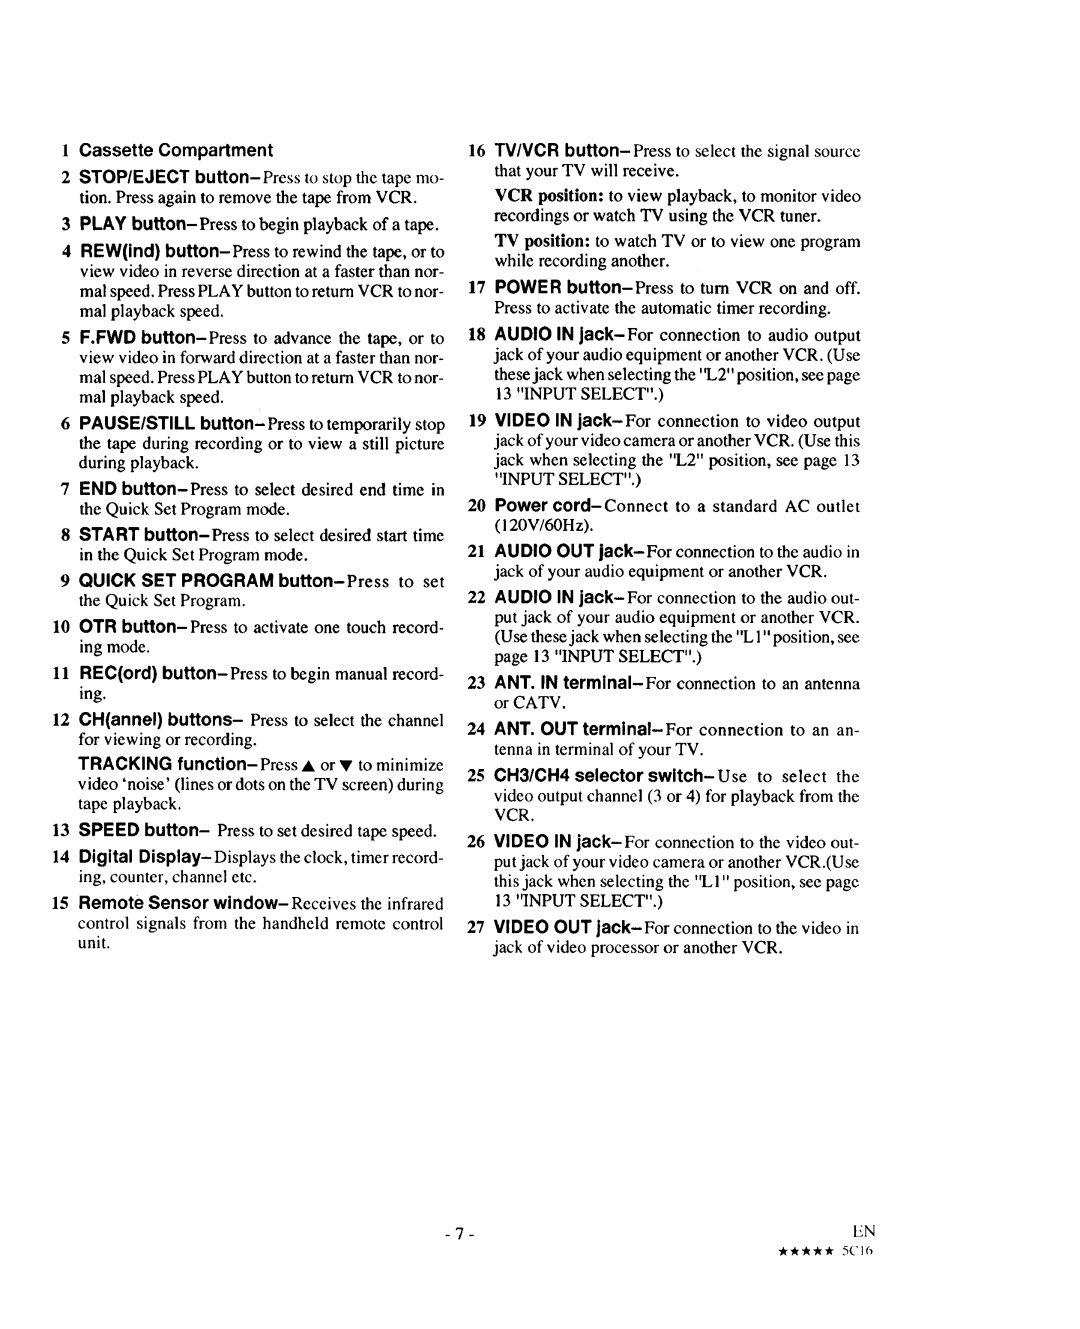
1 Cassette Compartment

2STOP/EJECT button-Press to stop the tape mo- tion. Pressagainto removethe tapefrom VCR.

3PLAY button-Press to begin playbackof a tape.

4REW(ind) button-Press to rewind the tape,or to view video in reversedirection at a faster than nor-

mal speed.PressPLAY button toreturn VCR to nor- mal playback speed.

5 F.FWD button-Pressto advance the tape, or to view video in forward direction at a faster than nor-

mal speed. Press PLAY button to return VCR to nor- mal playback speed.

6 PAUSE/STILL button- Press to temporarily stop the tapeduring recordingor to view a still picture

during playback.

7 END button-Press to select desired end time in the Quick Set Program mode.

8 START button-Pressto select desired start time

in the Quick Set Program mode.

9 QUICK SET PROGRAM button-Pressto set the Quick Set Program.

10 OTR button-Press to activateone touch record- ing mode.

11REC(ord) button-Press to begin manual record- ing.

12 CH(annel) buttons- Press to select the channel for viewing or recording.

TRACKING function-Pressor tominimize

video 'noise'(linesor dots on the TV screen)during

tape playback.

13 SPEED button- Press to set desired tape speed.

14 Digital Display- Displays the clock, timer record- ing, counter, channel etc.

15 Remote Sensor window-Receives the infrared

control signals from the handheld remote control unit.

16 TV/VCR button-Pressto select the signal source that your TV will receive.

VCR position: to view playback, to monitor video recordings or watch TV using the VCR tuner.

TV position: to watch TV or to view one program while recording another.

17 POWER button-Press to turn VCR on and off.

Press to activate the automatic timer recording.

18 AUDIO IN jack-Forconnection to audio output jack of your audio equipment or another VCR. (Use these jack when selecting the '1.,2"position, see page 13 "INPUT SELECT".)

19 VIDEO IN jack-Forconnection to video output jack of your video camera or another VCR. (Use this jack when selecting the "L2" position, see page 13 "INPUT SELECT".)

20 Power cord-Connectto a standard AC outlet

(120V/60H z).

21AUDIO OUT jack-For connection to the audio in jack of your audio equipment or anotherVCR.

22AUDIO IN jack-For connection to the audio out- put jack of your audio equipment or another VCR.

(Use these jack when selecting the "L 1"position, see page 13 "INPUT SELECT".)

23ANT. IN terminal-Forconnection to an antenna or CATV.

24ANT. OUT terminal-For connection to an an- tenna in terminal of your TV.

25CH3/CH4 selector switch-Use to select the

video output channel (3 or 4) for playback from the VCR.

26 VIDEO IN jack-Forconnection to the video out- put jack of your video camera or another VCR.(Use this jack when selecting the '%1" position, see page 13 "INPUT SELECT".)

27 VIDEO OUT jack-Forconnection to the video in jack of video processoror anotherVCR.

- 7 -

EN

"k "A""lk_" * 5('16

Page 7
Image 7
Sears 934.5512559 owner manual Remote Sensor window-Receives the infrared, Power button-Press to turn VCR on and off