INSTALLING THE PRINT HEADS AND INK TANKS
Inserting the ink tanks
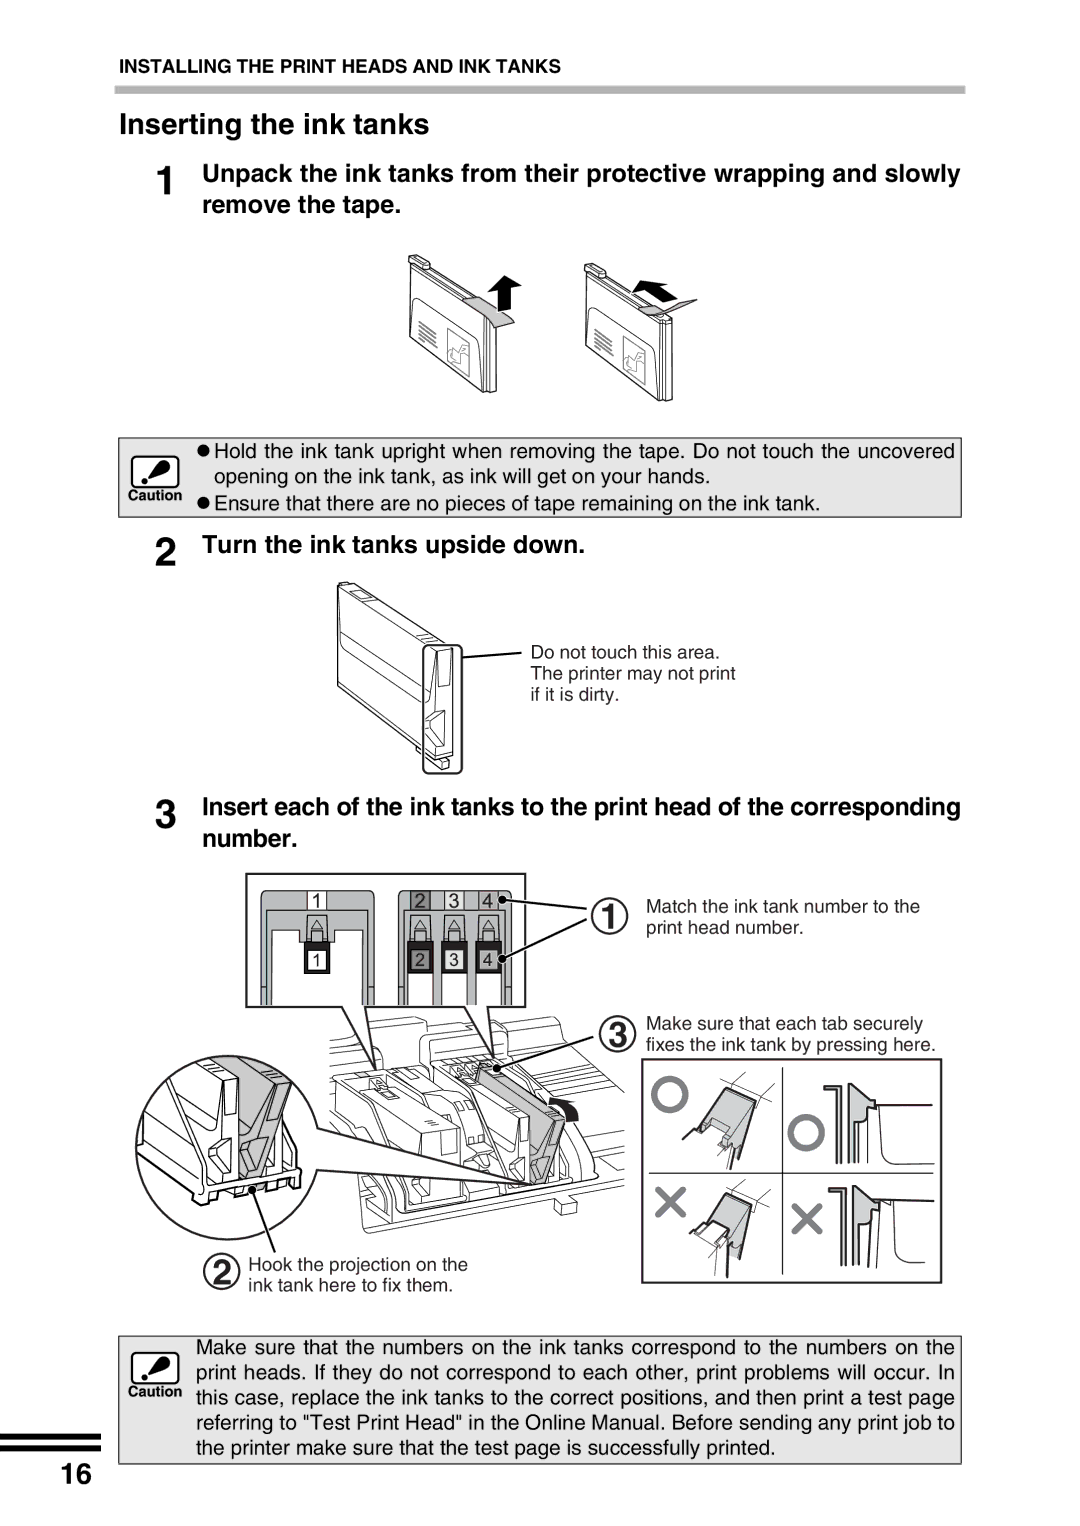
1 Unpack the ink tanks from their protective wrapping and slowly remove the tape.
16
zHold the ink tank upright when removing the tape. Do not touch the uncovered
opening on the ink tank, as ink will get on your hands.
zEnsure that there are no pieces of tape remaining on the ink tank.
2 Turn the ink tanks upside down.
![]() Do not touch this area. The printer may not print if it is dirty.
Do not touch this area. The printer may not print if it is dirty.
3 Insert each of the ink tanks to the print head of the corresponding number.
1 | Match the ink tank number to the |
print head number. | |
3 | Make sure that each tab securely |
fixes the ink tank by pressing here. |
2 | Hook the projection on the |
ink tank here to fix them. |
Make sure that the numbers on the ink tanks correspond to the numbers on the print heads. If they do not correspond to each other, print problems will occur. In this case, replace the ink tanks to the correct positions, and then print a test page referring to "Test Print Head" in the Online Manual. Before sending any print job to the printer make sure that the test page is successfully printed.