ALIGNING THE PRINT HEAD
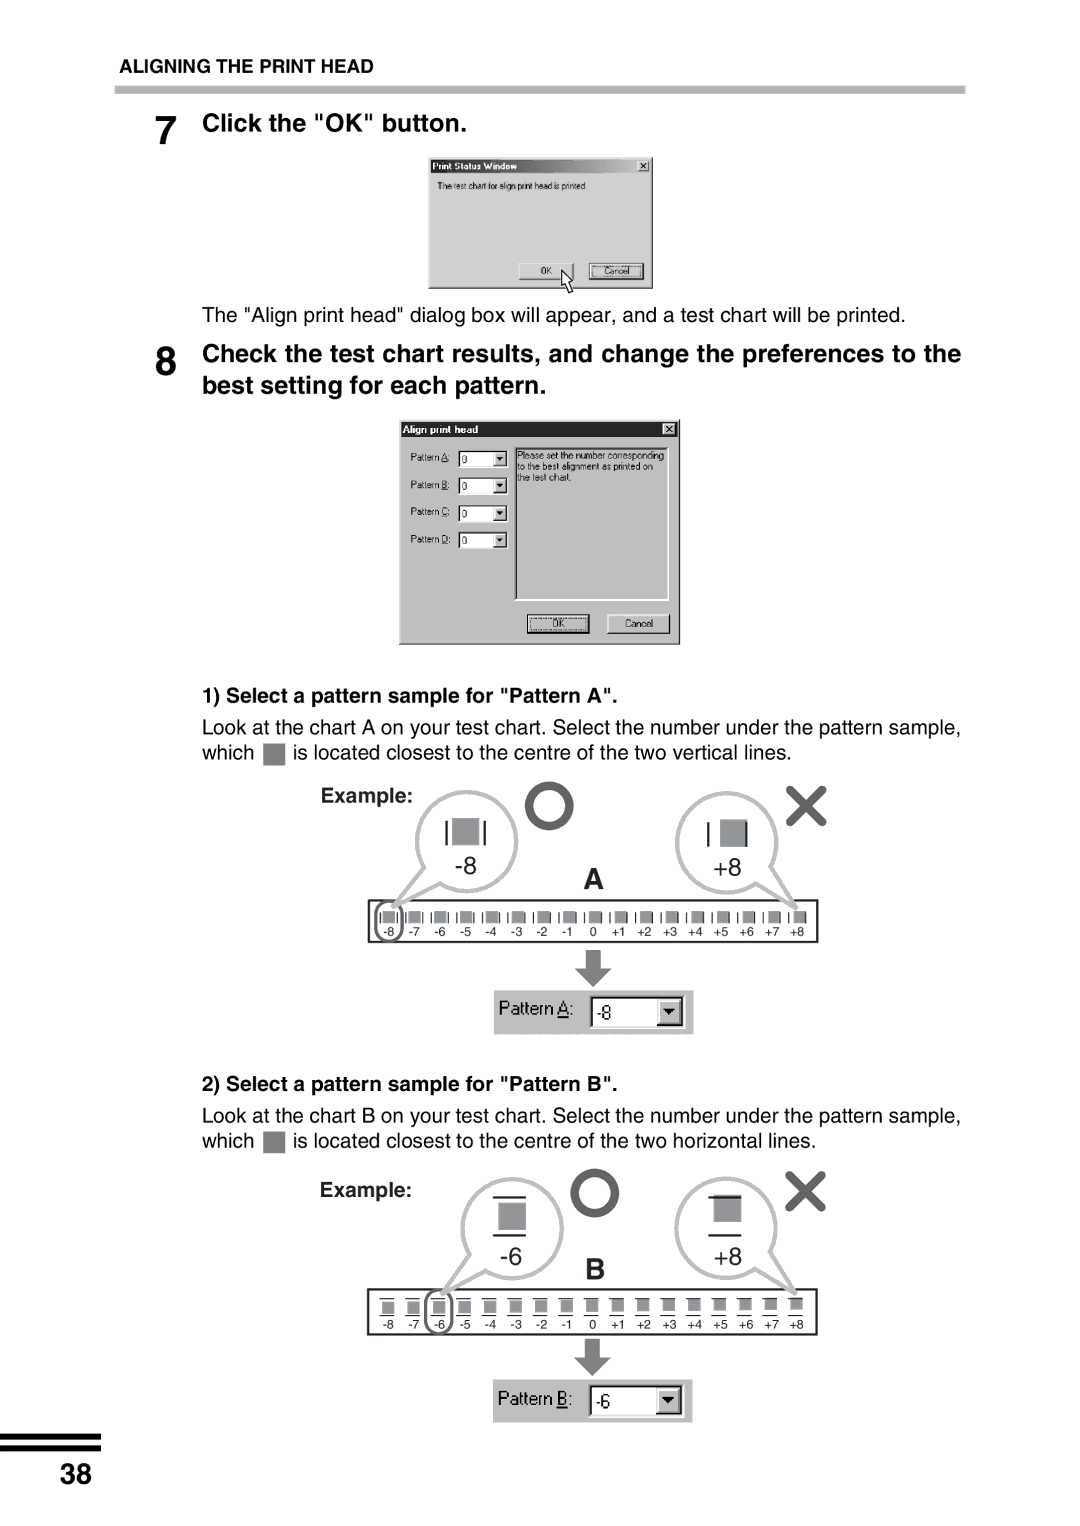
7 Click the "OK" button.
The "Align print head" dialog box will appear, and a test chart will be printed.
8 Check the test chart results, and change the preferences to the best setting for each pattern.
1) Select a pattern sample for "Pattern A".
Look at the chart A on your test chart. Select the number under the pattern sample, which ![]() is located closest to the centre of the two vertical lines.
is located closest to the centre of the two vertical lines.
Example:
A | +8 | |
|
|
2) Select a pattern sample for "Pattern B".
Look at the chart B on your test chart. Select the number under the pattern sample, which ![]() is located closest to the centre of the two horizontal lines.
is located closest to the centre of the two horizontal lines.
Example:
B | +8 | |
|
|
38