Changing the Print Head (part 3)
Maintenance
7 | Remove the ink tank(s) from the old print head and |
insert into the new print head. | |
| Reference:For details on inserting and removing the ink |
| tank, see Changing Ink Tank. |
8 | Close the front cover. |
The carriage will return to its home position, and the ink will |
be fed to the print head.
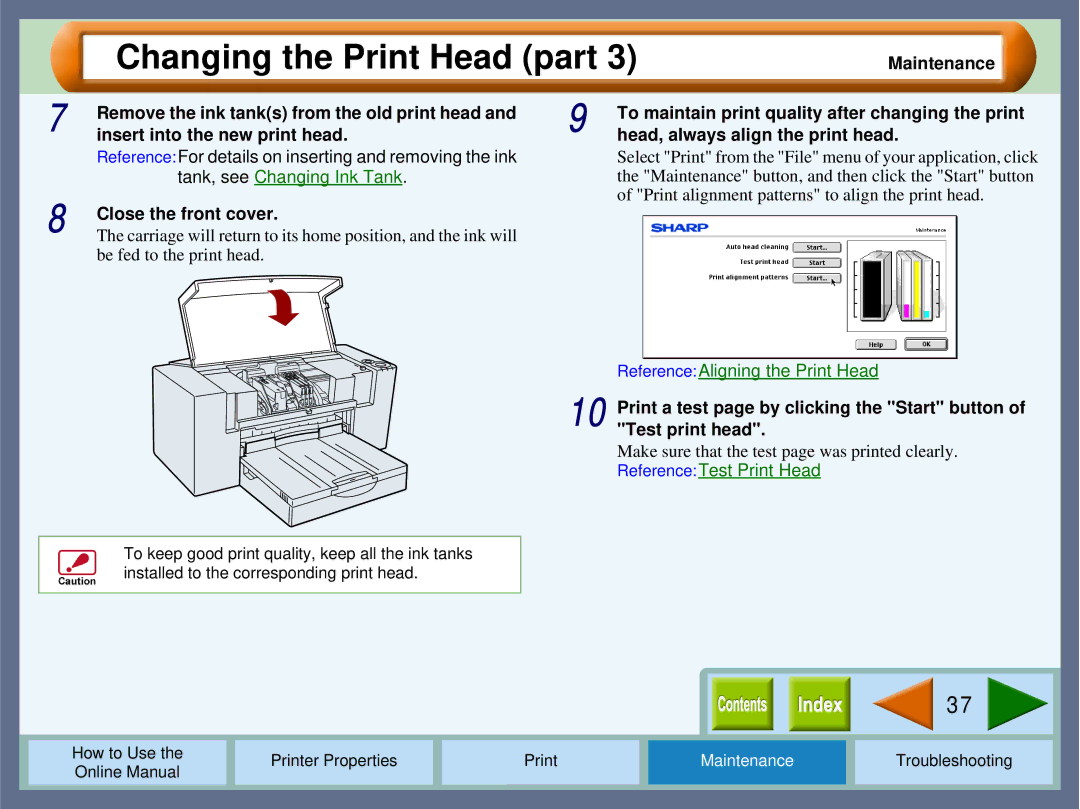
9 | To maintain print quality after changing the print |
head, always align the print head. |
Select "Print" from the "File" menu of your application, click the "Maintenance" button, and then click the "Start" button of "Print alignment patterns" to align the print head.
Reference:Aligning the Print Head
10 Print a test page by clicking the "Start" button of "Test print head".
Make sure that the test page was printed clearly.
Reference:Test Print Head
To keep good print quality, keep all the ink tanks installed to the corresponding print head.
|
|
|
|
|
|
|
| 37 |
|
|
|
|
|
|
|
|
|
|
|
|
|
|
|
|
|
|
|
|
|
How to Use the |
|
| Printer Properties |
| Maintenance | Troubleshooting | |||
Online Manual |
|
|
| ||||||
|
|
|
|
|
|
|
|
| |
|
|
|
|
|
|
|
|
|
|