AUTOMATIC EXPOSURE ADJUSTMENT
The automatic exposure level can be adjusted to suit your copying needs. This level is set for copying from the original table and copying from the SPF respectively. To set the level for the SPF, place an original in the document feeder tray and make sure that the SPF indicator lights up before proceeding to step 1. To set the level for the original table, ensure that the SPF indicator does not light up.
MAKING COPIES
Automatic exposure adjustment
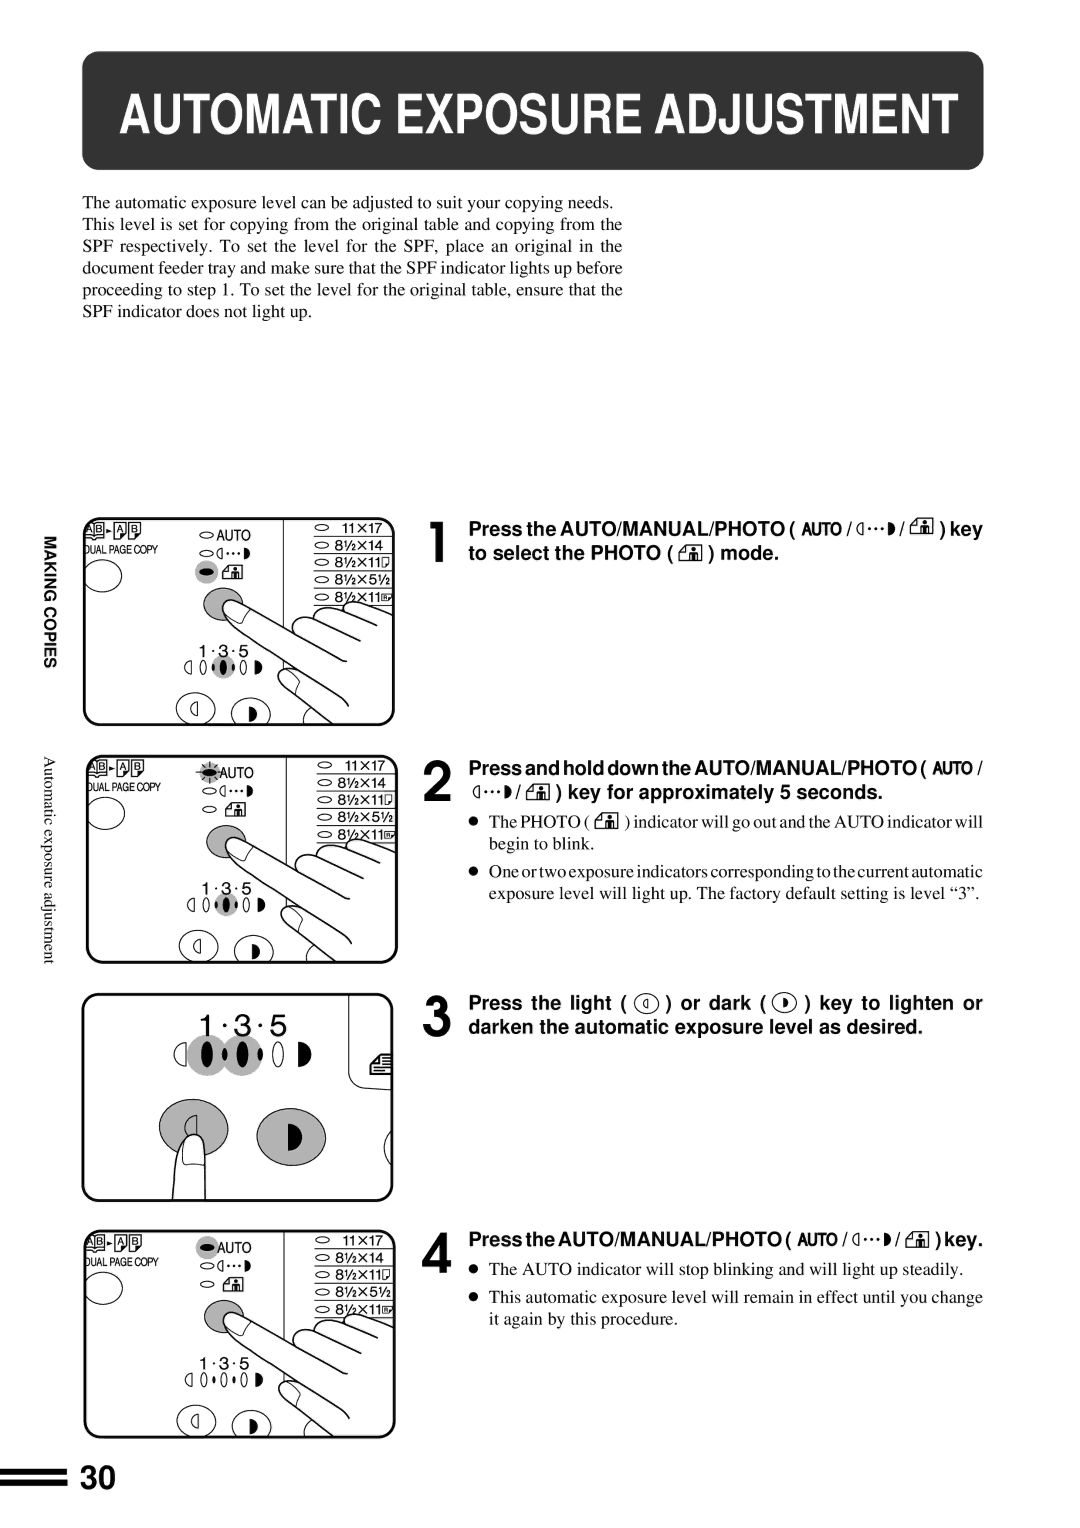
1
![]() 2
2
![]() 3
3
4
Press the AUTO/MANUAL/PHOTO ( ![]() /
/ ![]() /
/ ![]() ) key
) key
to select the PHOTO ( ![]() ) mode.
) mode.
Press and hold down the AUTO/MANUAL/PHOTO ( ![]() /
/
![]() /
/ ![]() ) key for approximately 5 seconds.
) key for approximately 5 seconds.
●The PHOTO ( ![]() ) indicator will go out and the AUTO indicator will begin to blink.
) indicator will go out and the AUTO indicator will begin to blink.
●One or two exposure indicators corresponding to the current automatic exposure level will light up. The factory default setting is level “3”.
Press the light ( ![]() ) or dark (
) or dark ( ![]() ) key to lighten or darken the automatic exposure level as desired.
) key to lighten or darken the automatic exposure level as desired.
Press the AUTO/MANUAL/PHOTO ( ![]() /
/ ![]() /
/ ![]() ) key.
) key.
●The AUTO indicator will stop blinking and will light up steadily.
●This automatic exposure level will remain in effect until you change it again by this procedure.
30