MODEL
Page
STATUS INDICATORS
AR-163
CAUTIONS
Cautions on laser
CONTENTS Page
STATUS INDICATORS
GETTING STARTED
MAKING COPIES
AB series metric and inch series references
INTRODUCTION
Conventions used in this manual
MAIN FEATURES
Substantial copying features
Optional features
High-speed laser copying
PART NAMES AND FUNCTIONS
Overall layout
PART NAMES AND FUNCTIONS
Fusing unit release levers
Accessories
Toner cartridge lock release lever
PART NAMES AND FUNCTIONS
Operation
panel
PART NAMES AND FUNCTIONS
Inch system
COPIER INSTALLATION
CAUTIONS ON HANDLING
LOADING COPY PAPER
1 Gently lift and pull out the paper tray until it stops
Push the pressure plate down until it locks in place
4 Push the paper tray firmly back into the copier
LOADING COPY PAPER
Squeeze the lock lever of the front guide and slide the
3 front guide to match the width of the paper
Left guide
ENTER
Use the TRAY SELECT key to select the paper tray
9 of which the paper size has been changed
Press the START key and then the PAPER SIZE 11 ENTER key
AUDITING ACCOUNTS
Enter your account number using the numeric keys
When copying is completed, press the AUDIT CLEAR 2 key
Turn the power switch on
Adjust the copy density
NORMAL COPYING
Place the original face down on the original table. Align
How to remove the platen cover
Set the number of copies using the numeric keys
NORMAL COPYING
Press the START key
REDUCTION/ENLARGEMENT/ZOOM
Automatic
Place the original on the original table and close the 1 platen cover
Press the ORIGINAL SIZE ENTER key until the
Use the PRESET RATIO selector , keys and the
Ensure that copy paper of the desired size is installed in
REDUCTION/ENLARGEMENT/ZOOM
Manual
Set the paper guides to the copy paper width
BYPASS FEED special paper
1 Unfold the bypass tray
Leave the copy quantity at 0 if using special papers. Set
5 the number of copies if using standard copy paper or envelopes
BYPASS FEED special paper
Press the TRAY SELECT key to select the bypass 4 tray
TWO-SIDED COPYING
Place the first original on the original table and make a 1 copy
Replace the first original with the second original and
2 close the platen cover
Use the PRESET RATIO selector , keys and zoom
XY ZOOM
Press the XY-ZOOM key
3 , keys to change the copy ratio in the vertical direction
XY ZOOM
7 the paper tray
8 Enter the desired number of copies 9 Press the START key
Use the PRESET RATIO selector , keys and zoom
B/W REVERSE
Press the B/W REVERSE key Check the copy paper size
Make all other desired copier selections and press the START key
Place the original on the original table and close the 1 platen cover
DUAL PAGE COPY
Place the originals on the original table with the centre
Press the DUAL PAGE COPY key
3 Set the number of copies 4 Press the START key
When the copier stops, remove the originals and set
When all INTERRUPT copies are finished, press the
INTERRUPTING A COPY RUN
Press the INTERRUPT key
AUTOMATIC EXPOSURE ADJUSTMENT
Press the AUTO/MANUAL/PHOTO / / key to 1 select the PHOTO mode
2/ key for approximately 5 seconds
“3”./Press and hold down the AUTO/MANUAL/PHOTO
TONER SAVE MODE
Press the AUTO/MANUAL/PHOTO / / key to 1 select the MANUAL mode
To enter the toner save mode, press the light key
2/ key for approximately 5 seconds
TONER CARTRIDGE REPLACEMENT
GENUINE SUPPLIES
Open the bypass tray. Lift slightly on the side cover and
1 slide the cover out until it stops
TONER CARTRIDGE REPLACEMENT
1 seconds until all the alarm indicators
Toner cartridge life
Gently insert the toner cartridge along the guides until
MISFEED REMOVAL
Misfeed in the bypass tray
Misfeed in the copier
First confirm the misfeed location
B. Misfeed in the fusing area
MISFEED REMOVAL
Check the misfeed location. Remove the misfed paper
A. Misfeed in the paper feed area
Carefully remove the misfed paper. Lower the fusing
Turn the roller rotating knob in the direction of the 2 arrow
C. Misfeed in the transport area
Open the paper guide by pressing down the projection
Misfeed in the paper tray
Close the side cover by pressing the handle on the 3 cover
Gently lift and pull out the paper tray and remove the 1 misfed paper
2 Close the paper tray
MAINTENANCE REQUIRED
DEVELOPER REQUIRED
USER PROGRAMS
List of user programs
Setting the user programs
Enter a program number using the numeric keys
USER PROGRAMS
and blink and “- -” appears in the copy quantity display
To continue with other user programs, press the key
Select the desired parameter using the numeric keys
USER PROGRAMS
Press the START key
Settings for auditing accounts
Program No. 10 Auditing mode
1. Select the desired setting using the numeric keys
1. Enter a 3-digit account number using the numeric keys
3. Enter a new account number using the numeric keys
USER PROGRAMS Program No. 12 Account number change
Program No. 13 Account number deletion
1. Use the copy ratio display key to select the account
USER PROGRAMS Program No. 14 Number of copies per account
1. Use the copy ratio display key to select the account number
2. Press and hold down the 0 key
Example 1,234 copies
USER PROGRAMS Program No. 15 Resetting account
1. To reset an individual account, press the 0 key
To reset all accounts, press key 2. Press the START key
number to be reset
Auto power shut-off mode
POWER SAVE MODES
Preheat mode
POWER SAVE MODES
Setting the power save modes
Copying from the preheat mode
Copying from the auto power shut-off mode
Bypass tray paper feed roller
USER MAINTENANCE
Original table and platen cover
USER MAINTENANCE
Transfer charger cleaning
1 Turn the power switch off
3 charger cleaner out by holding the tab
COPIER TROUBLE?
Problem
Solution
COPIER TROUBLE?
COPY/FAX key
Problem
Solution
Self-diagnostic function
Problem
Solution
COPIER TROUBLE?
SUPPLIES
Types and sizes of copy paper
SUPPLIES
Genuine supplies statement
Proper storage
1. Store the supplies in a location that is
SPECIFICATIONS
GENERAL
SPECIFICATIONS
CONTENTS
OPTIONAL EQUIPMENT
SYSTEM CONFIGURATION
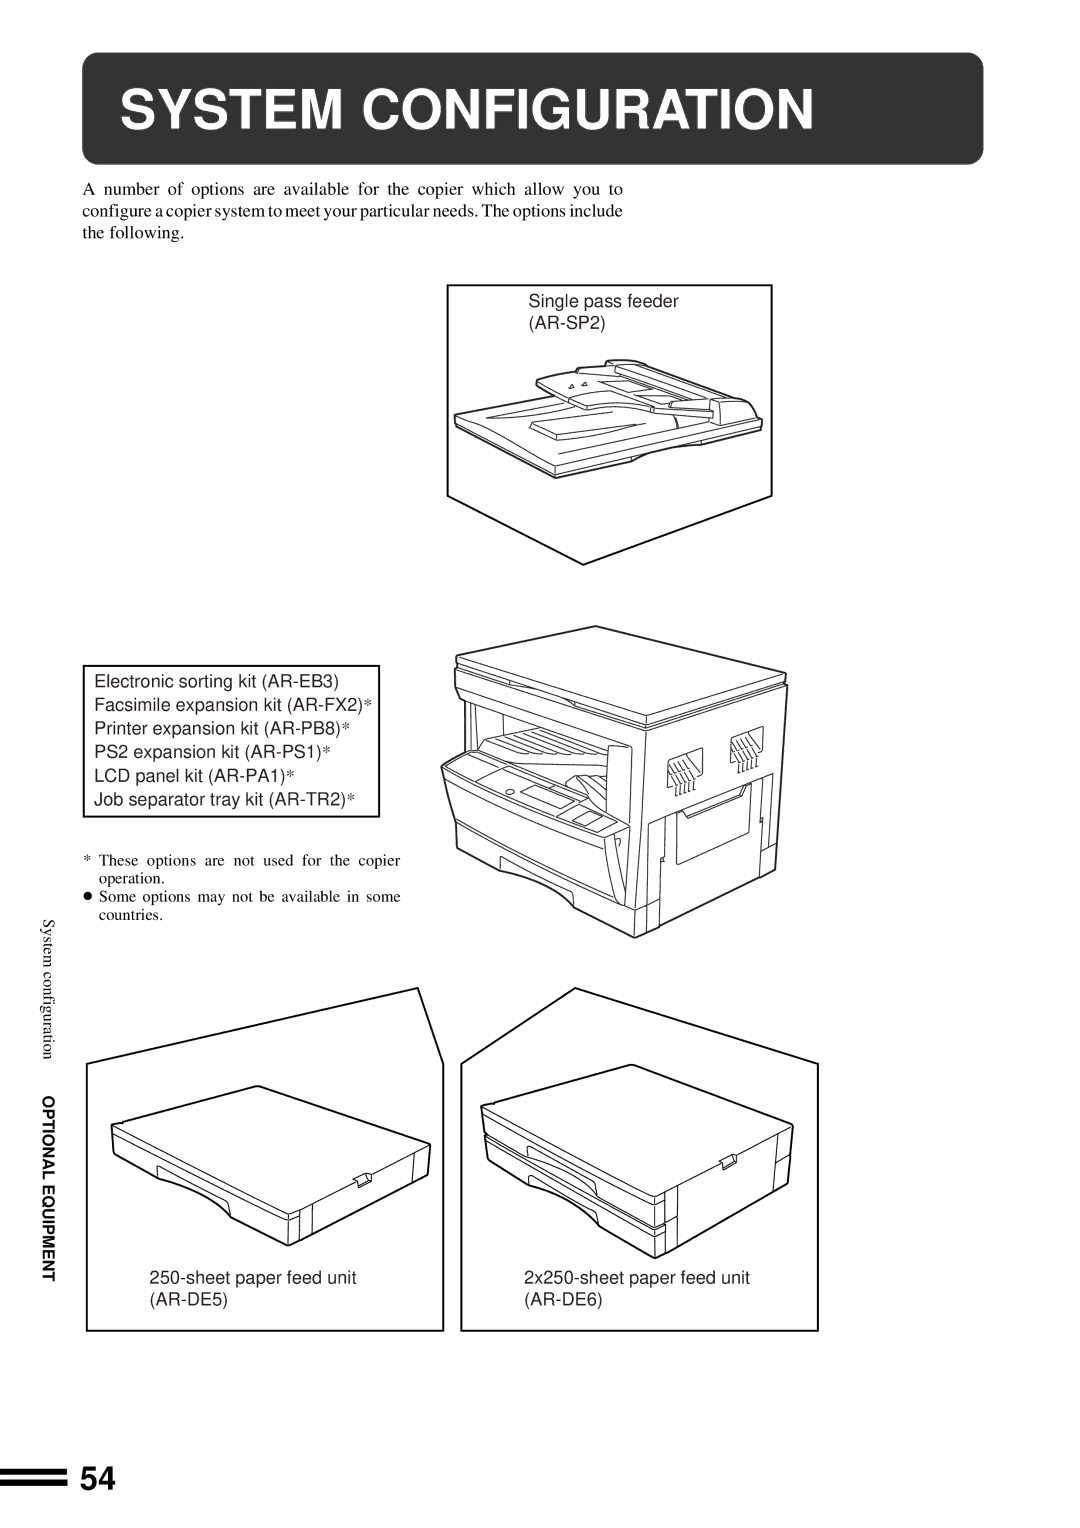
PART NAMES
Specifications
SINGLE PASS FEEDER AR-SP2
Press the START key
Using the SPF
SINGLE PASS FEEDER AR-SP2
Open and close the document feeder cover to cancel the
4 misfeed location indicator
Misfeed removal
Close the left feeding roller cover
Rotation copying
ELECTRONIC SORTING KIT AR-EB3
Sort mode
Group mode
If the offset stack mode is disabled, copies will not be offset
The offset stack mode is enabled in the factory default setting
Copying in the sort mode
Press the SORT/GROUP / key to select the SORT mode
Set the originals face up in the document feeder tray
Set the number of copies and press the START key
indicators are not lit then press and hold the 2 IN
IN 1 indicator then press and hold the 2 IN 1
2 in 1 or 4 in
2 with the desired paper size
Press the 2 IN 1 / 4 IN
6 the selection
7 Set the number of copies Press the START key
The entered number will light up steadily
Press the ERASE / key to select the desired 2 erase mode
Erase
Check the copy paper size
AB A B
Electronic sorting kit AR-EB3 OPTIONAL EQUIPMENT
Set the number of copies Press the START key
ELECTRONIC SORTING KIT AR-EB3
Margin shift
Place the original on the original table and close the platen cover
Press the MARGIN SHIFT key Check the copy paper size
ELECTRONIC SORTING KIT AR-EB3
250-SHEET PAPER FEED UNIT AR-DE5
2x250-SHEET PAPER FEED UNIT AR-DE6
Loading copy paper
250-sheet paper feed unit AR-DE5
Misfeed removal
250-SHEET PAPER FEED UNIT AR-DE5/2x250-SHEET PAPER FEED UNIT AR-DE6
Close the paper tray and the side cover
AR-DE5
AR-DE6
Specifications
250-SHEET PAPER FEED UNIT AR-DE5/2x250-SHEET PAPER FEED UNIT AR-DE6
INDEX
INDEX
MATERIAL SAFETY DATA SHEET
Section 1. Product Identification
Section 2. Supplier’s Name and Address
Section 3. Ingredients
Section 6. Physical Chemical Characteristics
Section 9. Precautions for Safe Handling and Use
Section 7. Fire and Explosion Data
Section 8. Reactivity Data
Section
Product Identification
Supplier’s Name and Address
Ingredients
Section 6. Physical Chemical Characteristics
Section 9. Precautions for Safe Handling and Use
Section 7. Fire and Explosion Data
Section 8. Reactivity Data
MEMO
CLASS LASER PRODUCT LASER KLASSE
This product is a class A product
CLASS 1 LASER PRODUCT LASER KLASSE LUOKAN 1 LASERLAITE
KLASS 1 LASERAPPARAT
For a complete electrical disconnection, pull out the main plug
SHARP CORPORATION
PRINTED IN CHINA
AR-163