Using the Menu Screen
The menu screens allow you to adjust the image and various projector settings. The menu can be operated to achieve two functions, adjustment and setting.
(For adjusting the menu items, see pages 32 and 33. For setting the menu items, see pages 34 and 35.)
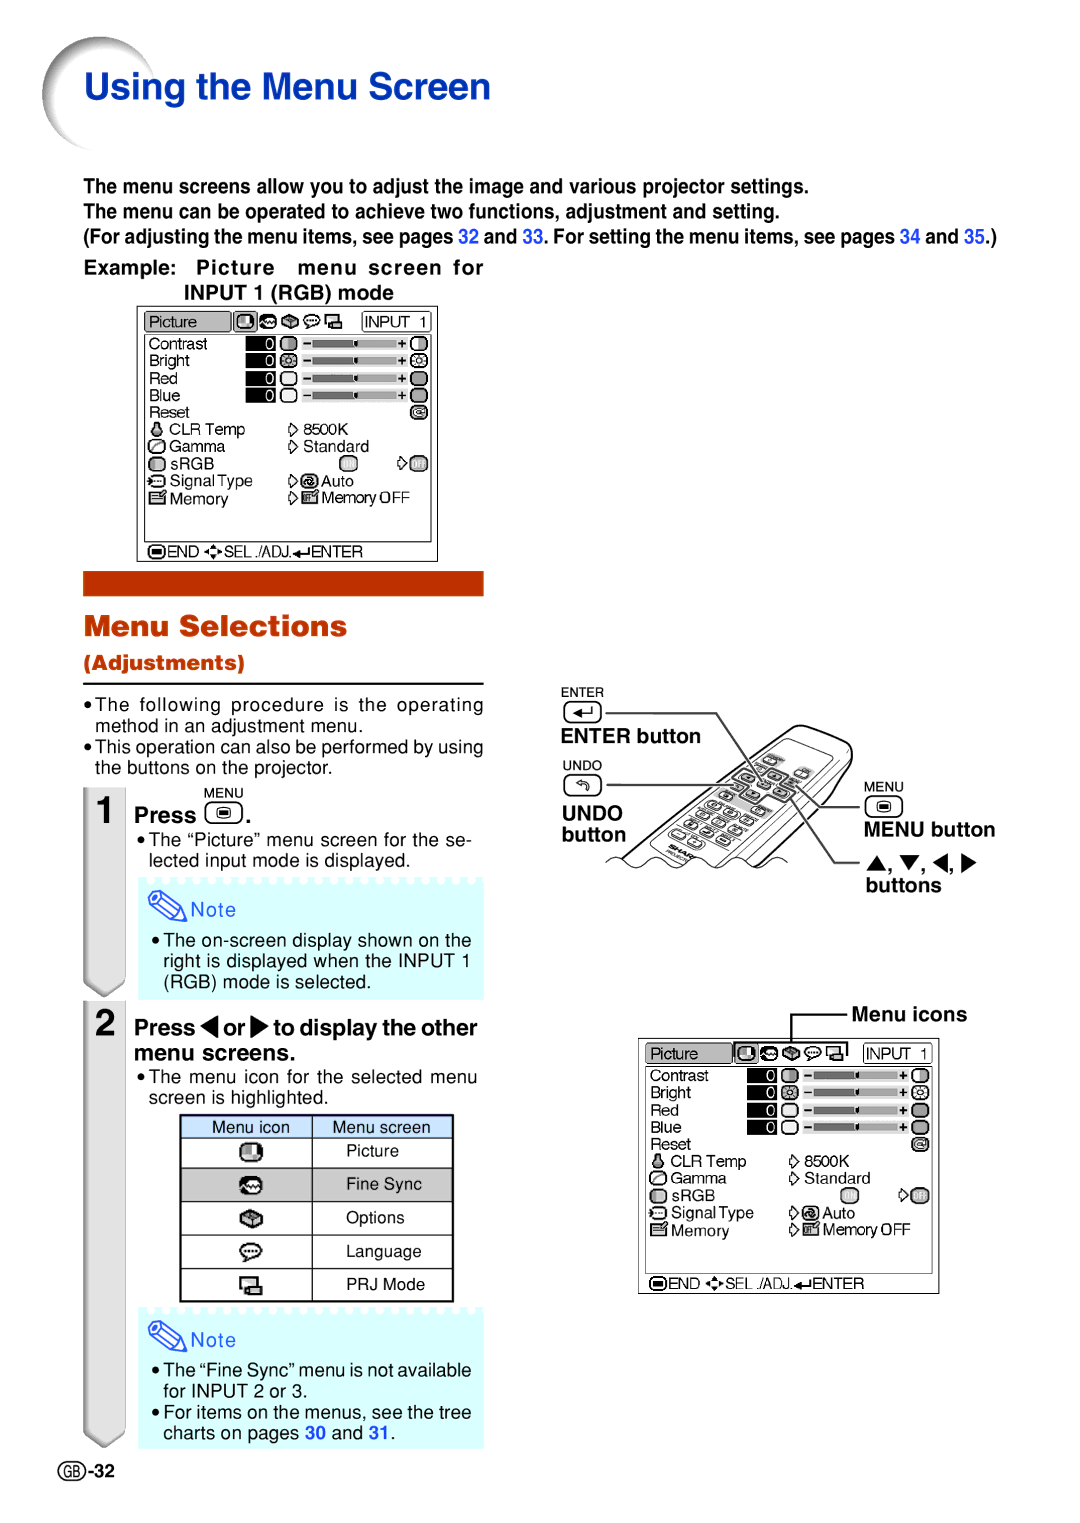
Example: “Picture” menu screen for
INPUT 1 (RGB) mode
Menu Selections
(Adjustments)
•The following procedure is the operating method in an adjustment menu.
•This operation can also be performed by using the buttons on the projector.
1 Press  .
.
•The “Picture” menu screen for the se- lected input mode is displayed.
![]() Note
Note
•The
2Press \or to display the other menu screens.
•The menu icon for the selected menu screen is highlighted.
Menu icon | Menu screen |
| Picture |
|
|
| Fine Sync |
|
|
| Options |
|
|
| Language |
|
|
| PRJ Mode |
|
|
![]() Note
Note
•The “Fine Sync” menu is not available for INPUT 2 or 3.
•For items on the menus, see the tree charts on pages 30 and 31.
ENTER button |
|
UNDO | MENU button |
button | |
| ', ", \, |
| buttons |
![]() Menu icons
Menu icons
![]() -32
-32