2. use ◂, ▸, ▴ or ▾ for a finer adjustment
Note: Avoid locations too close to corners or edges to prevent cropping of larger menus.
OSD Display Timeout
Sets duration OSD is visible after the last event. Adjust in 10 second increments from 10 to 200 seconds.
Memories
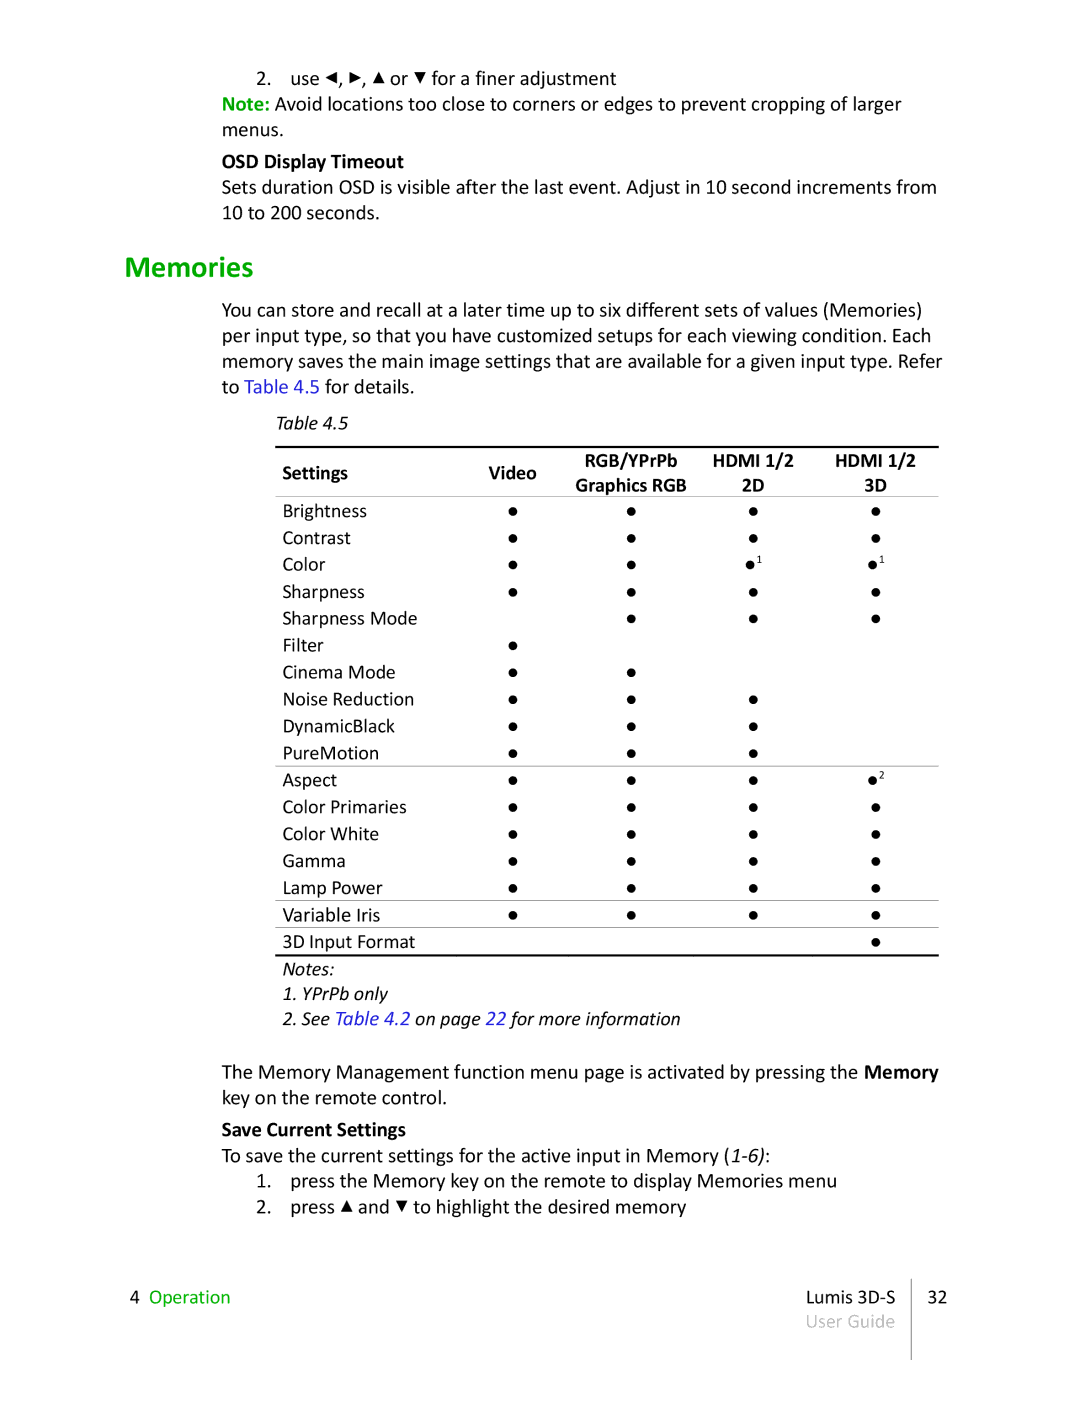
You can store and recall at a later time up to six different sets of values (Memories) per input type, so that you have customized setups for each viewing condition. Each memory saves the main image settings that are available for a given input type. Refer to Table 4.5 for details.
Table 4.5
Settings | Video | RGB/YPrPb | HDMI 1/2 | HDMI 1/2 | |
Graphics RGB | 2D | 3D | |||
|
| ||||
Brightness | ● | ● | ● | ● | |
Contrast | ● | ● | ● | ● | |
Color | ● | ● | ●1 | ●1 | |
Sharpness | ● | ● | ● | ● | |
Sharpness Mode |
| ● | ● | ● | |
Filter | ● |
|
|
| |
Cinema Mode | ● | ● |
|
| |
Noise Reduction | ● | ● | ● |
| |
DynamicBlack | ● | ● | ● |
| |
PureMotion | ● | ● | ● |
| |
Aspect | ● | ● | ● | ●2 | |
Color Primaries | ● | ● | ● | ● | |
Color White | ● | ● | ● | ● | |
Gamma | ● | ● | ● | ● | |
Lamp Power | ● | ● | ● | ● | |
Variable Iris | ● | ● | ● | ● | |
3D Input Format |
|
|
| ● |
Notes:
1.YPrPb only
2.See Table 4.2 on page 22 for more information
The Memory Management function menu page is activated by pressing the Memory key on the remote control.
Save Current Settings
To save the current settings for the active input in Memory
1.press the Memory key on the remote to display Memories menu
2.press ▴ and ▾ to highlight the desired memory
4 Operation | Lumis | 32 |
| User Guide |
|
|
|
|
