Using the projector
Preparations
1.Plug in and turn all of the connected equipment on.
2.If not already in, plug the supplied power cable into the
AC inlet on the rear of the projector and turn on the power switch.
3. Plug the power cable into a wall socket and turn the wall switch on.
Turning the projector on
Follow the steps below.
1.Make sure the Power light is orange after power has been applied and the main AC power switch is turned on.
2. Press and hold POWER ( ![]() ) on the remote control to turn the projector on.
) on the remote control to turn the projector on.
3. The fans will start operating, and a
4.If you are prompted for a password, press the arrow keys to
enter a six digit password. See "Utilizing the password function" on page 20 for details.
5. "Source Searching..." will be displayed on the screen before the projector identifies the input signal. This message will remain on the screen until a valid signal is detected. See "Selecting an input source" on page 18 for details.
6.If the horizontal frequency of the input signal exceeds the range of the projector, the message "Out of Range" will be displayed on the screen. This message will remain on- screen until you change the input signal to an appropriate source.
Selecting an input source
The projector can be connected to multiple equipment at the same time. When the projector is first turned on, it will attempt to reconnect with the input source which was in use when the projector was last shut down.
To select the video source:
•Using the remote control
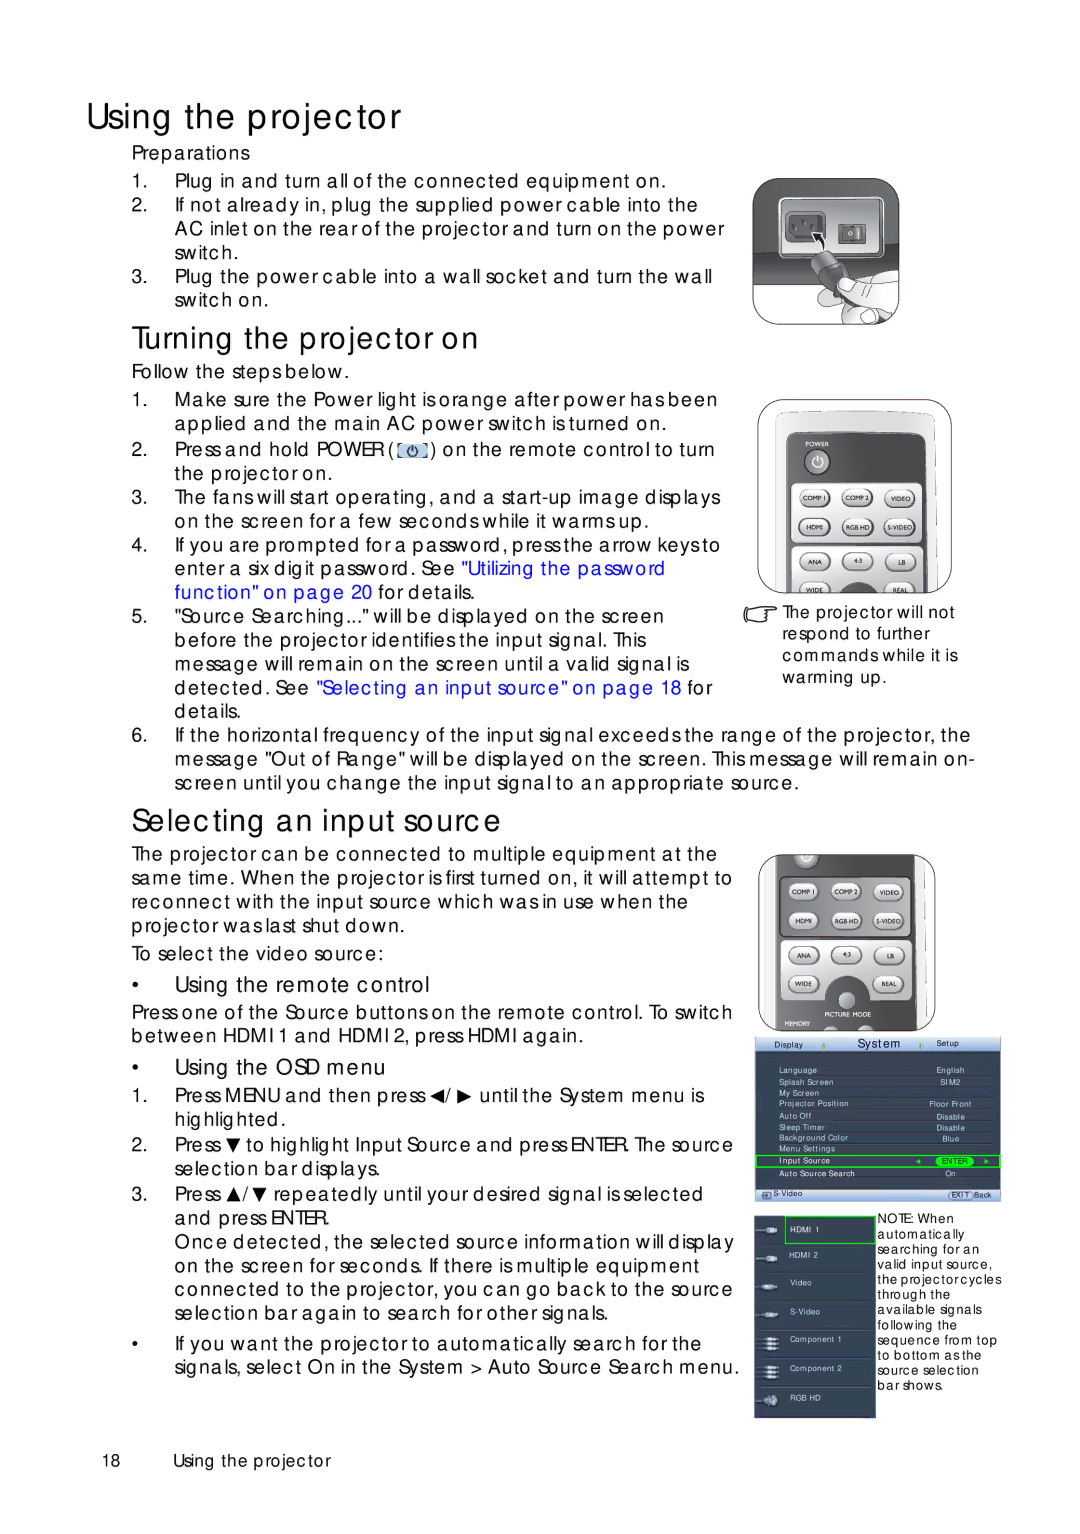
Press one of the Source buttons on the remote control. To switch between HDMI 1 and HDMI 2, press HDMI again.
•Using the OSD menu
1. | Press MENU and then press / until the System menu is | |
| highlighted. | |
2. | Press | to highlight Input Source and press ENTER. The source |
| selection bar displays. | |
3. | Press | / repeatedly until your desired signal is selected |
Display | System | Setup |
Language |
| English |
Splash Screen |
| SIM2 |
My Screen |
|
|
Projector Position |
| Floor Front |
Auto Off |
| Disable |
Sleep Timer |
| Disable |
Background Color |
| Blue |
Menu Settings |
|
|
Input Source |
| ENTER |
Auto Source Search |
| On |
| EXIT Back |
and press ENTER. |
Once detected, the selected source information will display |
on the screen for seconds. If there is multiple equipment |
connected to the projector, you can go back to the source |
selection bar again to search for other signals. |
•If you want the projector to automatically search for the signals, select On in the System > Auto Source Search menu.
HDMI 1
HDMI 2
Video
Component 1
Component 2
RGB HD
NOTE: When
automatically searching for an valid input source, the projector cycles through the available signals following the sequence from top to bottom as the source selection bar shows.
18 Using the projector
