i n t e l l i g e n t | w i r e l e s s | p l a t f o r m |
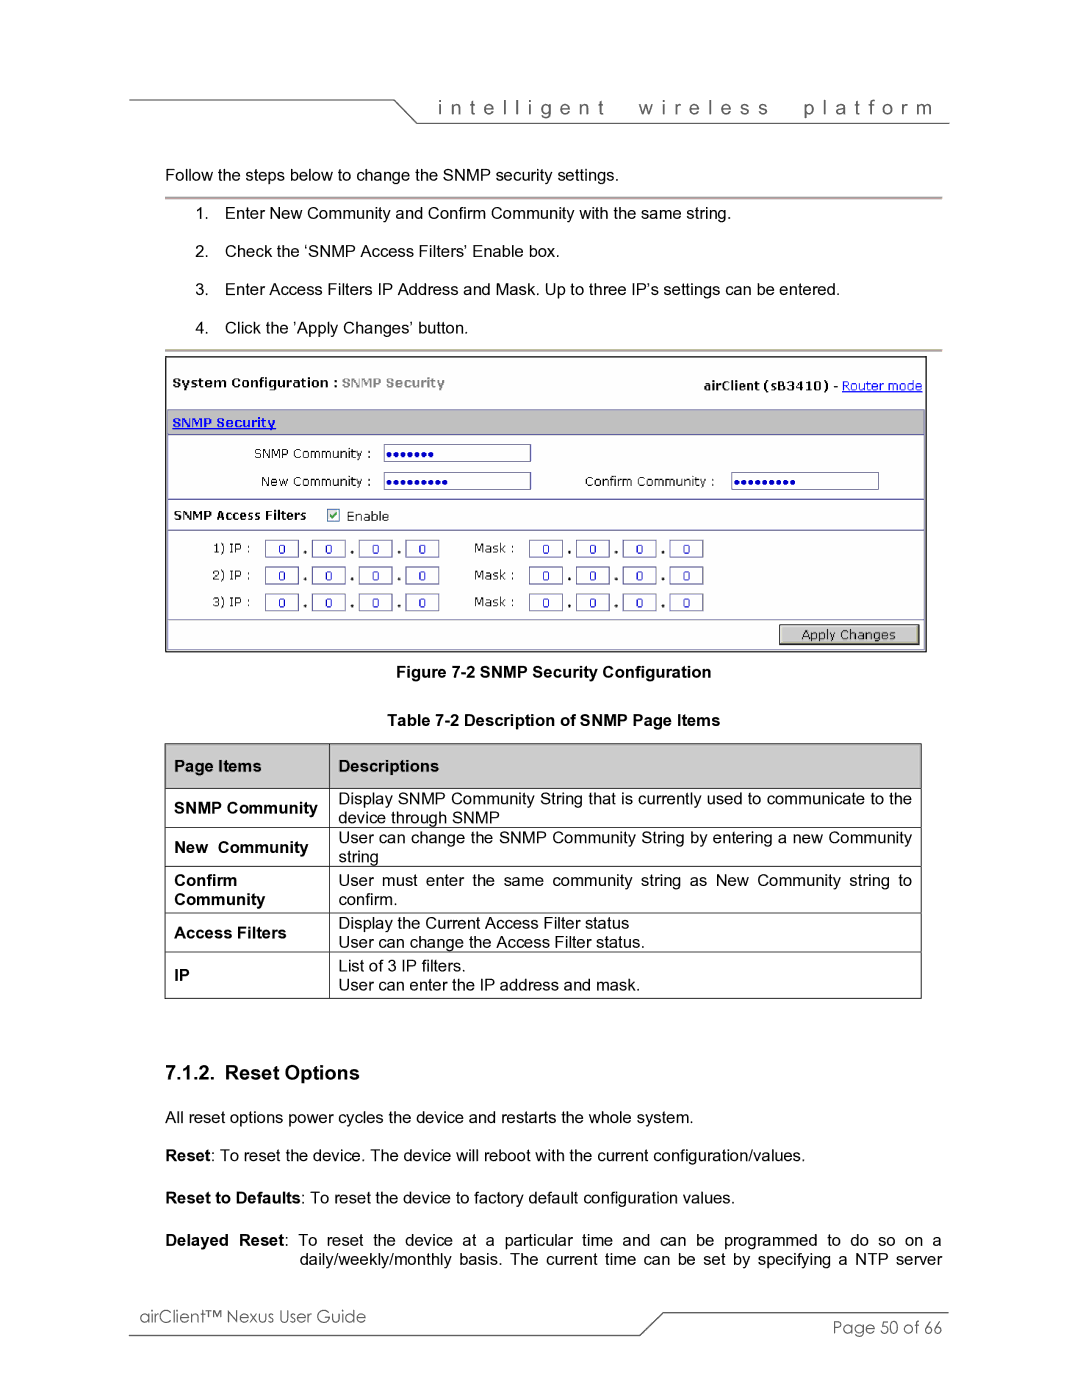
Follow the steps below to change the SNMP security settings.
1.Enter New Community and Confirm Community with the same string.
2.Check the ‘SNMP Access Filters’ Enable box.
3.Enter Access Filters IP Address and Mask. Up to three IP’s settings can be entered.
4.Click the ’Apply Changes’ button.
|
|
| Figure |
|
|
| Table |
|
|
|
|
| Page Items |
| Descriptions |
|
|
|
|
| SNMP Community |
| Display SNMP Community String that is currently used to communicate to the |
|
| device through SNMP | |
|
|
| |
| New Community |
| User can change the SNMP Community String by entering a new Community |
|
| string | |
|
|
| |
| Confirm |
| User must enter the same community string as New Community string to |
| Community |
| confirm. |
| Access Filters |
| Display the Current Access Filter status |
|
| User can change the Access Filter status. | |
|
|
| |
| IP |
| List of 3 IP filters. |
|
| User can enter the IP address and mask. | |
|
|
|
7.1.2. Reset Options
All reset options power cycles the device and restarts the whole system.
Reset: To reset the device. The device will reboot with the current configuration/values.
Reset to Defaults: To reset the device to factory default configuration values.
Delayed Reset: To reset the device at a particular time and can be programmed to do so on a daily/weekly/monthly basis. The current time can be set by specifying a NTP server
airClient™ Nexus User Guide | Page 50 of 66 |
|
