SECTION 3Ver. 1.3
DISASSEMBLY
•This set can be disassembled in the order shown below.
3-1. DISASSEMBLY FLOW
SET
(Page 8)
3-5. NAND BOARD,
SVX SWITCH FLEXIBLE (PWB ASSY) (Page 9)
BATTERY ASSY (Page 10)
Note: Follow the disassembly procedure in the numerical order given.
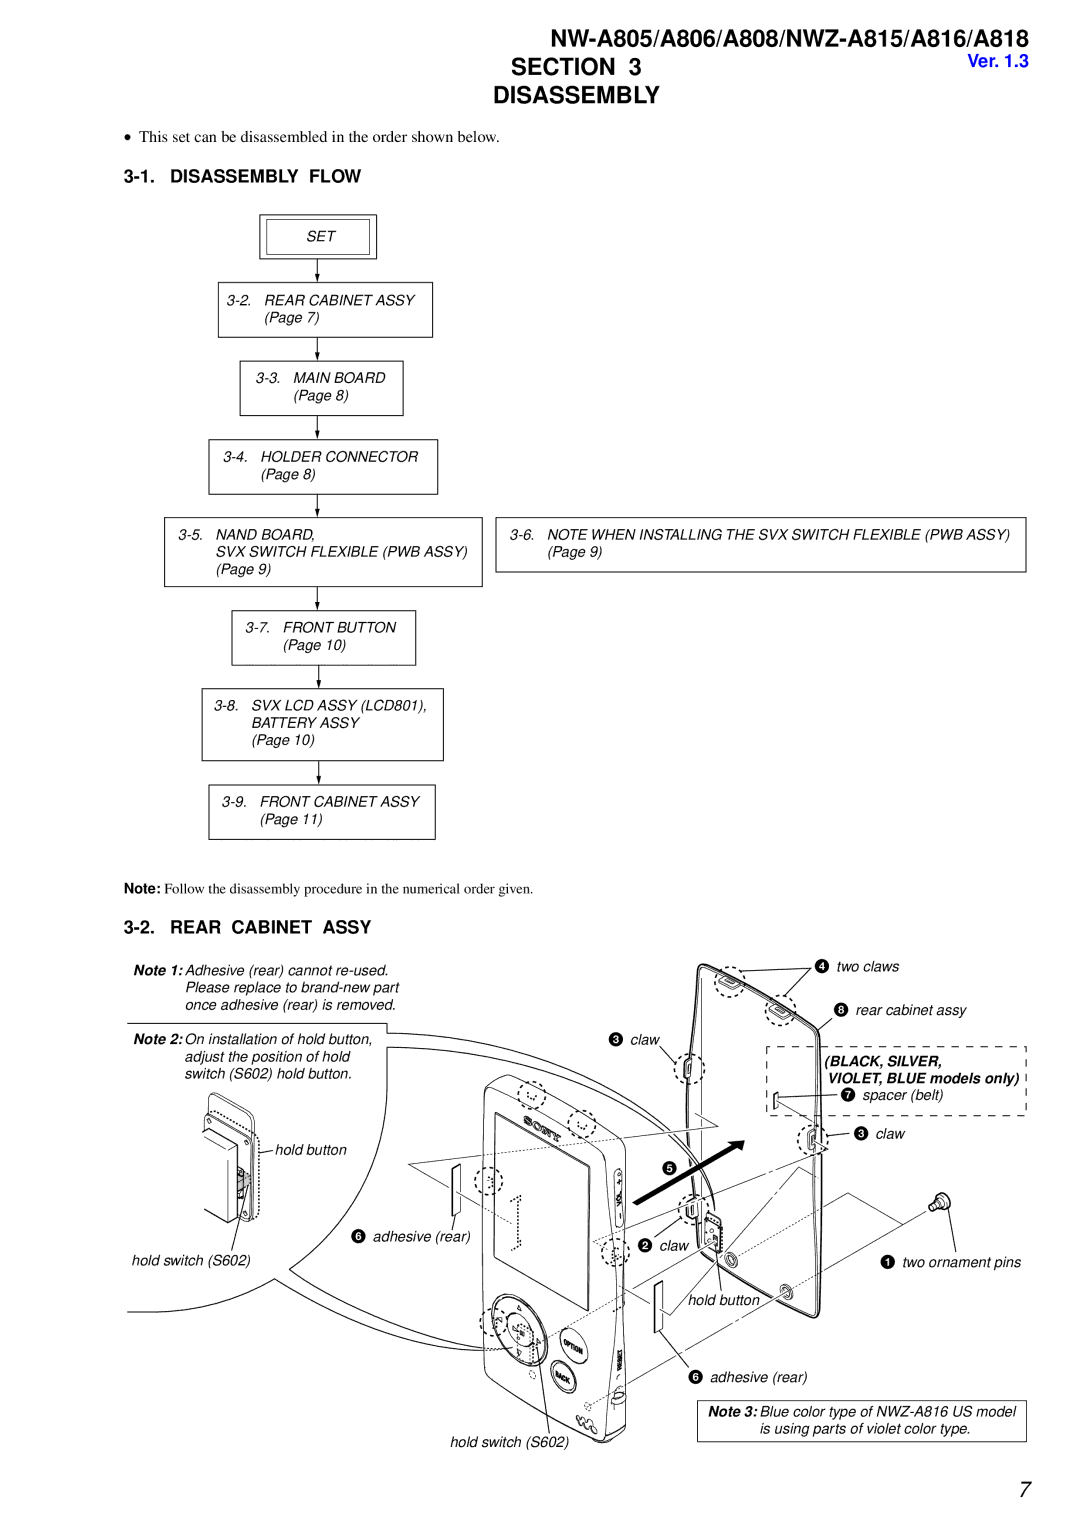
3-2. REAR CABINET ASSY
Note 1: Adhesive (rear) cannot
Note 2: On installation of hold button, adjust the position of hold switch (S602) hold button.
![]() hold button
hold button
6 adhesive (rear)
hold switch (S602)
3claw
5
2 claw
4two claws
8rear cabinet assy
(BLACK, SILVER,
VIOLET, BLUE models only) ![]() 7 spacer (belt)
7 spacer (belt)
![]() 3 claw
3 claw
1two ornament pins
hold switch (S602)
hold button
6adhesive (rear)
Note 3: Blue color type of
7