Caution
Do not turn the spanner forcibly when the screw has fully rotated. Otherwise, the spanner may slip and injure your hand.
Installing the Projector
This section describes briefly how to install the projector on the floor. The distance between the center of the lens and the screen varies depending on the optional lens attached, the horizontal screen size or the input signal.
For details on installation examples with projection distances, see “Installation Manual for Dealers.”
Screen
310 mm (12 1/4 inches)
Projection distance
Vertical positioning (side view)
Install the projector so that the center of the lens is between the bottom edge and the top edge of the screen. You can move the picture position vertically by half of the screen vertical size using the lens shift adjustment.
| Adjustable range with lens |
Center of lens | shift feature |
Screen
Installing the SRX Controller in a Computer for Controlling the Projector
If you install the supplied SRX Controller in a computer, you can control the projector from the computer.
System Requirements
The following are required to operate the supplied SRX Controller.
•Computer: Intel Celeron CPU, 1 GHz or more
–Installed memory: 256 MB or more
–Communication:
–VGA: XGA (1024 × 768) or higher
–HDD: Connected to a computer via the IDE port, Usable memory with 8 MB or more
–
•Operating System: Microsoft Windows XP Professional SP2 (English or Japanese version)
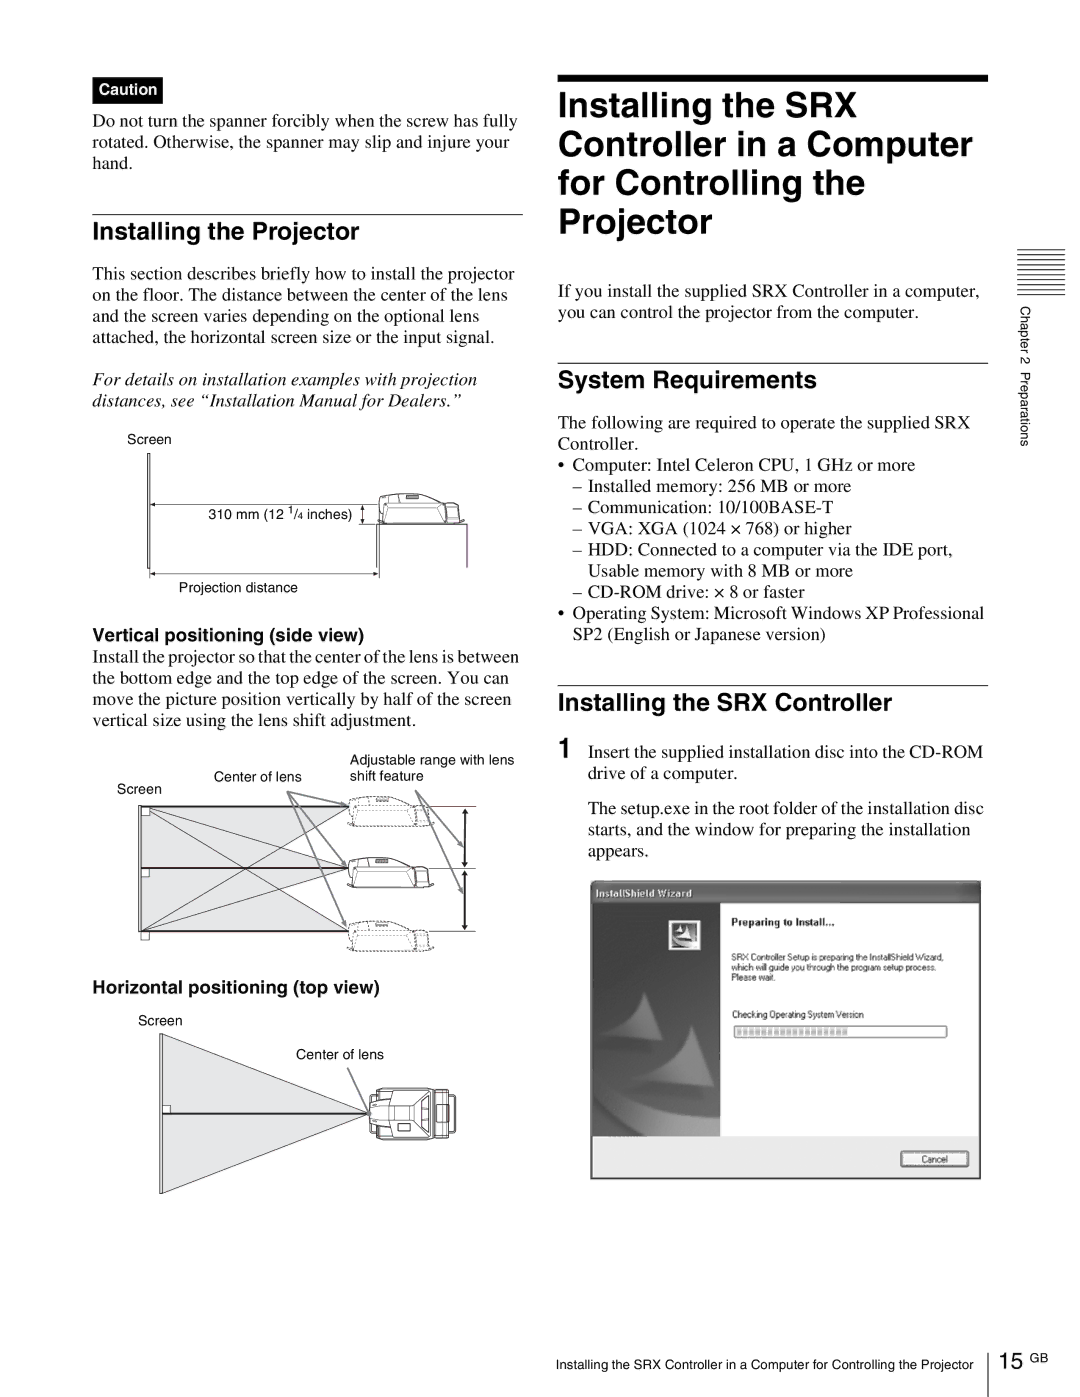
Installing the SRX Controller
1Insert the supplied installation disc into the
The setup.exe in the root folder of the installation disc starts, and the window for preparing the installation appears.
Chapter 2 Preparations
Horizontal positioning (top view)
Screen
Center of lens
Installing the SRX Controller in a Computer for Controlling the Projector