Connecting the Projector
When you connect the projector, make sure to:
•Turn off all equipment before making any connections.
•Use the proper cables for each connection.
•Insert the cable plugs firmly; loose connections may increase noise and reduce performance of picture signals. When pulling out a cable, be sure to pull it out from the plug, not the cable itself.
•When installing the optional input board, consult with the Sony dealer.
Refer also to the instruction manuals of the equipment to be connected.
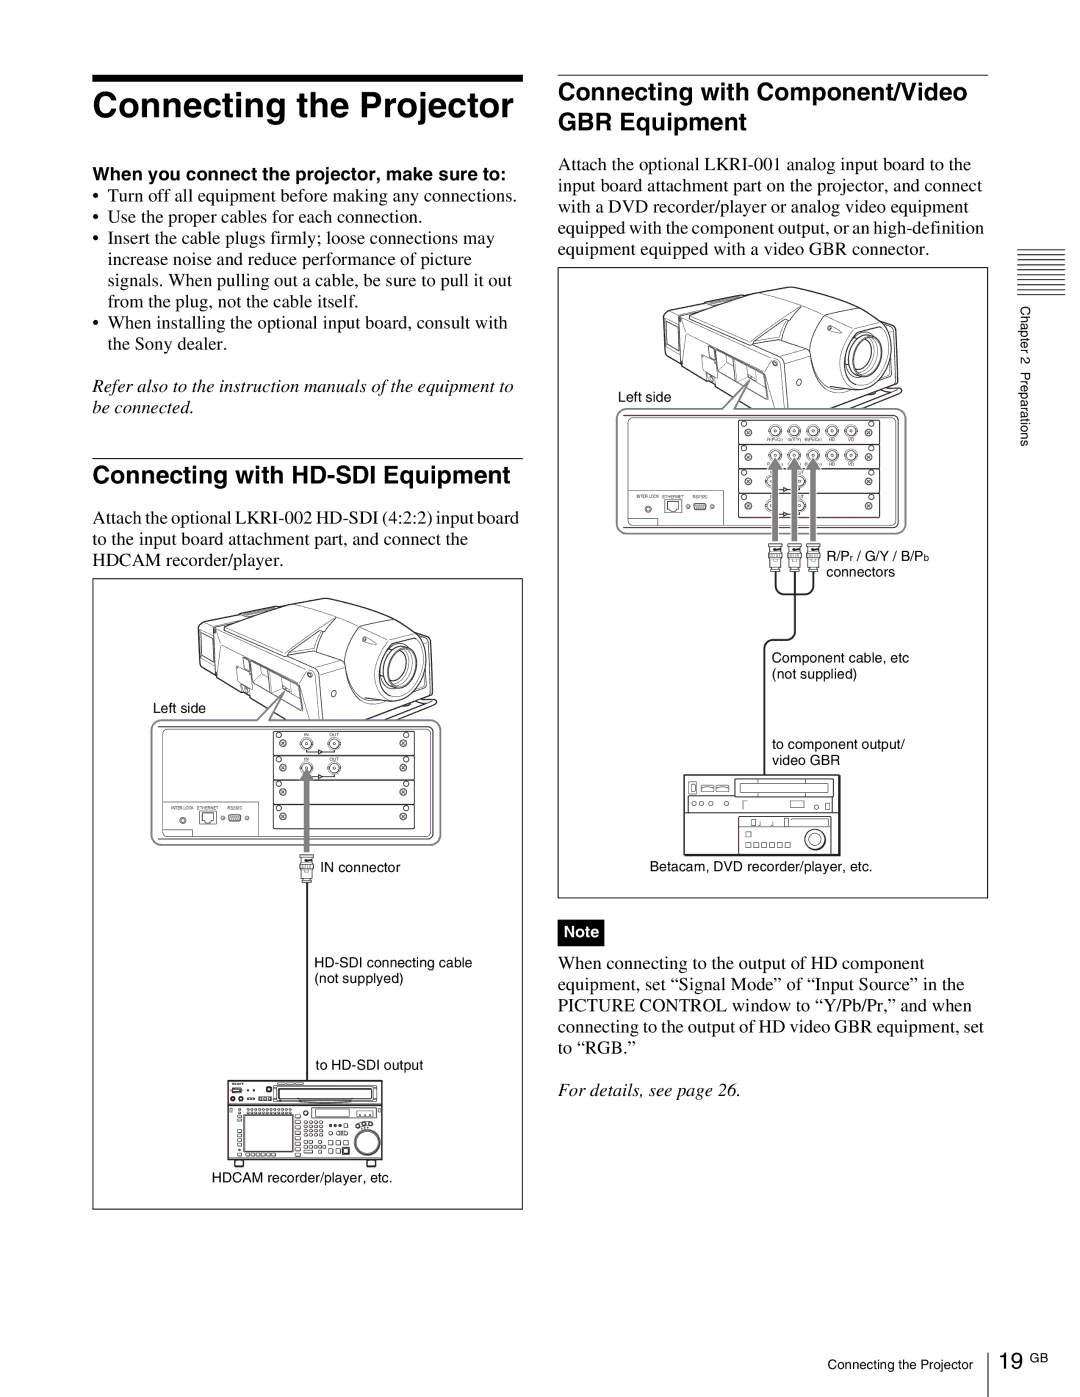
Connecting with HD-SDI Equipment
Attach the optional
Connecting with Component/Video GBR Equipment
Attach the optional
Left side
R(Pr/Cr) | G(Y/Y) B(Pb/Cb) | HD | VD |
r) | b) | HD | VD |
INTER LOCK ETHERNET | RS232C | |||
|
|
|
|
|
|
|
|
|
|
|
|
|
|
|
R/Pr / G/Y / B/Pb connectors
Component cable, etc (not supplied)
Chapter 2 Preparations
Left side
INTER LOCK ETHERNET | RS232C | |||
|
|
|
|
|
|
|
|
|
|
|
|
|
|
|
IN ![]() OUT
OUT
INOUT
![]() IN connector
IN connector
to component output/ video GBR
Betacam, DVD recorder/player, etc.
Note
to
HDCAM recorder/player, etc.
When connecting to the output of HD component equipment, set “Signal Mode” of “Input Source” in the PICTURE CONTROL window to “Y/Pb/Pr,” and when connecting to the output of HD video GBR equipment, set to “RGB.”
For details, see page 26.
Connecting the Projector