14" | S E R V I C E | For Machines Mfg. Since 5/11 |
|
|
|
Leadscrew Shear Pin Replacement
The leadscrew is secured to a connecting collar that is part of the headstock drivetrain with the use of a
Contact South Bend to order a replacement shear pin (Part Number PSB10121234) or use the specifications in Figure 129 to fabricate your own.
| 9mm |
| 7mm |
5.8mm | 3mm |
| 0.5mm |
0.2mm | 0.2mm |
NOTE: Shear Pin Material = S45C (SAE 1045) | |
Figure 129. Shear pin specifications.
Tools Needed: | Qty |
External Retaining Ring Pliers #1 | ........................1 |
Magnet | 1 |
Safety Goggles | 1 |
Blow Gun w/Compressed Air | 1 |
Light Machine Oil | As needed |
To replace the shear pin:
1.DISCONNECT LATHE FROM POWER!
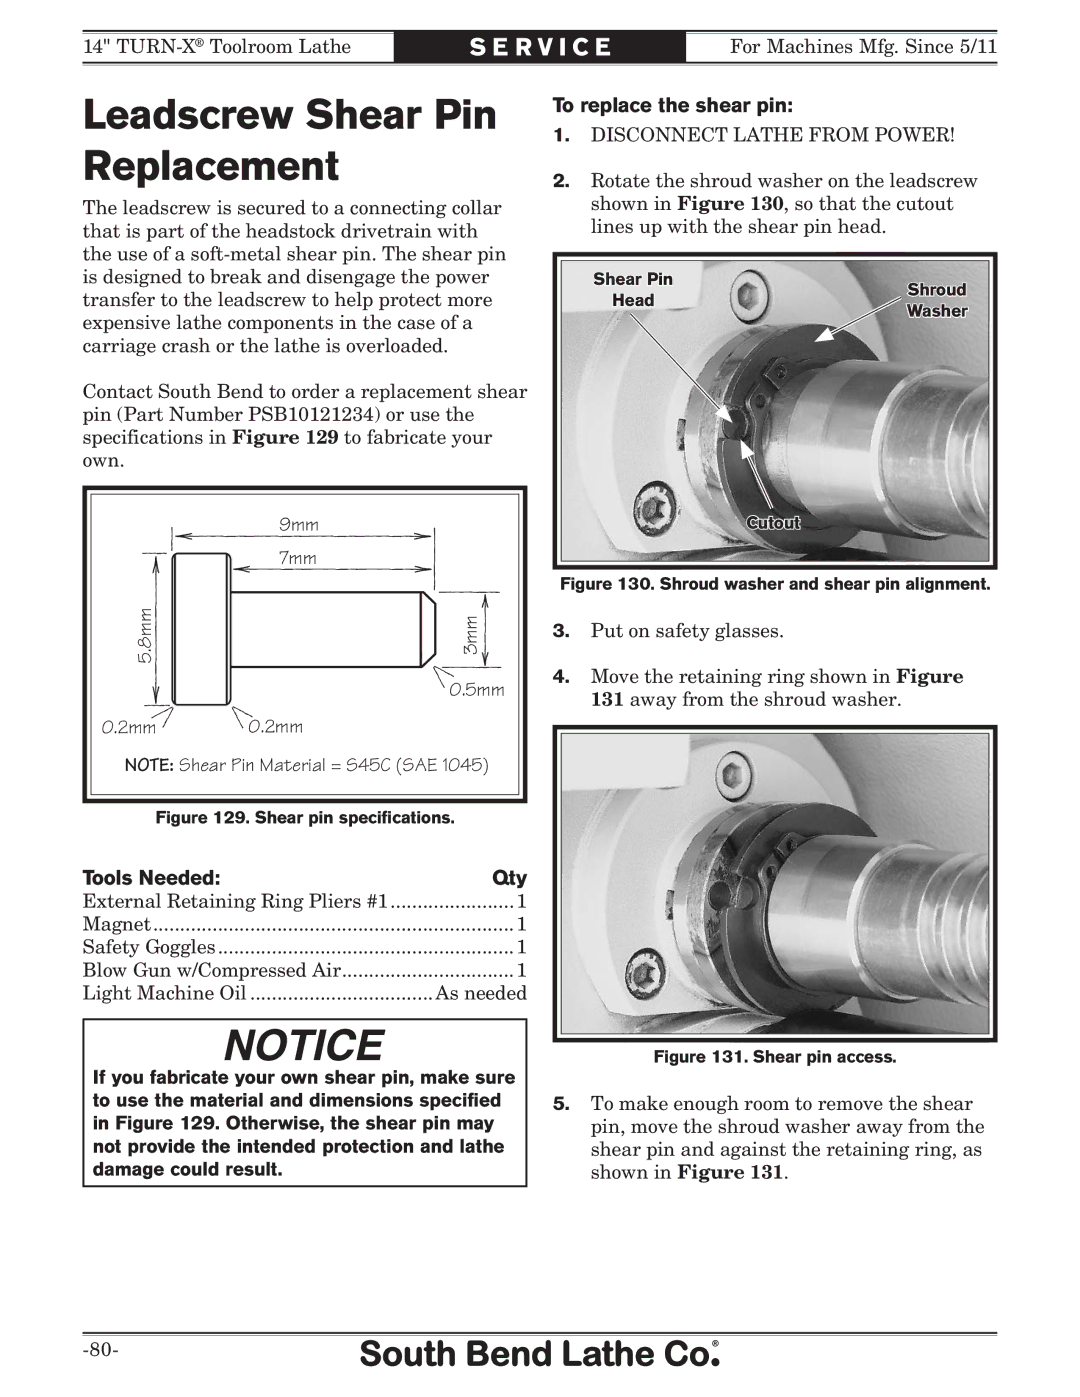
2.Rotate the shroud washer on the leadscrew shown in Figure 130, so that the cutout lines up with the shear pin head.
Shear Pin | Shroud | |
Head | ||
Washer | ||
|
Cutout
Figure 130. Shroud washer and shear pin alignment.
3.Put on safety glasses.
4.Move the retaining ring shown in Figure 131 away from the shroud washer.
If you fabricate your own shear pin, make sure to use the material and dimensions specified in Figure 129. Otherwise, the shear pin may not provide the intended protection and lathe damage could result.
Figure 131. Shear pin access.
5.To make enough room to remove the shear pin, move the shroud washer away from the shear pin and against the retaining ring, as shown in Figure 131.