For Machines Mfg. Since 5/11 | O P E R A T I O N | 14" |
|
|
|
Removing Tooling
1.Use a shop rag to hold the tool.
2.Rotate the quill handwheel counterclockwise until the tool is forced out of the quill.
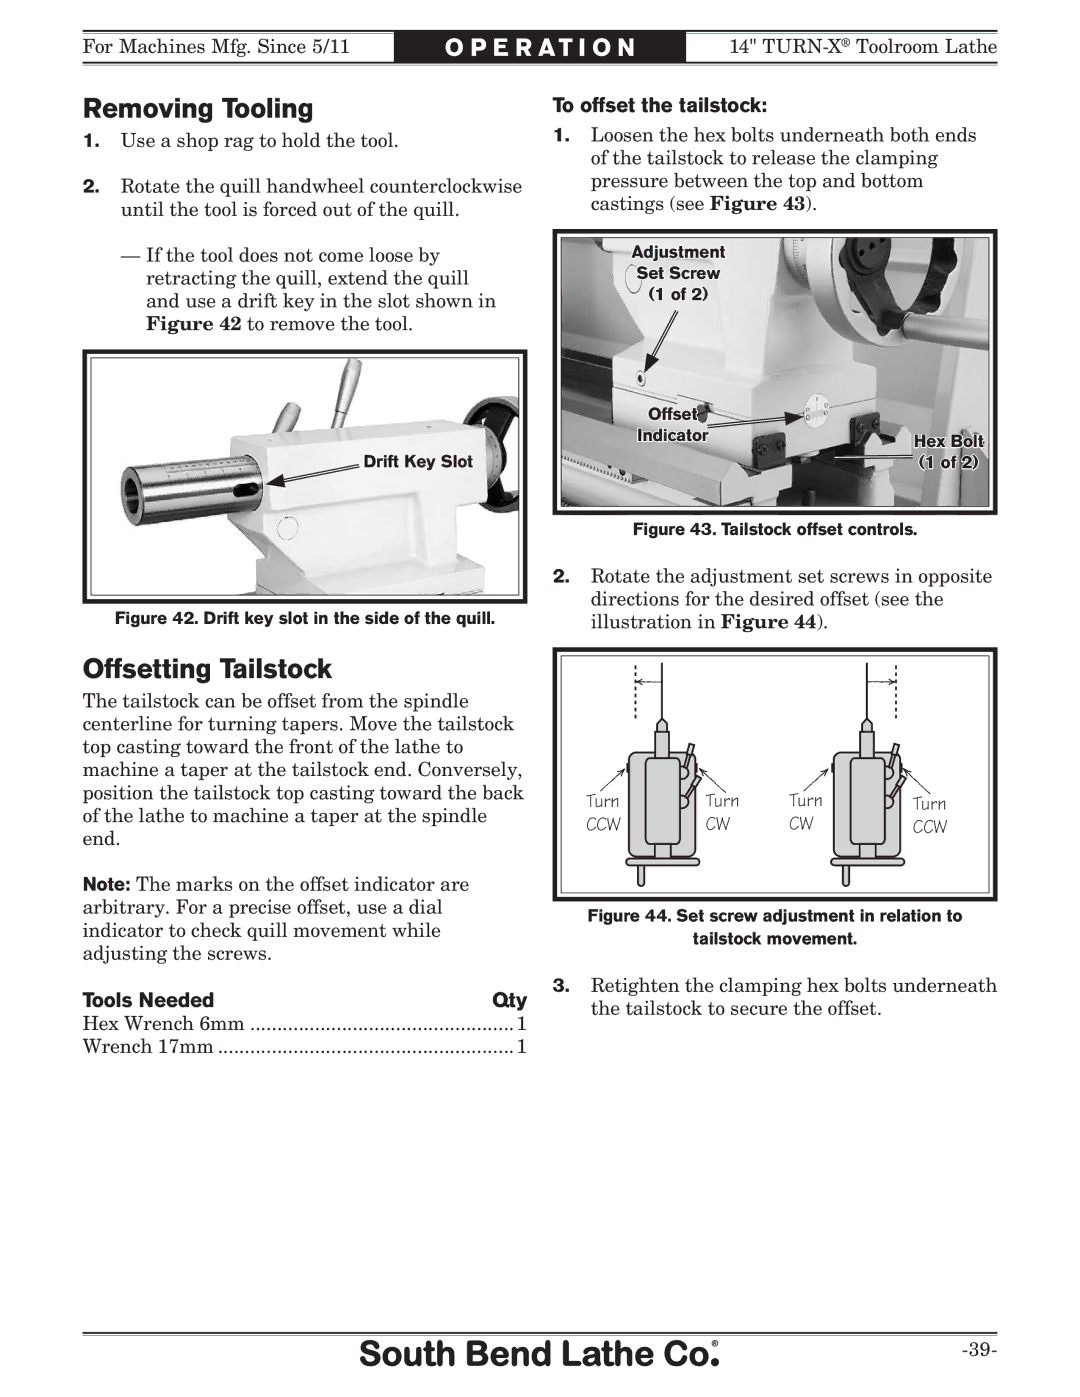
—If the tool does not come loose by retracting the quill, extend the quill and use a drift key in the slot shown in Figure 42 to remove the tool.
Drift Key Slot
Figure 42. Drift key slot in the side of the quill.
To offset the tailstock:
1.Loosen the hex bolts underneath both ends of the tailstock to release the clamping pressure between the top and bottom castings (see Figure 43).
Adjustment
Set Screw
(1 of 2)
Offset |
|
Indicator | Hex Bolt |
| |
| (1 of 2) |
Figure 43. Tailstock offset controls.
2.Rotate the adjustment set screws in opposite directions for the desired offset (see the illustration in Figure 44).
Offsetting Tailstock
The tailstock can be offset from the spindle centerline for turning tapers. Move the tailstock top casting toward the front of the lathe to machine a taper at the tailstock end. Conversely, position the tailstock top casting toward the back of the lathe to machine a taper at the spindle end.
Note: The marks on the offset indicator are |
|
arbitrary. For a precise offset, use a dial |
|
indicator to check quill movement while |
|
adjusting the screws. |
|
Tools Needed | Qty |
Hex Wrench 6mm | 1 |
Wrench 17mm | 1 |
Turn | Turn | Turn | Turn |
CCW | CW | CW | CCW |
Figure 44. Set screw adjustment in relation to
tailstock movement.
3.Retighten the clamping hex bolts underneath the tailstock to secure the offset.
