For Machines Mfg. Since 5/11 | O P E R A T I O N | 14" |
|
|
|
Scroll Chuck Clamping
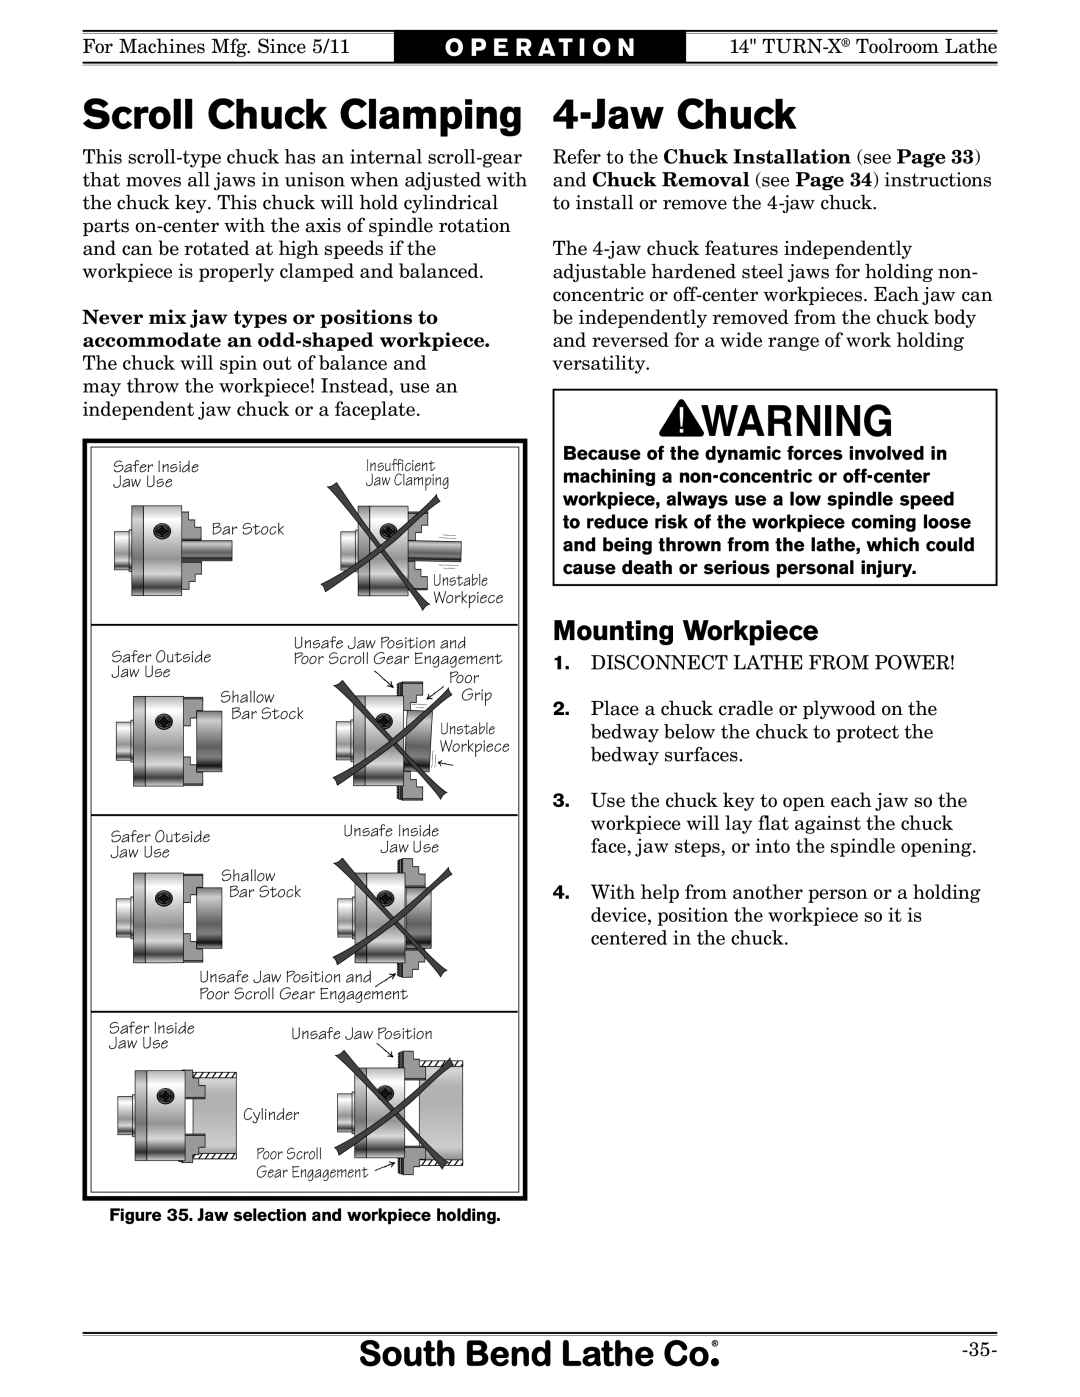
This
Never mix jaw types or positions to accommodate an
may throw the workpiece! Instead, use an independent jaw chuck or a faceplate.
4-Jaw Chuck
Refer to the Chuck Installation (see Page 33) and Chuck Removal (see Page 34) instructions to install or remove the
The
Safer Inside
Jaw Use
Bar Stock
Insufficient
Jaw Clamping
Unstable
![]()
![]() Workpiece
Workpiece
Because of the dynamic forces involved in machining a
Safer Outside | Unsafe Jaw Position and | |
Poor Scroll Gear Engagement | ||
Jaw Use | Poor | |
Shallow | Grip | |
Bar Stock | ||
| Unstable | |
| Workpiece | |
Safer Outside | Unsafe Inside | |
Jaw Use | ||
Jaw Use | ||
| Shallow | |
| Bar Stock | |
| Unsafe Jaw Position and | |
| Poor Scroll Gear Engagement | |
Safer Inside | Unsafe Jaw Position | |
Jaw Use | ||
|
Cylinder
Poor Scroll
Gear Engagement ![]()
![]()
![]()
Figure 35. Jaw selection and workpiece holding.
Mounting Workpiece
1.DISCONNECT LATHE FROM POWER!
2.Place a chuck cradle or plywood on the bedway below the chuck to protect the bedway surfaces.
3.Use the chuck key to open each jaw so the workpiece will lay flat against the chuck face, jaw steps, or into the spindle opening.
4.With help from another person or a holding device, position the workpiece so it is centered in the chuck.
