10Printer Setup
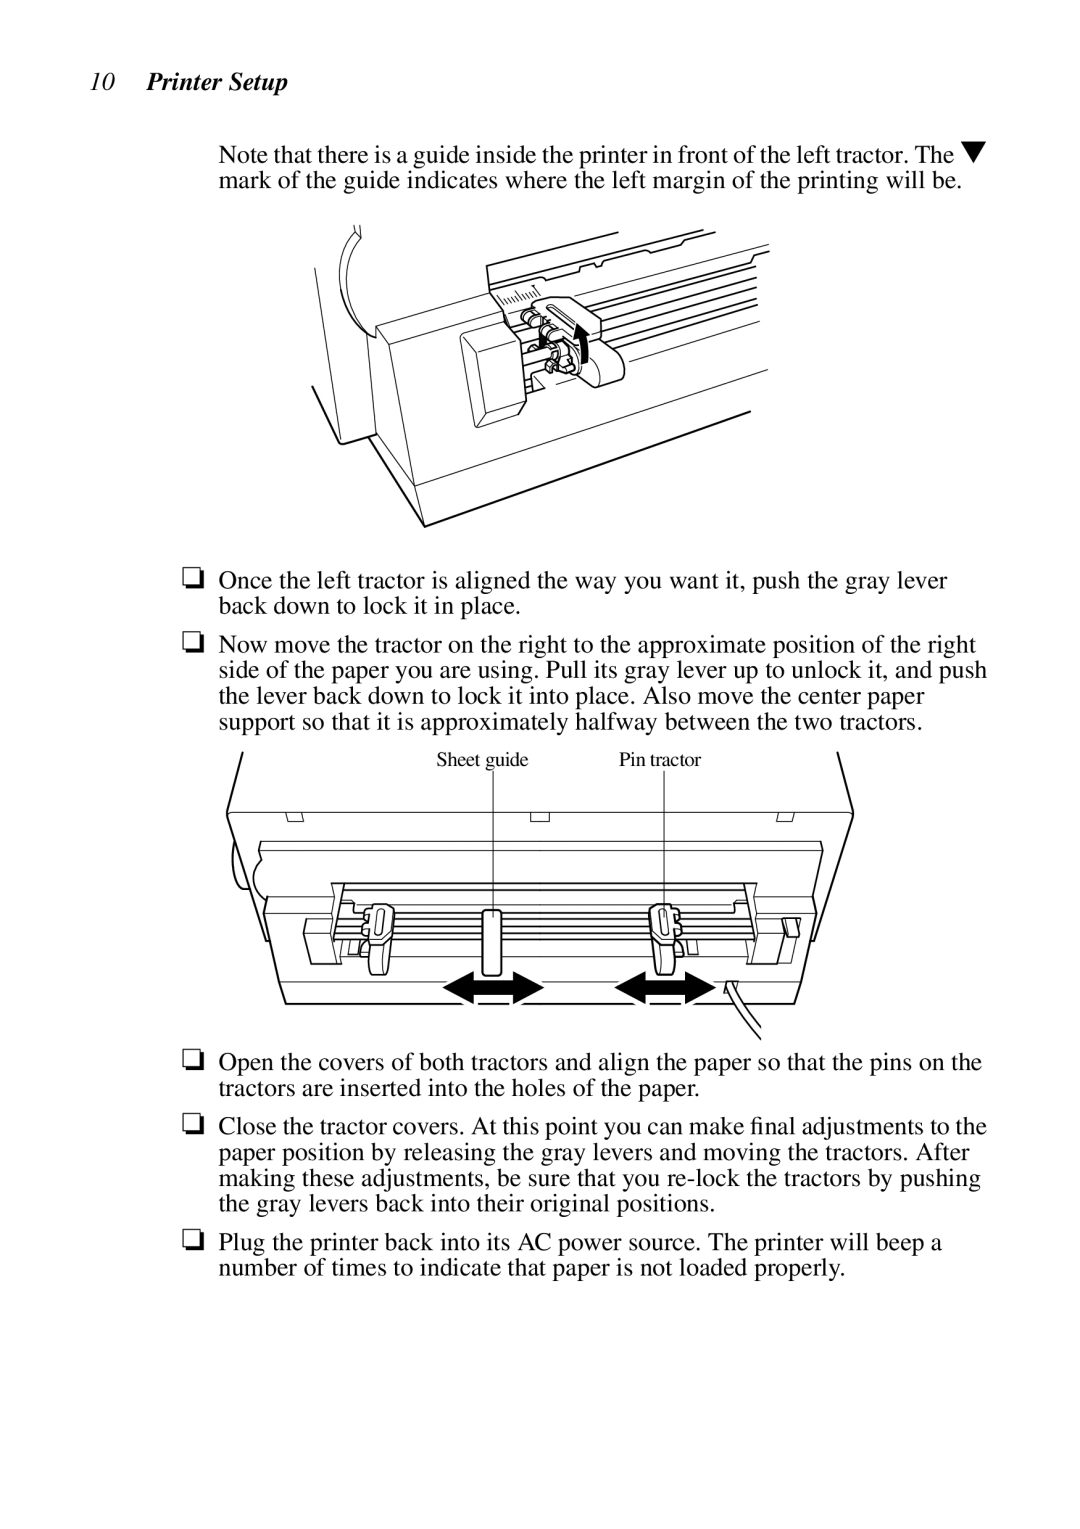
Note that there is a guide inside the printer in front of the left tractor. The ▼ mark of the guide indicates where the left margin of the printing will be.
❏Once the left tractor is aligned the way you want it, push the gray lever back down to lock it in place.
❏Now move the tractor on the right to the approximate position of the right side of the paper you are using. Pull its gray lever up to unlock it, and push the lever back down to lock it into place. Also move the center paper support so that it is approximately halfway between the two tractors.
Sheet guide | Pin tractor |
❏Open the covers of both tractors and align the paper so that the pins on the tractors are inserted into the holes of the paper.
❏Close the tractor covers. At this point you can make final adjustments to the paper position by releasing the gray levers and moving the tractors. After making these adjustments, be sure that you
❏Plug the printer back into its AC power source. The printer will beep a number of times to indicate that paper is not loaded properly.
