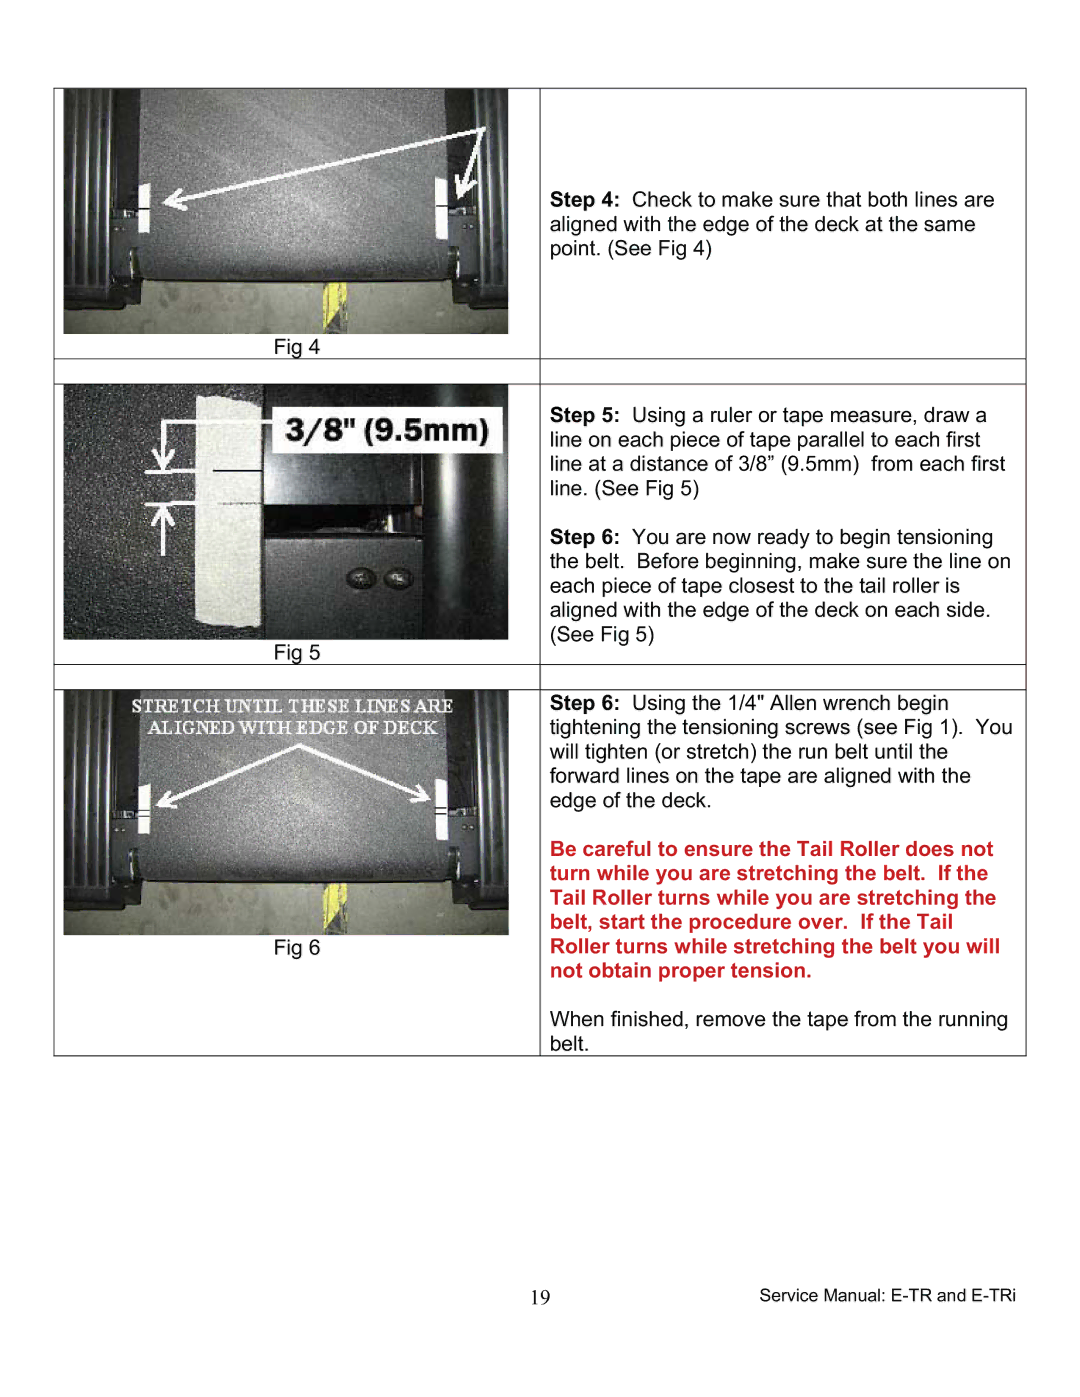
Step 4: Check to make sure that both lines are aligned with the edge of the deck at the same point. (See Fig 4)
Fig 4 |
|
|
|
| Step 5: Using a ruler or tape measure, draw a |
| line on each piece of tape parallel to each first |
| line at a distance of 3/8” (9.5mm) from each first |
| line. (See Fig 5) |
| Step 6: You are now ready to begin tensioning |
| the belt. Before beginning, make sure the line on |
| each piece of tape closest to the tail roller is |
| aligned with the edge of the deck on each side. |
Fig 5 | (See Fig 5) |
| |
|
|
| Step 6: Using the 1/4" Allen wrench begin |
| tightening the tensioning screws (see Fig 1). You |
| will tighten (or stretch) the run belt until the |
| forward lines on the tape are aligned with the |
| edge of the deck. |
| Be careful to ensure the Tail Roller does not |
| turn while you are stretching the belt. If the |
| Tail Roller turns while you are stretching the |
| belt, start the procedure over. If the Tail |
Fig 6 | Roller turns while stretching the belt you will |
| not obtain proper tension. |
| When finished, remove the tape from the running |
| belt. |
19 | Service Manual: |
