INSTALLATION INSTRUCTIONS
INSTALLATION
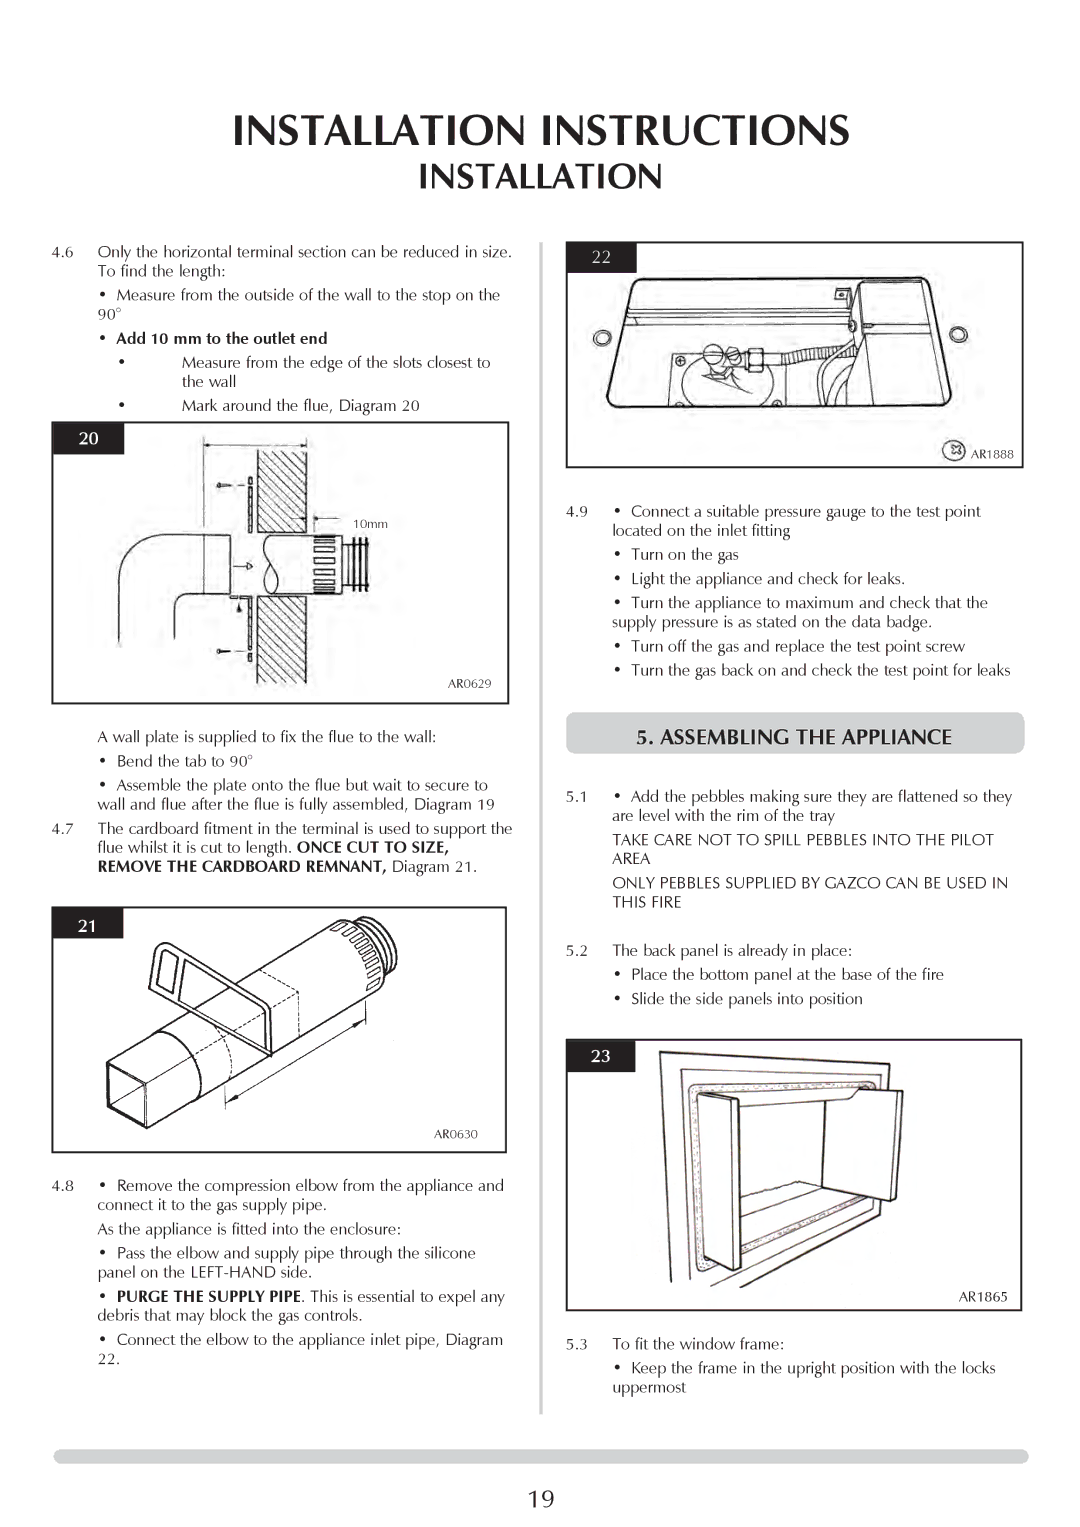
4.6Only the horizontal terminal section can be reduced in size.
To find the length:
•Measure from the outside of the wall to the stop on the
90°
•Add 10 mm to the outlet end
•Measure from the edge of the slots closest to the wall
•Mark around the flue, Diagram 20
20
10mm
AR0629
A wall plate is supplied to fix the flue to the wall:
•Bend the tab to 90°
•Assemble the plate onto the flue but wait to secure to wall and flue after the flue is fully assembled, Diagram 19
4.7The cardboard fitment in the terminal is used to support the flue whilst it is cut to length. ONCE CUT TO SIZE, REMOVE THE CARDBOARD REMNANT, Diagram 21.
21
AR0630
4.8• Remove the compression elbow from the appliance and connect it to the gas supply pipe.
As the appliance is fitted into the enclosure:
•Pass the elbow and supply pipe through the silicone panel on the
•PURGE THE SUPPLY PIPE. This is essential to expel any debris that may block the gas controls.
•Connect the elbow to the appliance inlet pipe, Diagram
22.
22
AR1888
4.9• Connect a suitable pressure gauge to the test point located on the inlet fitting
•Turn on the gas
•Light the appliance and check for leaks.
•Turn the appliance to maximum and check that the supply pressure is as stated on the data badge.
•Turn off the gas and replace the test point screw
•Turn the gas back on and check the test point for leaks
5.ASSEMBLING THE APPLIANCE
5.1• Add the pebbles making sure they are flattened so they are level with the rim of the tray
TAKE CARE NOT TO SPILL PEBBLES INTO THE PILOT AREA
ONLY PEBBLES SUPPLIED BY GAZCO CAN BE USED IN THIS FIRE
5.2The back panel is already in place:
•Place the bottom panel at the base of the fire
•Slide the side panels into position
23
AR1865
5.3To fit the window frame:
• Keep the frame in the upright position with the locks uppermost
19