SERVICING INSTRUCTIONS
REPLACING PARTS
1.GENERAL
1.1All main components can be replaced without removing the appliance from its installation. It is essential that the gas
supply to the appliance is turned off at the isolation device before proceeding further.
1.2Removal of Flue
If, for any reason, the flue has to be removed from the appliance, the seal must be replaced in the inner spigot.
1.3Access to the controls is restricted and the whole of the control assembly is to be removed as one unit. Refer to Section 7 below
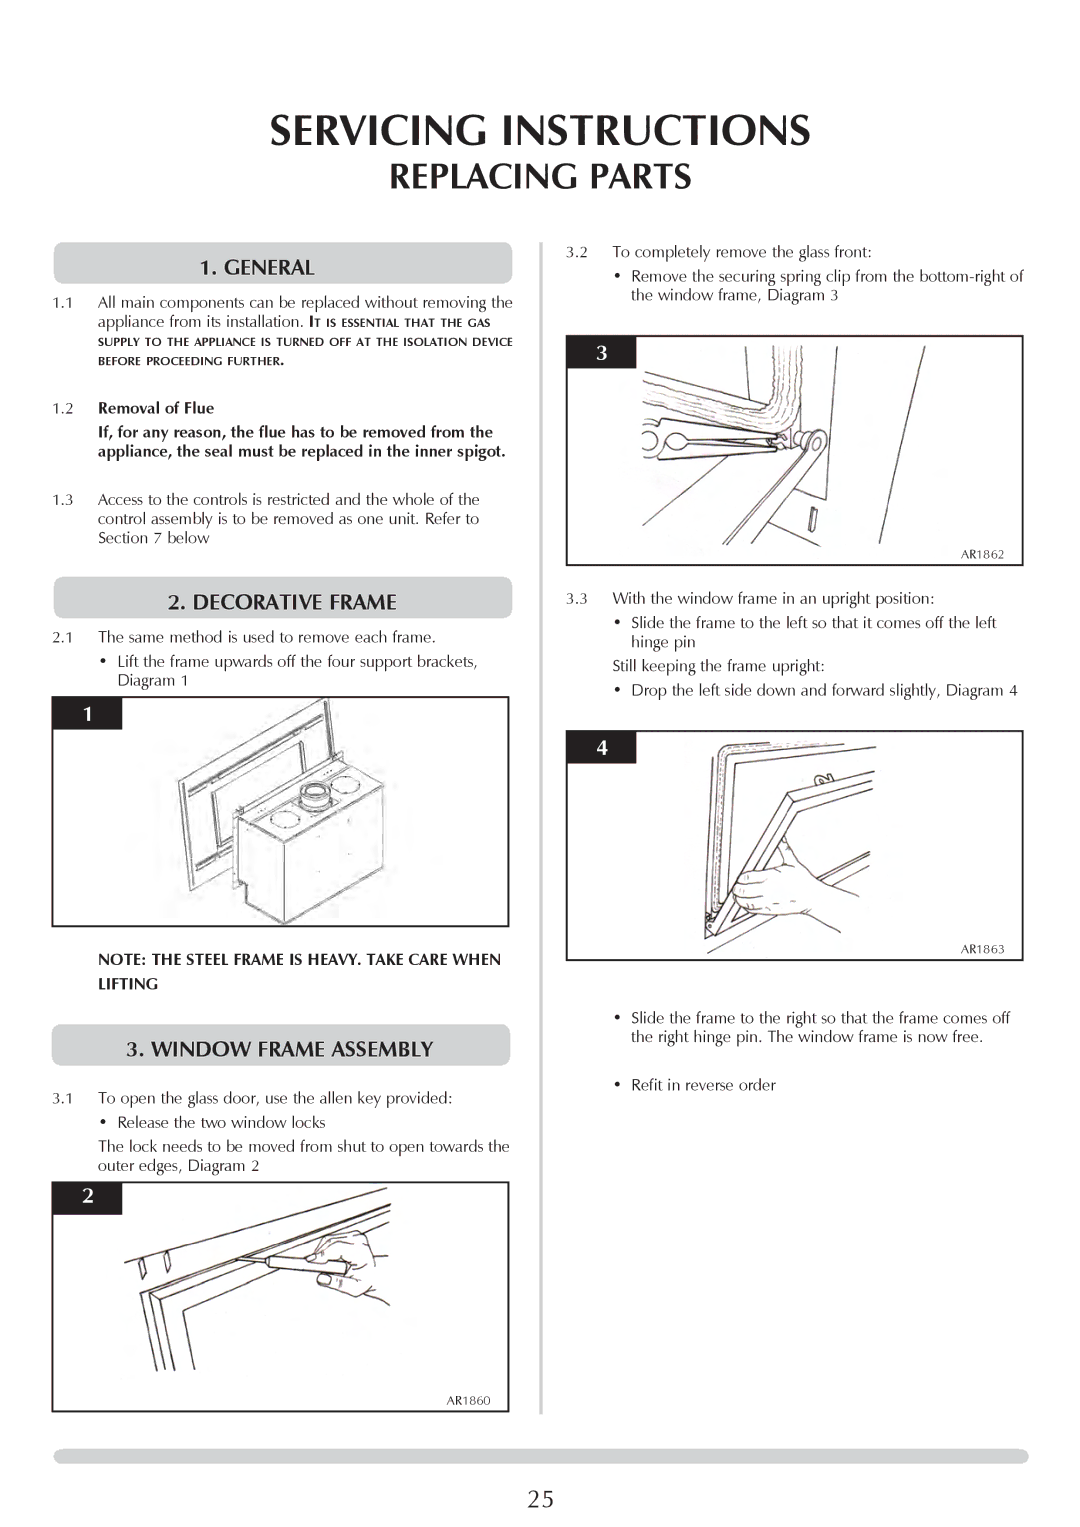
2.DECORATIVE FRAME
2.1The same method is used to remove each frame.
•Lift the frame upwards off the four support brackets,
Diagram 1
1
NOTE: THE STEEL FRAME IS HEAVY. TAKE CARE WHEN LIFTING
3.WINDOW FRAME ASSEMBLY
3.1To open the glass door, use the allen key provided:
•Release the two window locks
The lock needs to be moved from shut to open towards the outer edges, Diagram 2
2
3.2To completely remove the glass front:
•Remove the securing spring clip from the
3
AR1862
3.3With the window frame in an upright position:
•Slide the frame to the left so that it comes off the left hinge pin
Still keeping the frame upright:
• Drop the left side down and forward slightly, Diagram 4
4
AR1863
•Slide the frame to the right so that the frame comes off the right hinge pin. The window frame is now free.
•Refit in reverse order
AR1860
25