GB
the settings made. These settings include the power levels, the timer of the heating elements, as well as the Power and Heat- Up functions.
After having disconnected the control panel using the on/off sensor button ![]() (1), you will have six seconds to turn on the hob again. After doing so, to recover the settings lost, touch the Stop sensor
(1), you will have six seconds to turn on the hob again. After doing so, to recover the settings lost, touch the Stop sensor
button ![]() (6) before another six seconds pass.
(6) before another six seconds pass.
This function will only work if at least one heating element is active, regardless of the Lock function.
The activation of the Recovery Function will be confirmed by a beep.
Heat-up function
(Automatic start of cooking)
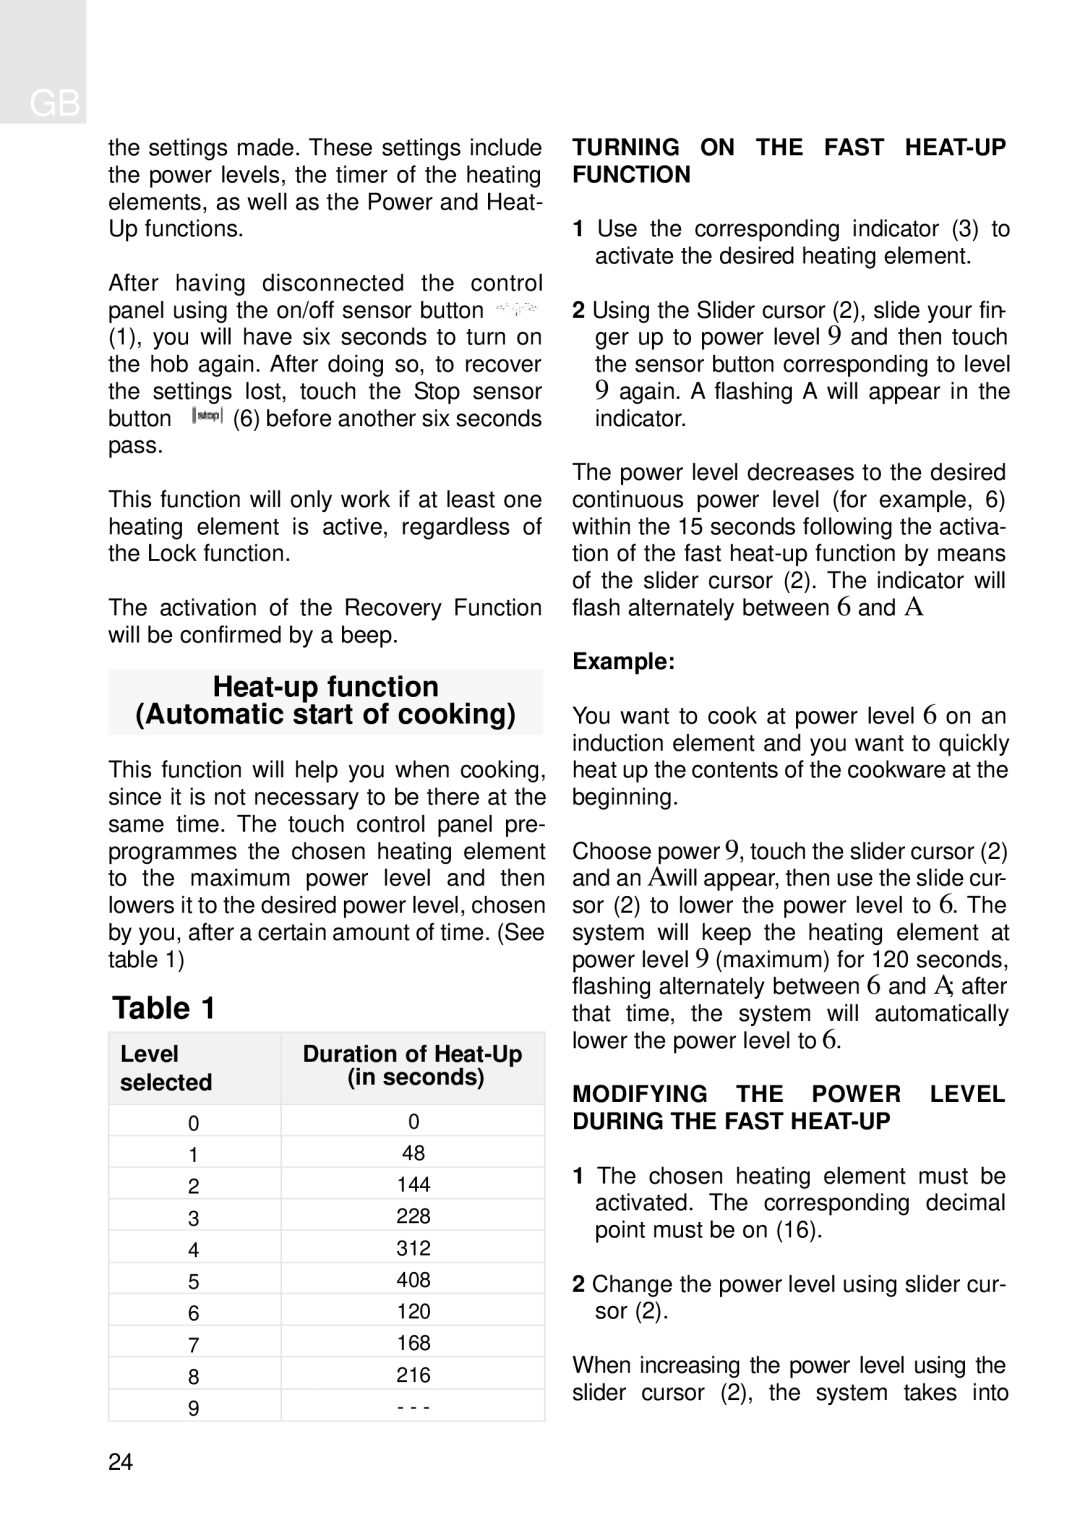
This function will help you when cooking, since it is not necessary to be there at the same time. The touch control panel pre- programmes the chosen heating element to the maximum power level and then lowers it to the desired power level, chosen by you, after a certain amount of time. (See table 1)
Table 1
Level | Duration of |
selected | (in seconds) |
0 | 0 |
1 | 48 |
2 | 144 |
3 | 228 |
4 | 312 |
5 | 408 |
6 | 120 |
7 | 168 |
8 | 216 |
9 | - - - |
TURNING ON THE FAST HEAT-UP FUNCTION
1 Use the corresponding indicator (3) to activate the desired heating element.
2 Using the Slider cursor (2), slide your fin- ger up to power level 9 and then touch the sensor button corresponding to level 9 again. A flashing A will appear in the indicator.
The power level decreases to the desired continuous power level (for example, 6) within the 15 seconds following the activa- tion of the fast
Example:
You want to cook at power level 6 on an induction element and you want to quickly heat up the contents of the cookware at the beginning.
Choose power 9, touch the slider cursor (2) and an A will appear, then use the slide cur- sor (2) to lower the power level to 6. The system will keep the heating element at power level 9 (maximum) for 120 seconds, flashing alternately between 6 and A; after that time, the system will automatically lower the power level to 6.
MODIFYING THE POWER LEVEL DURING THE FAST HEAT-UP
1 The chosen heating element must be activated. The corresponding decimal point must be on (16).
2 Change the power level using slider cur- sor (2).
When increasing the power level using the slider cursor (2), the system takes into
24
