All installations and services must be performed by qualified service personnel.
connector duct. Remove the bottom panel. Cut an opening in the distribution duct slightly larger than the connector duct. (refer to Figure 2 for location of this cut.) Cut the connector duct to length. Install the connector duct. Bend over each tab. Insure an airtight seal by using high temperature sealant or tape on the joint. Reinstall the bottom panel over the connector duct. Put the base top assembly in place (see
Slit the corners of connector duct down to the top of the base assembly. If metal projects more than
2. Cottage Base Model: 01COT BASE
The 01COT BASE cottage base (Figure 1C) is required for a freestanding cottage base installation. The cottage base allows the two sides and rear to have an 8” x 12” register installed. IMPORTANT: All joints and seams of supply ducts must be sealed with a sealing method suitable to the application conditions and temperatures (I.E. High temperature silicone and/or aluminum tape). Refer to assembly and installation instructions included with cottage base for additional information.
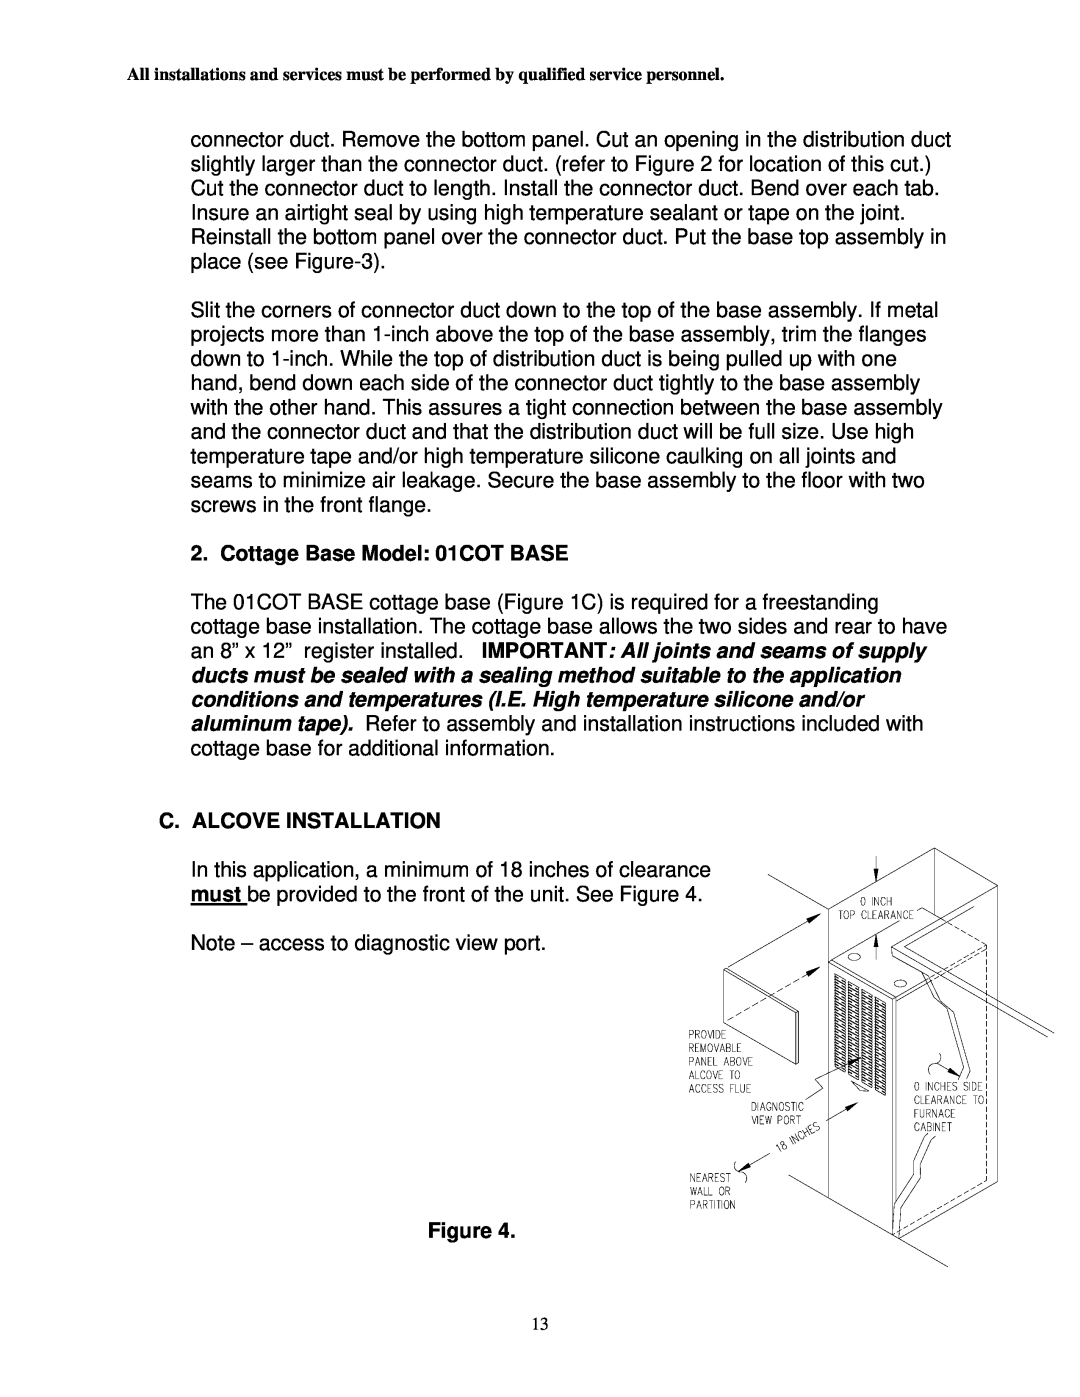
C. ALCOVE INSTALLATION
In this application, a minimum of 18 inches of clearance must be provided to the front of the unit. See Figure 4.
Note – access to diagnostic view port.
Figure 4.
13