Under Ceiling Type | Installation Manual |
Wire connection
REQUIREMENT
•Be sure to connect the wires matching the terminal numbers. Incorrect connection causes a trouble.
•The
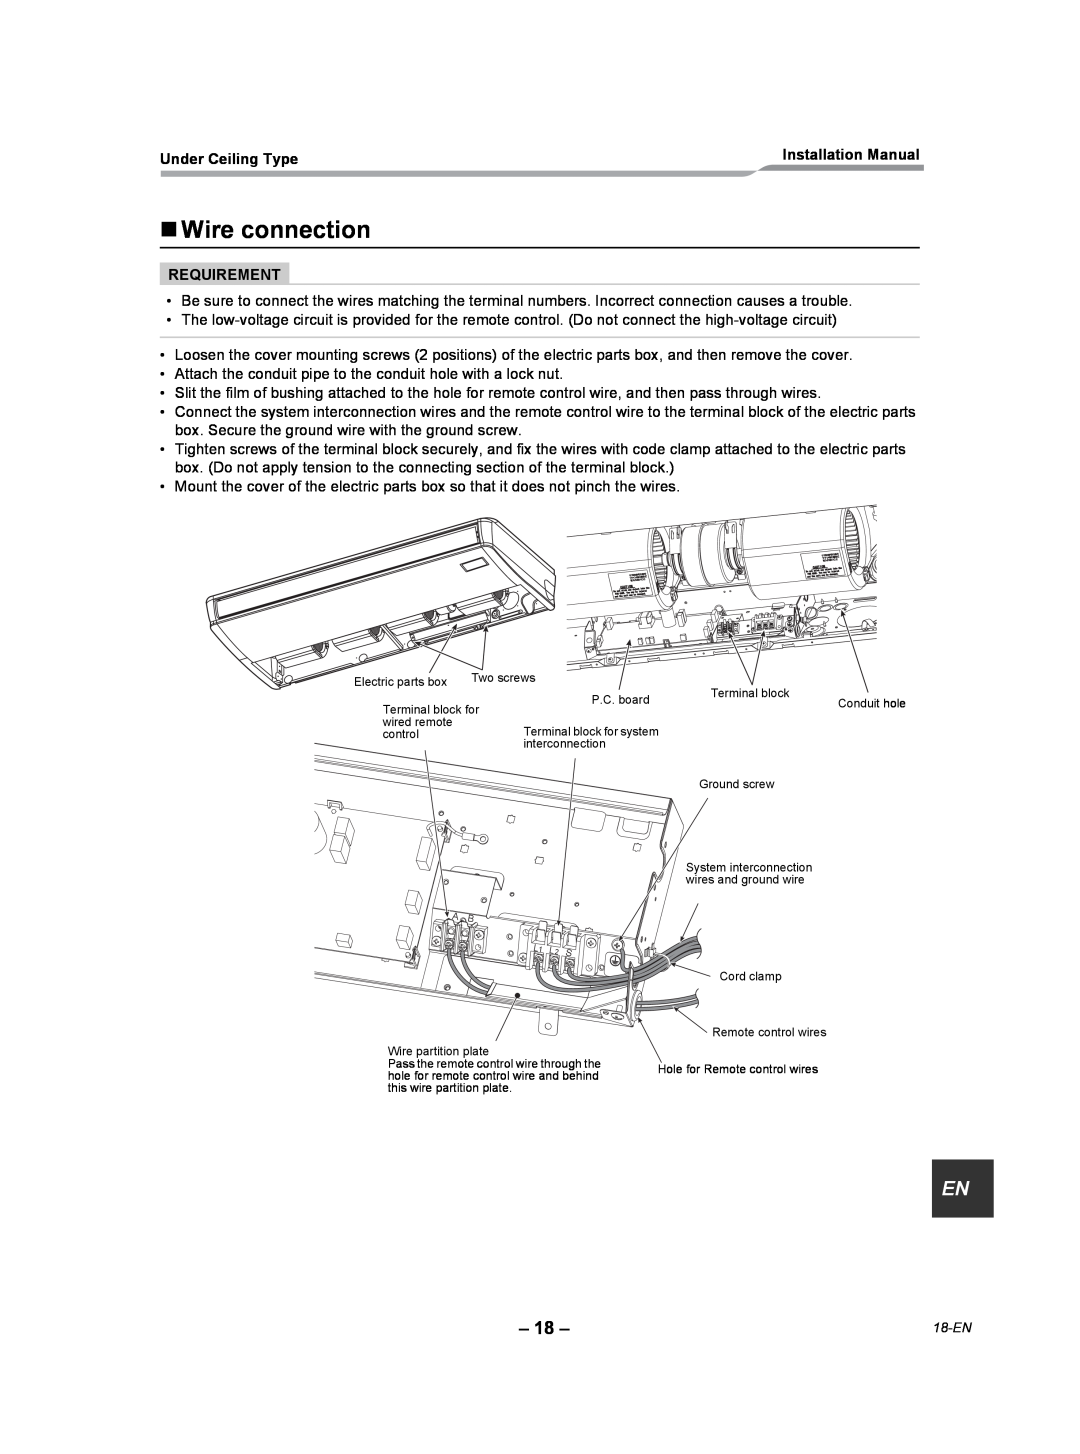
•Loosen the cover mounting screws (2 positions) of the electric parts box, and then remove the cover.
•Attach the conduit pipe to the conduit hole with a lock nut.
•Slit the film of bushing attached to the hole for remote control wire, and then pass through wires.
•Connect the system interconnection wires and the remote control wire to the terminal block of the electric parts box. Secure the ground wire with the ground screw.
•Tighten screws of the terminal block securely, and fix the wires with code clamp attached to the electric parts box. (Do not apply tension to the connecting section of the terminal block.)
•Mount the cover of the electric parts box so that it does not pinch the wires.
Electric parts box | Two screws | Terminal block | |
|
| P.C. board | |
Terminal block for | Conduit hole | ||
wired remote |
| Terminal block for system |
|
control |
|
| |
|
| interconnection |
|
Ground screw
System interconnection wires and ground wire
A | B |
L1 | L2 | S |
|
|
Wire partition plate
Pass the remote control wire through the hole for remote control wire and behind this wire partition plate.
Cord clamp
![]() Remote control wires
Remote control wires
Hole for Remote control wires
EN |
– 18 – |