Under Ceiling Type | Installation Manual |
Procedure 5
Push ![]() button. In this time, if the display changes from flashing to lighting, the setup completes.
button. In this time, if the display changes from flashing to lighting, the setup completes.
•To change the setup of an indoor unit other than the selected one, start operation from Procedure 2.
•To change the setup of another setup in the selected indoor unit, start operation from Procedure 3.
Pushing ![]() button clears the set up contents which have been already set. In this case, retry from Procedure 2.
button clears the set up contents which have been already set. In this case, retry from Procedure 2.
Procedure 6
When settings have been completed, push ![]() button to determine the settings.
button to determine the settings.
When ![]() button is pushed, “SETTING” flashes and then the display content disappears and the air conditioner enters the normal stop mode.
button is pushed, “SETTING” flashes and then the display content disappears and the air conditioner enters the normal stop mode.
(While “SETTING” is flashing, no operation of the remote control is accepted.)
Installation to high ceiling
When the height of the ceiling to be installed exceeds
3.5m (11’6”), adjustment of fan speed is necessary. Set up the high ceiling.
•Set according to the basic operation procedure
(1 → 2 → 3 → 4 → 5 → 6).
•Item code in Procedure specifies [5d].
•Select [SET DATA] in Procedure from “List of installable ceiling height” in this Manual.
•For the item code in Procedure 3, specify [5d].
•For the SET DATA in Procedure 4, select the setup data of static pressure to be set up from the table on the right.
(Exchange by wired remote control)
SET DATA |
|
| |
|
|
| |
0000 | Standard | 11’6” (3.5 m) or less | |
(Factory default) | |||
|
| ||
0001 | High static pressure 1 | more than 11’6” (3.5 m) | |
|
| up to 13’1” (4.0 m) |
Using wireless remote control
Change the high ceiling setting with the DIP switch on the P.C. board of the signal receiving part.
Refer to the installation manual of the wireless remote controller kit for the details.
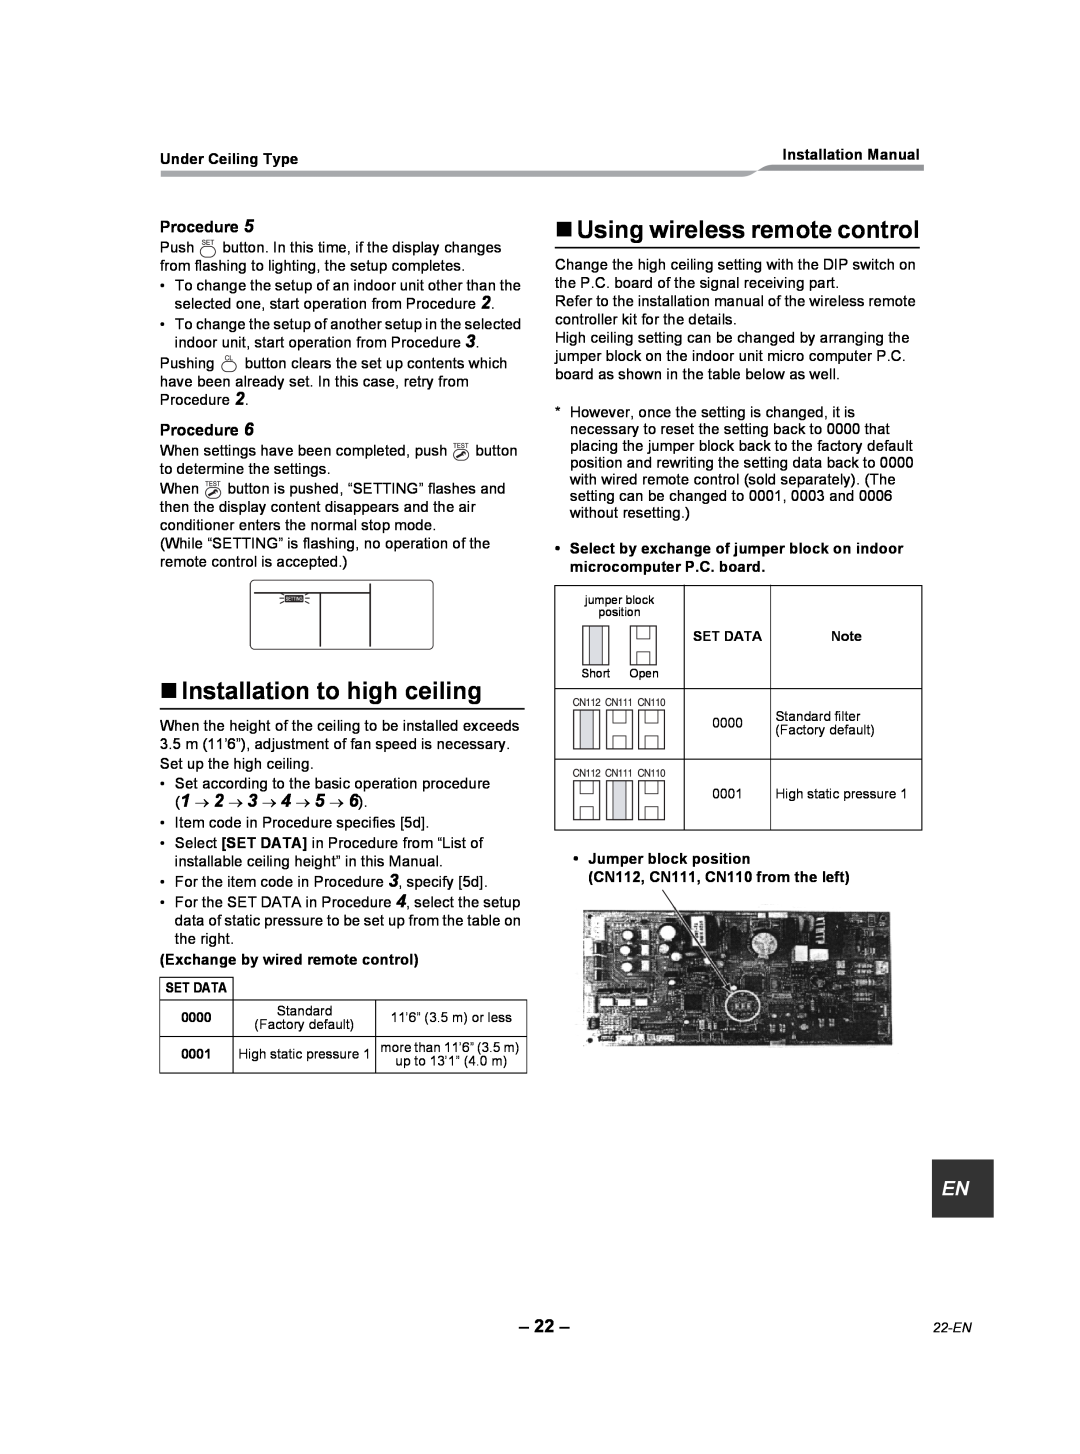
High ceiling setting can be changed by arranging the jumper block on the indoor unit micro computer P.C. board as shown in the table below as well.
*However, once the setting is changed, it is necessary to reset the setting back to 0000 that placing the jumper block back to the factory default position and rewriting the setting data back to 0000 with wired remote control (sold separately). (The setting can be changed to 0001, 0003 and 0006 without resetting.)
•Select by exchange of jumper block on indoor microcomputer P.C. board.
jumper block
position
|
|
|
|
|
|
|
|
|
|
|
|
| SET DATA | Note |
|
|
|
|
|
|
|
|
|
|
|
| |||
|
|
|
|
|
|
|
|
|
|
|
|
|
|
|
|
|
|
|
|
|
|
|
|
|
|
|
|
|
|
|
| Short Open |
| |||||||||||
|
|
|
|
|
|
|
|
|
|
|
|
|
|
|
|
|
|
|
|
|
|
|
|
|
|
|
| 0000 | Standard filter |
|
|
|
|
|
|
|
|
|
|
|
|
| ||
|
|
|
|
|
|
|
|
|
|
|
| (Factory default) | ||
|
|
|
|
|
|
|
|
|
|
|
|
|
| |
|
|
|
|
|
|
|
|
|
|
|
|
|
|
|
|
|
|
|
|
|
|
|
|
|
|
|
|
|
|
|
|
|
|
|
| High static pressure 1 | ||||||||
|
|
|
|
|
|
|
|
|
|
|
| 0001 | ||
|
|
|
|
|
|
|
|
|
|
|
|
| ||
|
|
|
|
|
|
|
|
|
|
|
|
|
|
|
|
|
|
|
|
|
|
|
|
|
|
|
|
|
|
•Jumper block position
(CN112, CN111, CN110 from the left)
EN |
– 22 – |