Chapter 3 Making RFID Applications
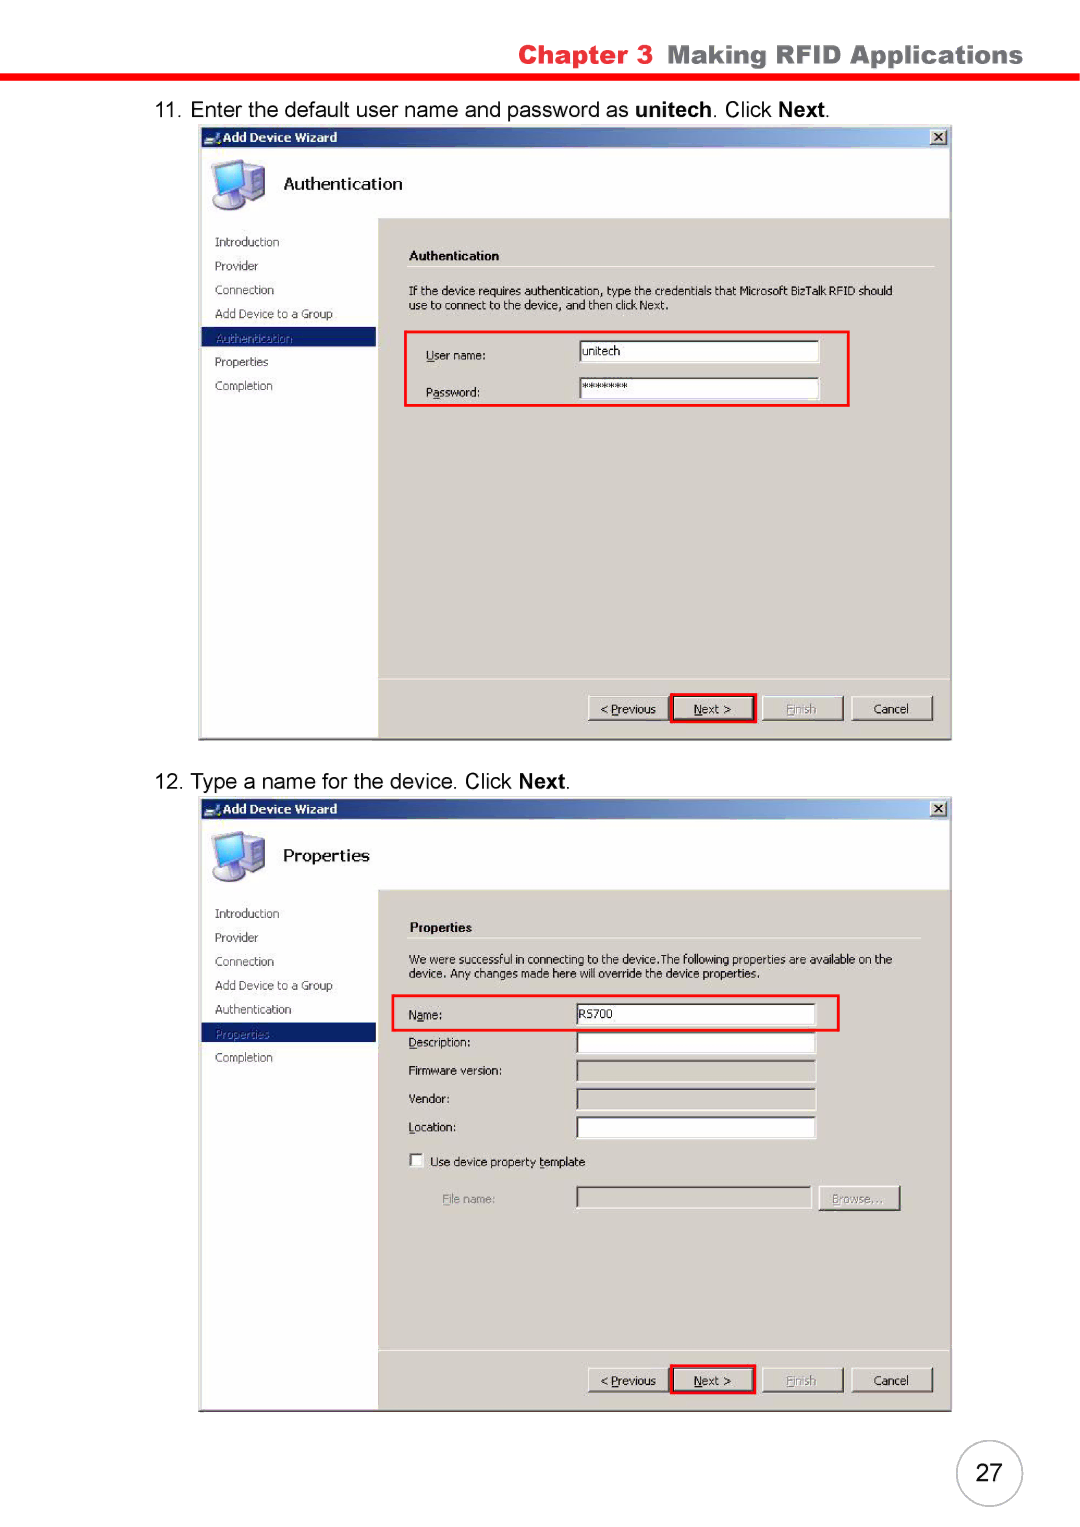
11. Enter the default user name and password as unitech. Click Next.
12. Type a name for the device. Click Next.
27
11. Enter the default user name and password as unitech. Click Next.
12. Type a name for the device. Click Next.
27