Chapter 1 Getting Started
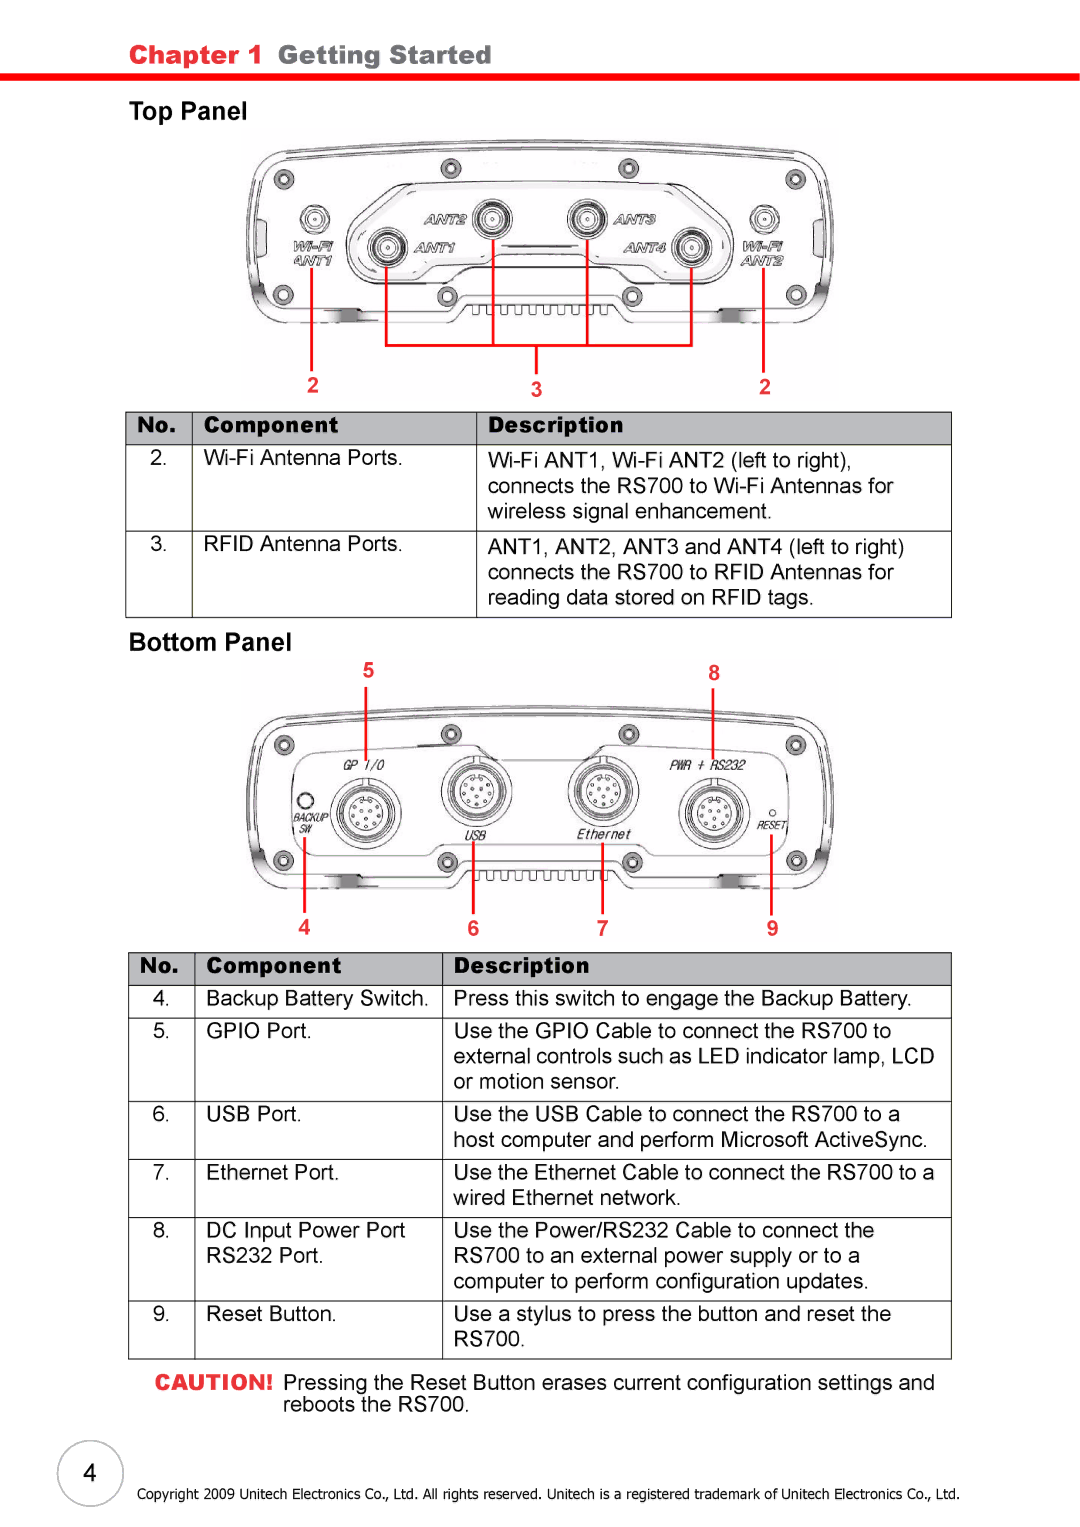
Top Panel
|
|
|
|
|
|
|
|
|
|
|
|
|
|
|
|
|
|
|
|
|
|
|
|
|
|
|
|
|
|
| 2 |
| 3 |
| 2 | ||||
|
|
|
|
|
|
|
|
|
|
No. | Component | Description |
|
| |||||
2. | |||||||||
|
|
|
| connects the RS700 to | |||||
|
|
|
| wireless signal enhancement. | |||||
|
|
|
|
|
|
|
|
|
|
3. | RFID Antenna Ports. | ANT1, ANT2, ANT3 and ANT4 (left to right) | |||||||
|
|
|
| connects the RS700 to RFID Antennas for | |||||
|
|
|
| reading data stored on RFID tags. | |||||
|
|
|
|
|
|
|
|
|
|
Bottom Panel
5 | 8 |
|
|
|
|
|
|
|
|
|
|
|
|
|
|
|
|
4 | 6 | 7 | 9 | ||||
|
|
|
|
|
|
|
|
No. Component | Description |
|
|
|
| ||
4.Backup Battery Switch. Press this switch to engage the Backup Battery.
5. | GPIO Port. | Use the GPIO Cable to connect the RS700 to |
|
| external controls such as LED indicator lamp, LCD |
|
| or motion sensor. |
|
|
|
6. | USB Port. | Use the USB Cable to connect the RS700 to a |
|
| host computer and perform Microsoft ActiveSync. |
|
|
|
7. | Ethernet Port. | Use the Ethernet Cable to connect the RS700 to a |
|
| wired Ethernet network. |
|
|
|
8. | DC Input Power Port | Use the Power/RS232 Cable to connect the |
| RS232 Port. | RS700 to an external power supply or to a |
|
| computer to perform configuration updates. |
|
|
|
9. | Reset Button. | Use a stylus to press the button and reset the |
|
| RS700. |
CAUTION! Pressing the Reset Button erases current configuration settings and reboots the RS700.
4
Copyright 2009 Unitech Electronics Co., Ltd. All rights reserved. Unitech is a registered trademark of Unitech Electronics Co., Ltd.
