VIVOTEK
If successful, you will receive a test.txt file on the network storage server.
3.Enter a server name.
4.Click Save to complete the settings and click Close to exit the page.
Recording Settings
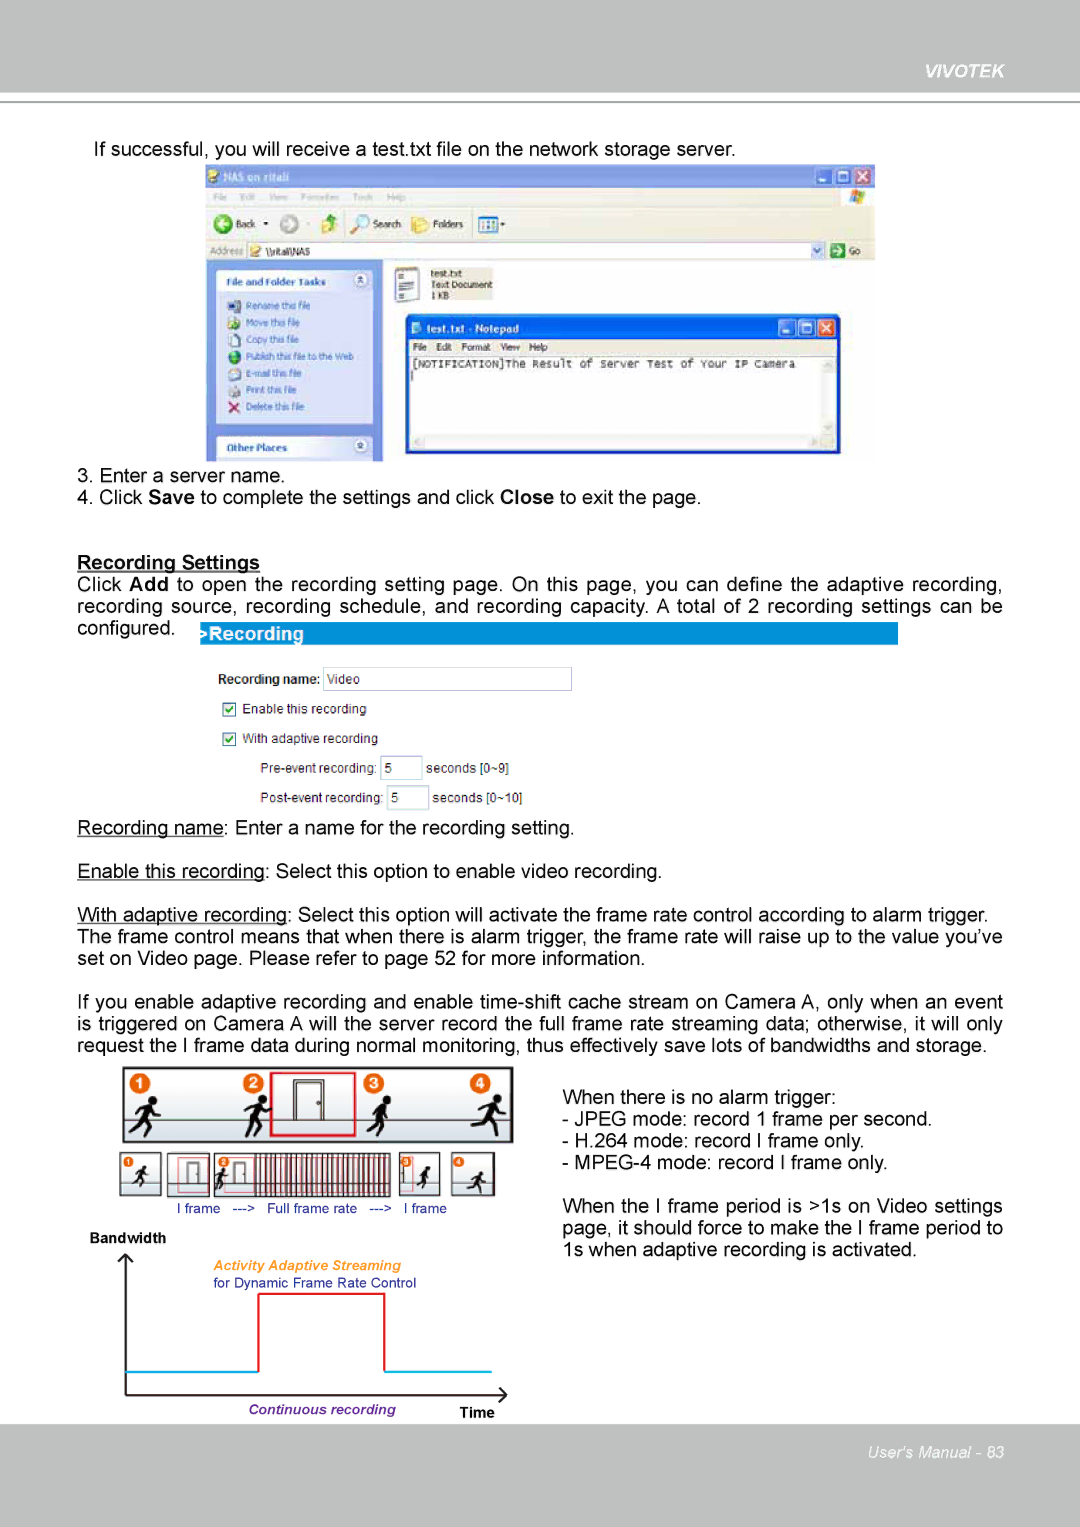
Click Add to open the recording setting page. On this page, you can define the adaptive recording, recording source, recording schedule, and recording capacity. A total of 2 recording settings can be configured.
Recording name: Enter a name for the recording setting.
Enable this recording: Select this option to enable video recording.
With adaptive recording: Select this option will activate the frame rate control according to alarm trigger. The frame control means that when there is alarm trigger, the frame rate will raise up to the value you’ve set on Video page. Please refer to page 52 for more information.
If you enable adaptive recording and enable
Bandwidth |
|
I frame | I frame |
Bandwidth |
|
Activity Adaptive Streaming |
|
for Dynamic Frame Rate Control | |
Continuous recording | Time |
When there is no alarm trigger:
-JPEG mode: record 1 frame per second.
-H.264 mode: record I frame only.
-
When the I frame period is >1s on Video settings page, it should force to make the I frame period to 1s when adaptive recording is activated.
User's Manual - 83
