Customization basics
This manual only covers the basics of customizing Cintiq. For detailed information see the Cintiq Software User’s Manual. If you installed the Wacom tablet software, just open the Wacom Tablet control panel and click on the HELP button to display the manual. You can also access the manual from the Installation menu on the Wacom Pen Tablet Driver CD.
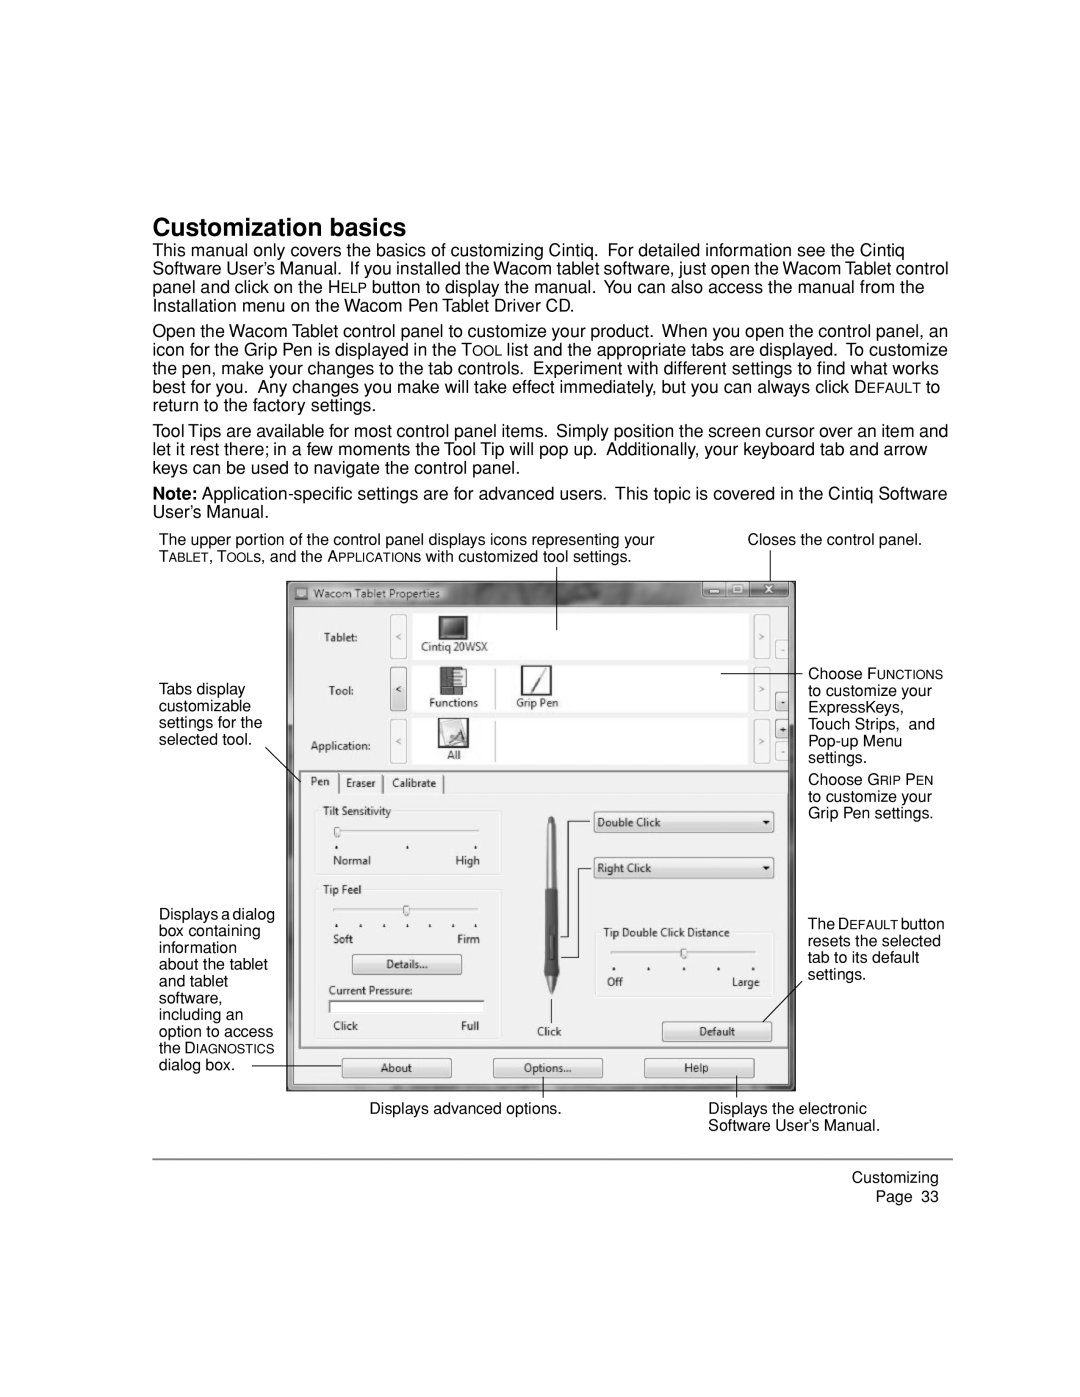
Open the Wacom Tablet control panel to customize your product. When you open the control panel, an icon for the Grip Pen is displayed in the TOOL list and the appropriate tabs are displayed. To customize the pen, make your changes to the tab controls. Experiment with different settings to find what works best for you. Any changes you make will take effect immediately, but you can always click DEFAULT to return to the factory settings.
Tool Tips are available for most control panel items. Simply position the screen cursor over an item and let it rest there; in a few moments the Tool Tip will pop up. Additionally, your keyboard tab and arrow keys can be used to navigate the control panel.
Note:
The upper portion of the control panel displays icons representing your | Closes the control panel. | |
TABLET, TOOLs, and the APPLICATIONs with customized tool settings. |
|
|
|
| |
|
|
|
Tabs display customizable settings for the selected tool.
Displays a dialog box containing information about the tablet and tablet software, including an option to access the DIAGNOSTICS dialog box.
Choose FUNCTIONS to customize your ExpressKeys, Touch Strips, and
Choose GRIP PEN to customize your Grip Pen settings.
The DEFAULT button resets the selected tab to its default settings.
Displays advanced options. | Displays the electronic |
| Software User’s Manual. |
Customizing Page 33
