The basic process for working with the OSD is as follows:
•Press the MENU button to open the OSD main menu.
•Use the up or down buttons to select an option. When the option you want to adjust is highlighted, press the ENTER button. The current settings and adjustment
•Use the up or down buttons to adjust the option settings.
•When you have made your changes, press the ENTER button to save. To exit, press the MENU button.
Note: All settings are automatically saved when the OSD menu closes and will be used the next time the unit receives a similar video signal. This is applicable to all display modes. If you make changes to the display appearance and cannot return to the original settings, use the RESET RECALL option to return Cintiq to its original factory defaults.
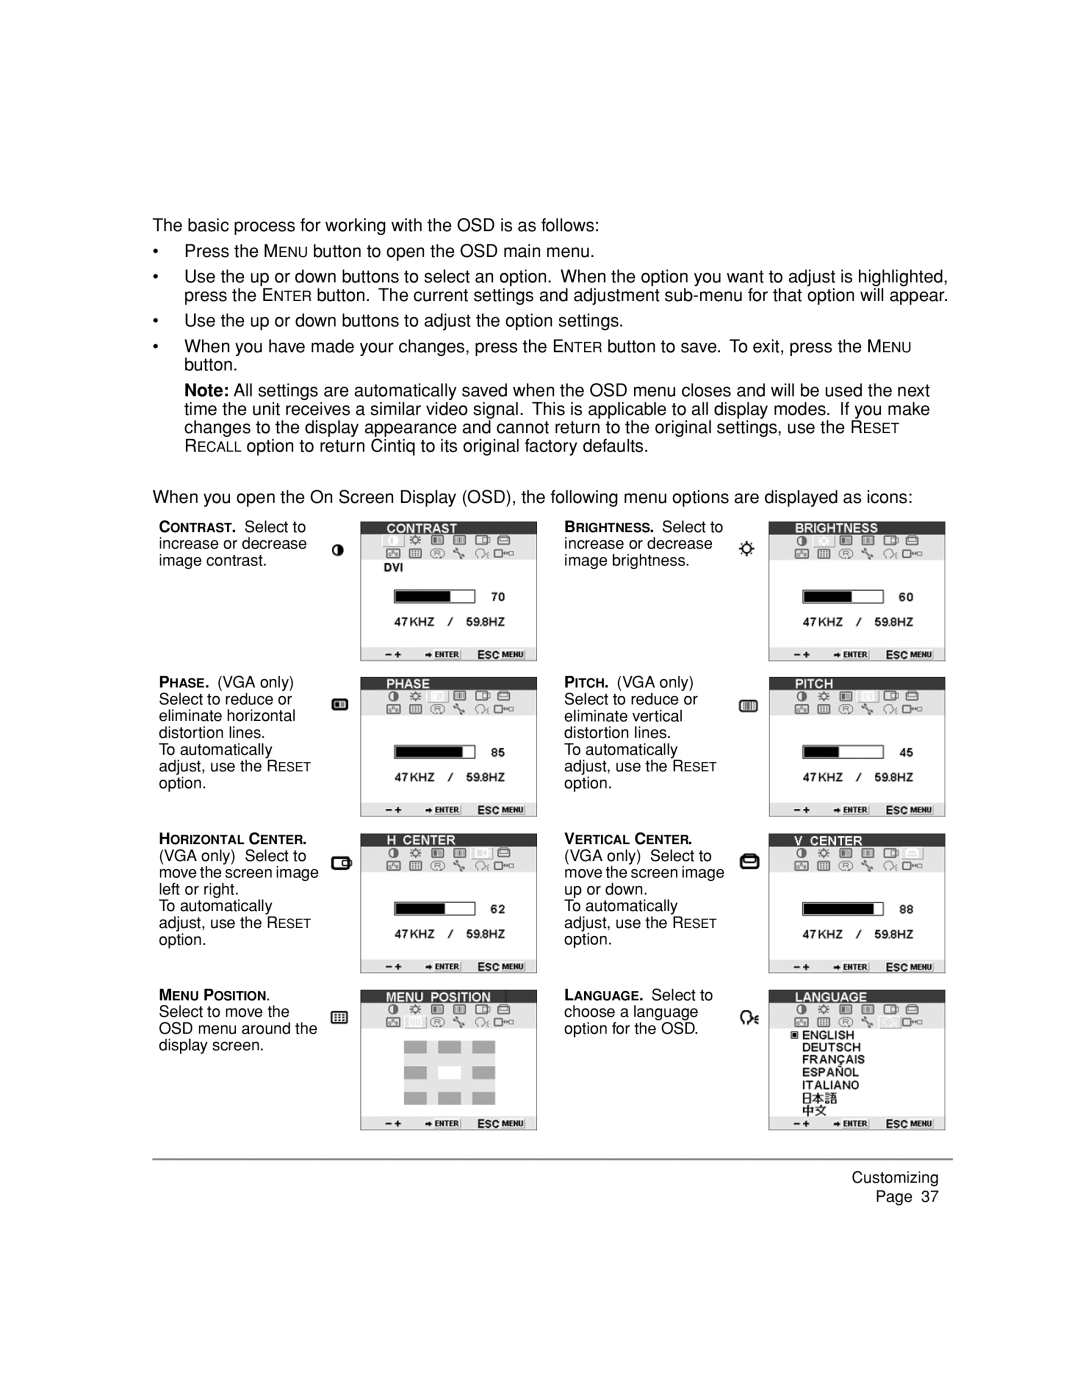
When you open the On Screen Display (OSD), the following menu options are displayed as icons:
CONTRAST. Select to increase or decrease image contrast.
BRIGHTNESS. Select to increase or decrease image brightness.
PHASE. (VGA only) Select to reduce or eliminate horizontal distortion lines.
To automatically adjust, use the RESET option.
HORIZONTAL CENTER. (VGA only) Select to move the screen image left or right.
To automatically adjust, use the RESET option.
MENU POSITION. Select to move the OSD menu around the display screen.
PITCH. (VGA only) Select to reduce or eliminate vertical distortion lines.
To automatically adjust, use the RESET option.
VERTICAL CENTER. (VGA only) Select to move the screen image up or down.
To automatically adjust, use the RESET option.
LANGUAGE. Select to choose a language option for the OSD.
Customizing Page 37