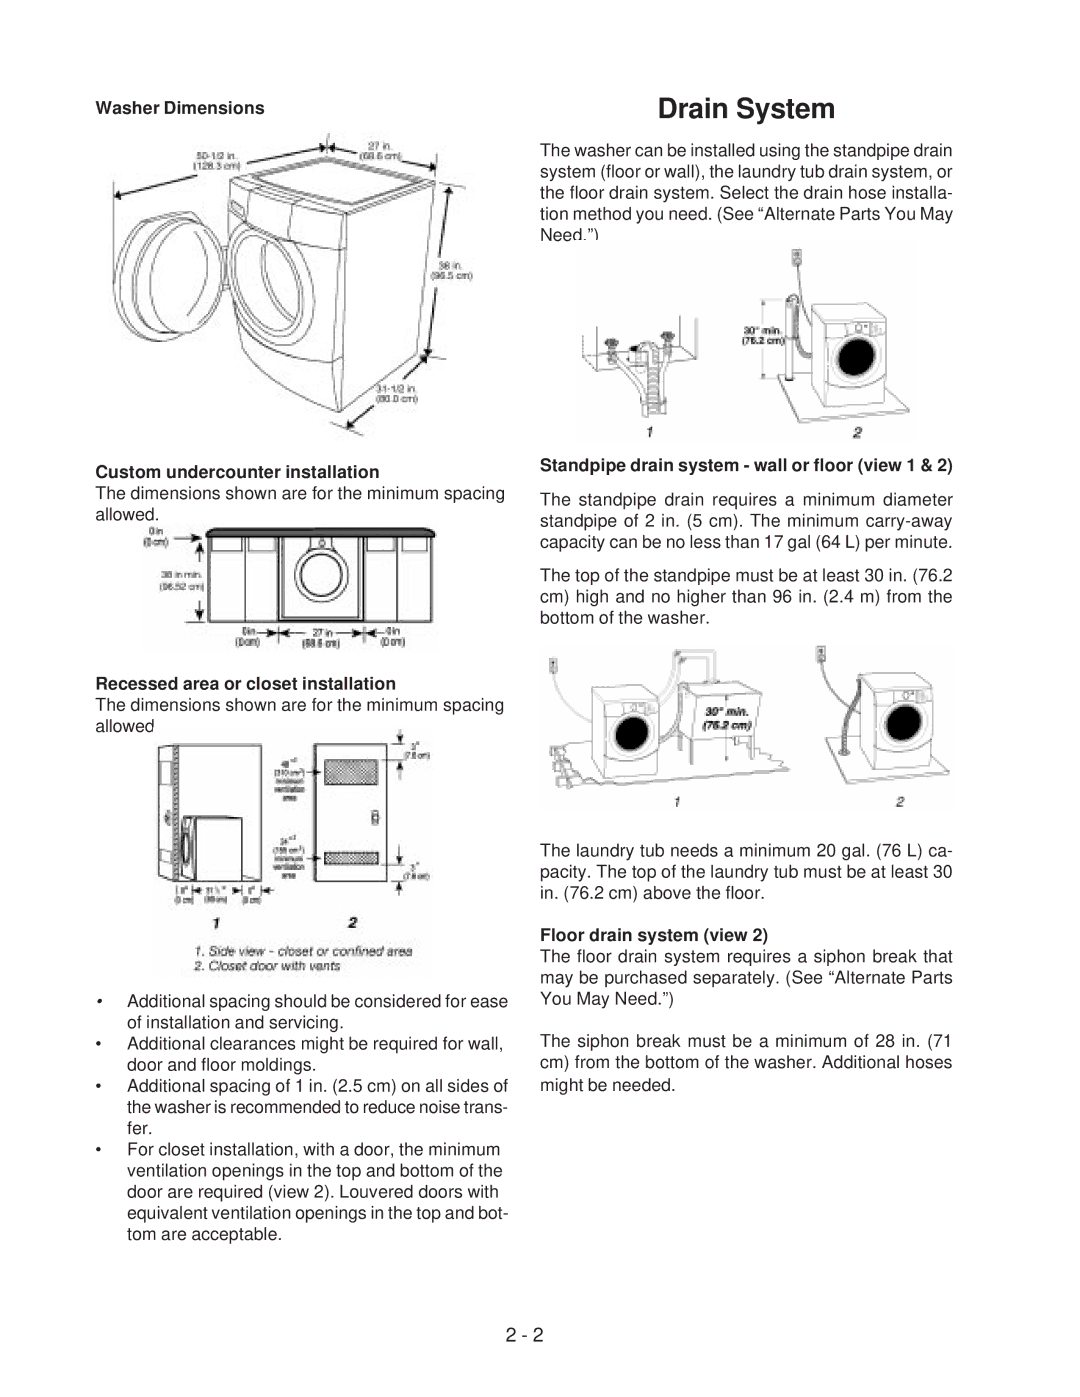
Washer Dimensions | Drain System |
Custom undercounter installation
The dimensions shown are for the minimum spacing allowed.
Recessed area or closet installation
The dimensions shown are for the minimum spacing allowed.
The washer can be installed using the standpipe drain system (floor or wall), the laundry tub drain system, or the floor drain system. Select the drain hose installa- tion method you need. (See “Alternate Parts You May Need.”)
Standpipe drain system - wall or floor (view 1 & 2)
The standpipe drain requires a minimum diameter standpipe of 2 in. (5 cm). The minimum
The top of the standpipe must be at least 30 in. (76.2 cm) high and no higher than 96 in. (2.4 m) from the bottom of the washer.
•Additional spacing should be considered for ease of installation and servicing.
•Additional clearances might be required for wall, door and floor moldings.
•Additional spacing of 1 in. (2.5 cm) on all sides of the washer is recommended to reduce noise trans- fer.
•For closet installation, with a door, the minimum ventilation openings in the top and bottom of the door are required (view 2). Louvered doors with equivalent ventilation openings in the top and bot- tom are acceptable.
The laundry tub needs a minimum 20 gal. (76 L) ca- pacity. The top of the laundry tub must be at least 30 in. (76.2 cm) above the floor.
Floor drain system (view 2)
The floor drain system requires a siphon break that may be purchased separately. (See “Alternate Parts You May Need.”)
The siphon break must be a minimum of 28 in. (71 cm) from the bottom of the washer. Additional hoses might be needed.
2 - 2