To clean out the large item filter, turn the large knob counterclockwise and pull it out. (Fig.
NOTE: It is recommended that a small pan be placed under the pump prior to removing the large item filter. There will be water in the pump hous- ing.
Fig.
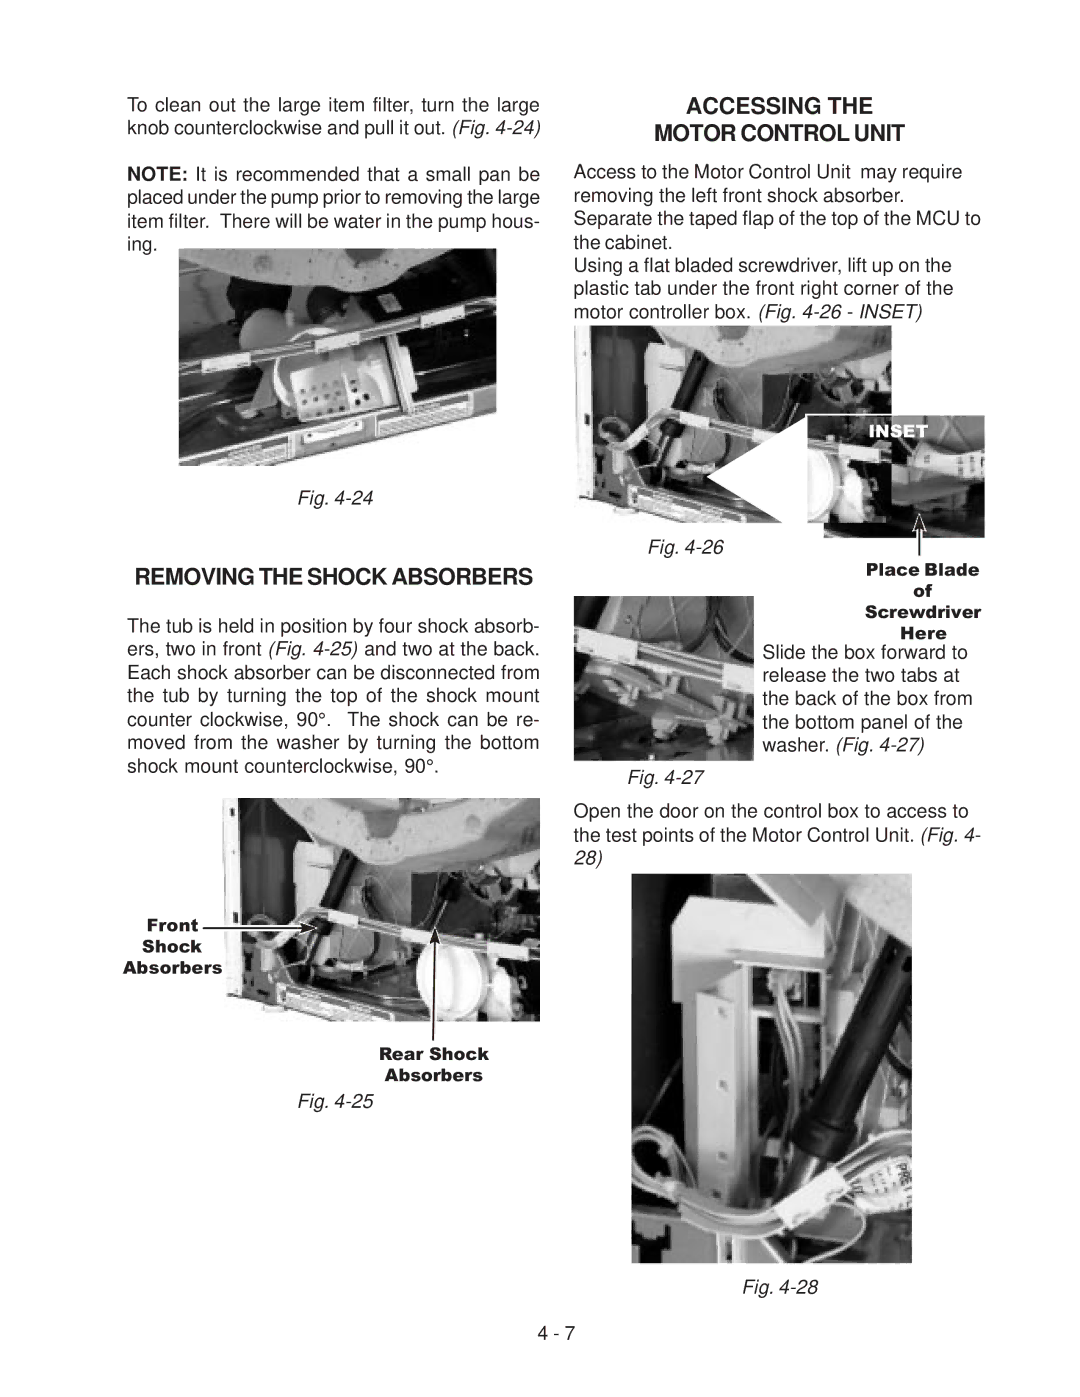
REMOVING THE SHOCK ABSORBERS
The tub is held in position by four shock absorb- ers, two in front (Fig.
Front
Shock
Absorbers
Rear Shock
Absorbers
Fig.
ACCESSING THE
MOTOR CONTROL UNIT
Access to the Motor Control Unit may require removing the left front shock absorber. Separate the taped flap of the top of the MCU to the cabinet.
Using a flat bladed screwdriver, lift up on the plastic tab under the front right corner of the motor controller box. (Fig.
INSET
Fig.
Place Blade
of
Screwdriver
Here
Slide the box forward to release the two tabs at the back of the box from the bottom panel of the washer. (Fig.
Fig.
Open the door on the control box to access to the test points of the Motor Control Unit. (Fig. 4- 28)
Fig.
4 - 7