W1754 20" Planer With Mobile Base
Bed Rollers
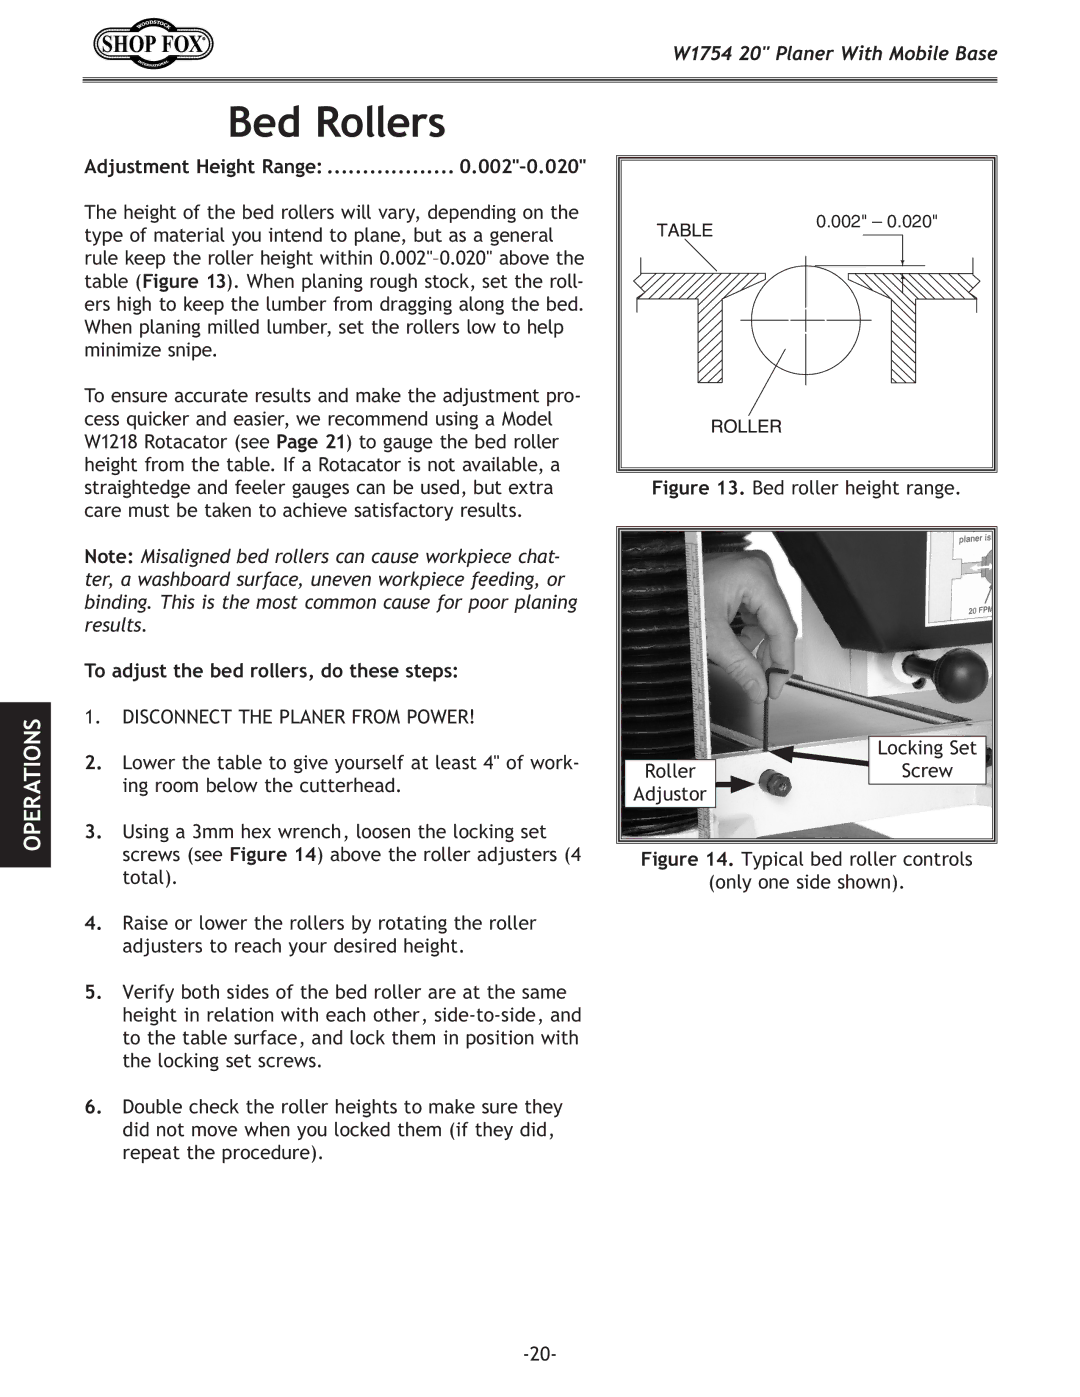
Adjustment Height Range: |
|
The height of the bed rollers will vary, depending on the type of material you intend to plane, but as a general rule keep the roller height within
To ensure accurate results and make the adjustment pro- cess quicker and easier, we recommend using a Model W1218 Rotacator (see Page 21) to gauge the bed roller height from the table. If a Rotacator is not available, a straightedge and feeler gauges can be used, but extra care must be taken to achieve satisfactory results.
���������������
Figure 13. Bed roller height range.
OPERATIONS
Note: Misaligned bed rollers can cause workpiece chat- ter, a washboard surface, uneven workpiece feeding, or binding. This is the most common cause for poor planing results.
To adjust the bed rollers, do these steps:
1.DISCONNECT THE PLANER FROM POWER!
2.Lower the table to give yourself at least 4" of work- ing room below the cutterhead.
3.Using a 3mm hex wrench, loosen the locking set screws (see Figure 14) above the roller adjusters (4 total).
4.Raise or lower the rollers by rotating the roller adjusters to reach your desired height.
5.Verify both sides of the bed roller are at the same height in relation with each other,
6.Double check the roller heights to make sure they did not move when you locked them (if they did, repeat the procedure).
| Locking Set |
Roller | Screw |
Adjustor |
|