Model W1829 (Mfg. Since 9/11)
Motor Brush Replacement
This jointer has a universal motor that uses carbon brushes, which are considered
You can order a new brush kit (two brush assemblies) by calling customer service and ordering part
To replace motor brushes, do these steps:
1.DISCONNECT JOINTER FROM POWER!
2.While facing the rear of the jointer, tip it away from you until it rests on the fence assembly.
3.Remove the screws that hold the motor cover to the jointer base. Lift the cover off and set it aside.
4.Vacuum all dust and debris from the motor and belt areas.
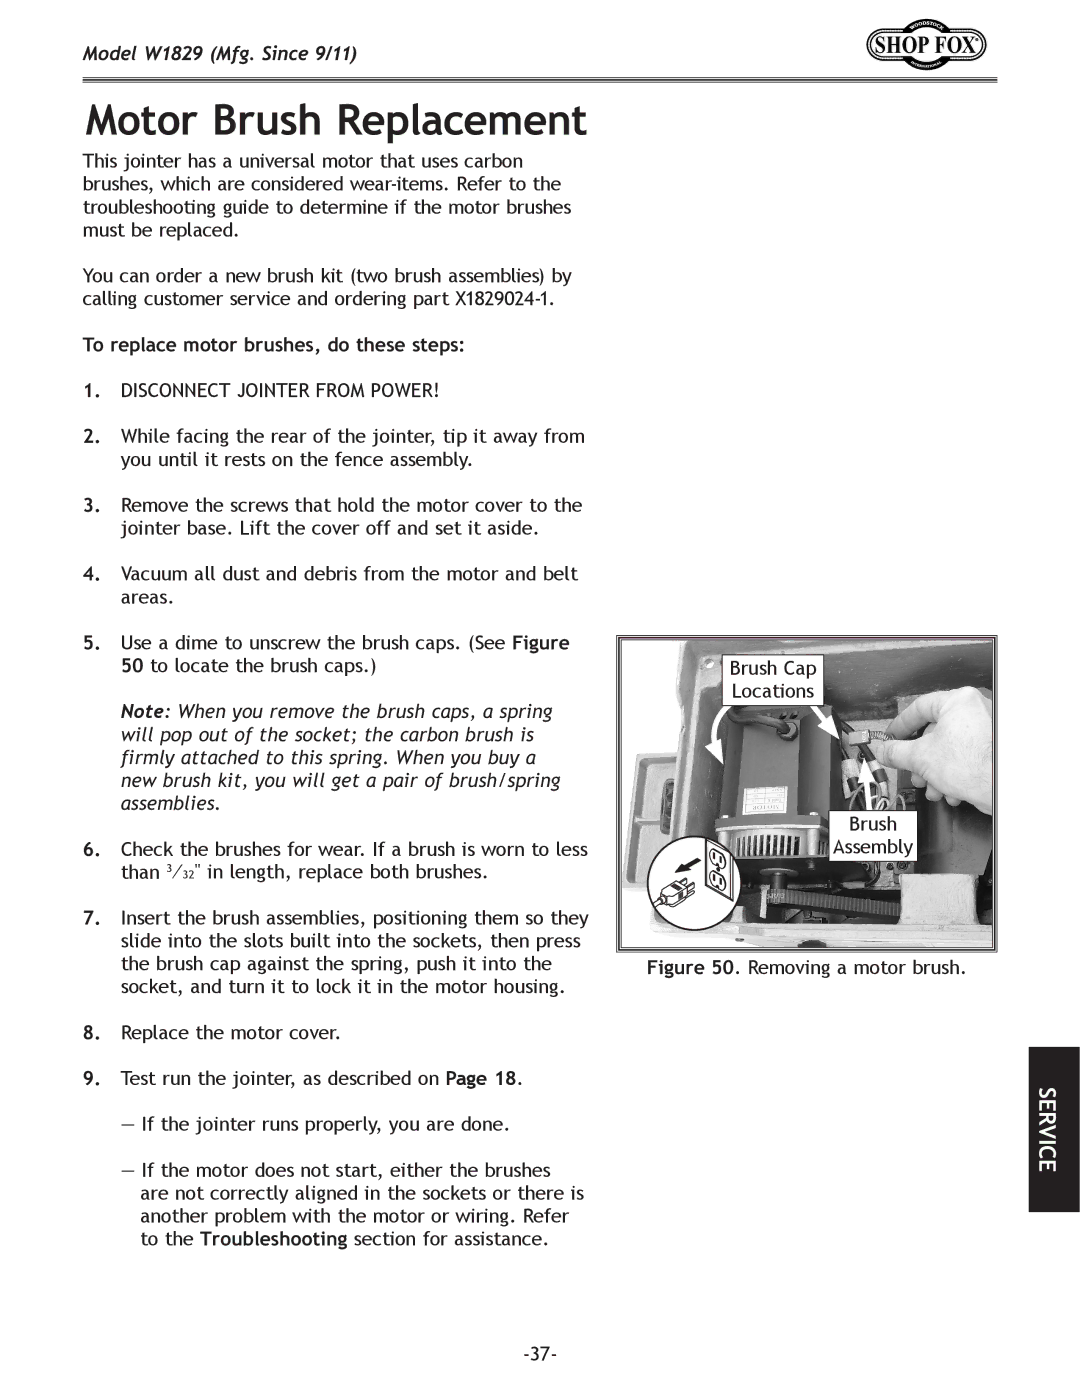
5.Use a dime to unscrew the brush caps. (See Figure 50 to locate the brush caps.)
Note: When you remove the brush caps, a spring will pop out of the socket; the carbon brush is firmly attached to this spring. When you buy a new brush kit, you will get a pair of brush/spring assemblies.
6.Check the brushes for wear. If a brush is worn to less than 3⁄32" in length, replace both brushes.
7.Insert the brush assemblies, positioning them so they slide into the slots built into the sockets, then press the brush cap against the spring, push it into the socket, and turn it to lock it in the motor housing.
8.Replace the motor cover.
9.Test run the jointer, as described on Page 18.
—If the jointer runs properly, you are done.
—If the motor does not start, either the brushes are not correctly aligned in the sockets or there is another problem with the motor or wiring. Refer to the Troubleshooting section for assistance.
Brush Cap
Locations
Brush
Assembly
Figure 50. Removing a motor brush.
SERVICE