Model W1829 (Mfg. Since 9/11)
Setting Fence Angle Stops
This section provides instructions for setting the fence angle stops precisely at 90°, 45° inward, or 45° outward.
Note: To ensure accurate results when edge jointing, check the accuracy of these settings frequently (monthly at a minimum) and
Tools Needed | Qty |
Flathead Screwdriver | ...........................................1 |
Wrench 8mm | 1 |
Wrench 10mm | 1 |
Setting 90° Fence Angle Stop
1.DISCONNECT THE JOINTER FROM POWER!
2.Position the fence over the bed and tighten the sliding handle, loosen the fence tilting handle.
3.Press the forward tab of the limit plate into the rear slot of the limit block.
4.Tilt the fence as far as it will go towards 90º (perpendicular to the table) until it hits the limit block shaft. Tighten the fence tilting handle.
5.Use a square to check the angle of the fence, as shown in Figure 44.
—If the fence is perpendicular to the table, the 90º stop is set correctly; no additional steps are necessary. Proceed to set the 45º inward and 45º outward stops (see Page 34).
—If the fence is not perpendicular to the table, adjust the 90º stop by doing Steps
6.Loosen the fence tilting handle, bring the fence to 90º with the square set against the fence, then tighten the handle.
Note: Keep the limit plate tab in the rear slot of the limit block.
7.Loosen the jam nut (located at the rear of the limit block shaft).
8.Using a flathead screwdriver, turn the limit block shaft until it hits the fence.
9.Tighten the jam nut. The 90º stop is now set.
Make sure that your machine is unplugged during all service proce- dures! If this warning is ignored, seri- ous personal injury may occur.
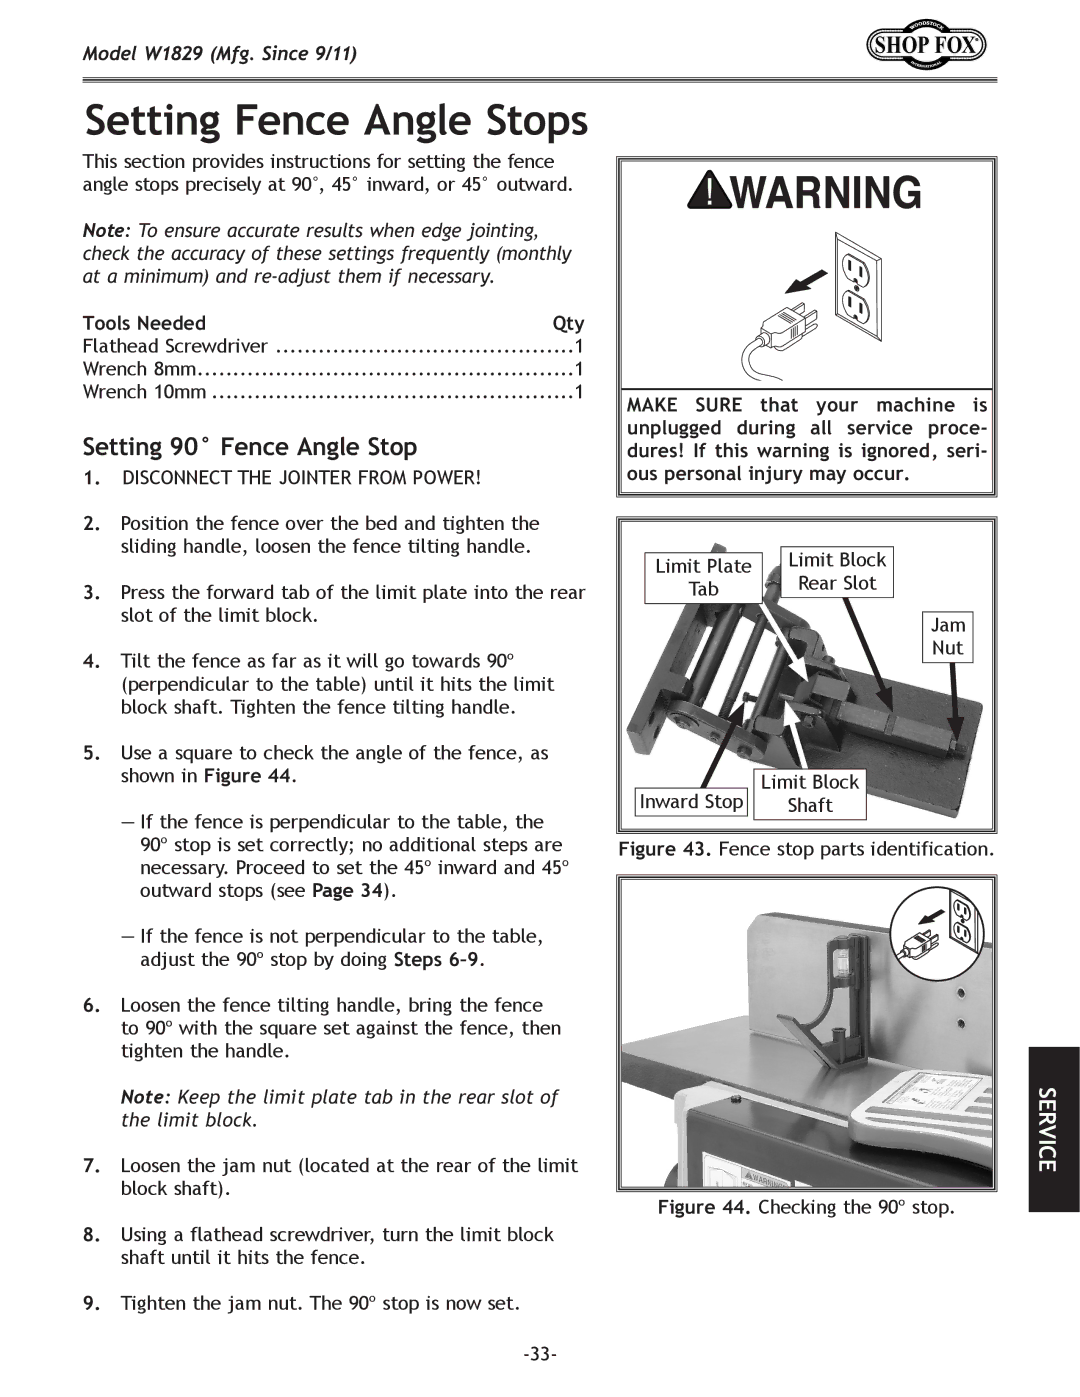
Limit Plate | Limit Block | |
Rear Slot | ||
Tab | ||
| ||
| Jam | |
| Nut | |
Inward Stop | Limit Block | |
Shaft |
Figure 43. Fence stop parts identification.
Figure 44. Checking the 90º stop.
SERVICE