Model W1829 (Mfg. Since 9/11)
V-Belt Replacement
SERVICE
The Model W1829 uses two belts to drive the cutterhead and the dust collection impeller. When these belts are not tensioned correctly, misaligned, or damaged, your jointer will not function properly.
The part number for the replacement drive belt is X1829070; the part number for the replacement fan belt is X1829092.
Refer to the parts diagram in this manual when fixing belt problems. If you need further assistance, call our Tech Support at (360)
To realign or replace the cutterhead belt, do these steps:
1.DISCONNECT JOINTER FROM POWER!
2.While facing the rear of the jointer, tip it away from you until it rests on the fence assembly.
3.Remove the screws that hold the motor cover to the jointer base. Lift the cover off and set it aside.
4.Inspect the cutterhead belt for proper tension, straight alignment, and possible damage or wear.
Note: The belt is properly tensioned if it deflects about 3⁄8" when you press down on middle of the belt with moderate pressure from your thumb or forefinger. The belt is properly aligned if it lies flat and straight on the motor shaft and drive pulley. Belt damage will be evident upon inspection.
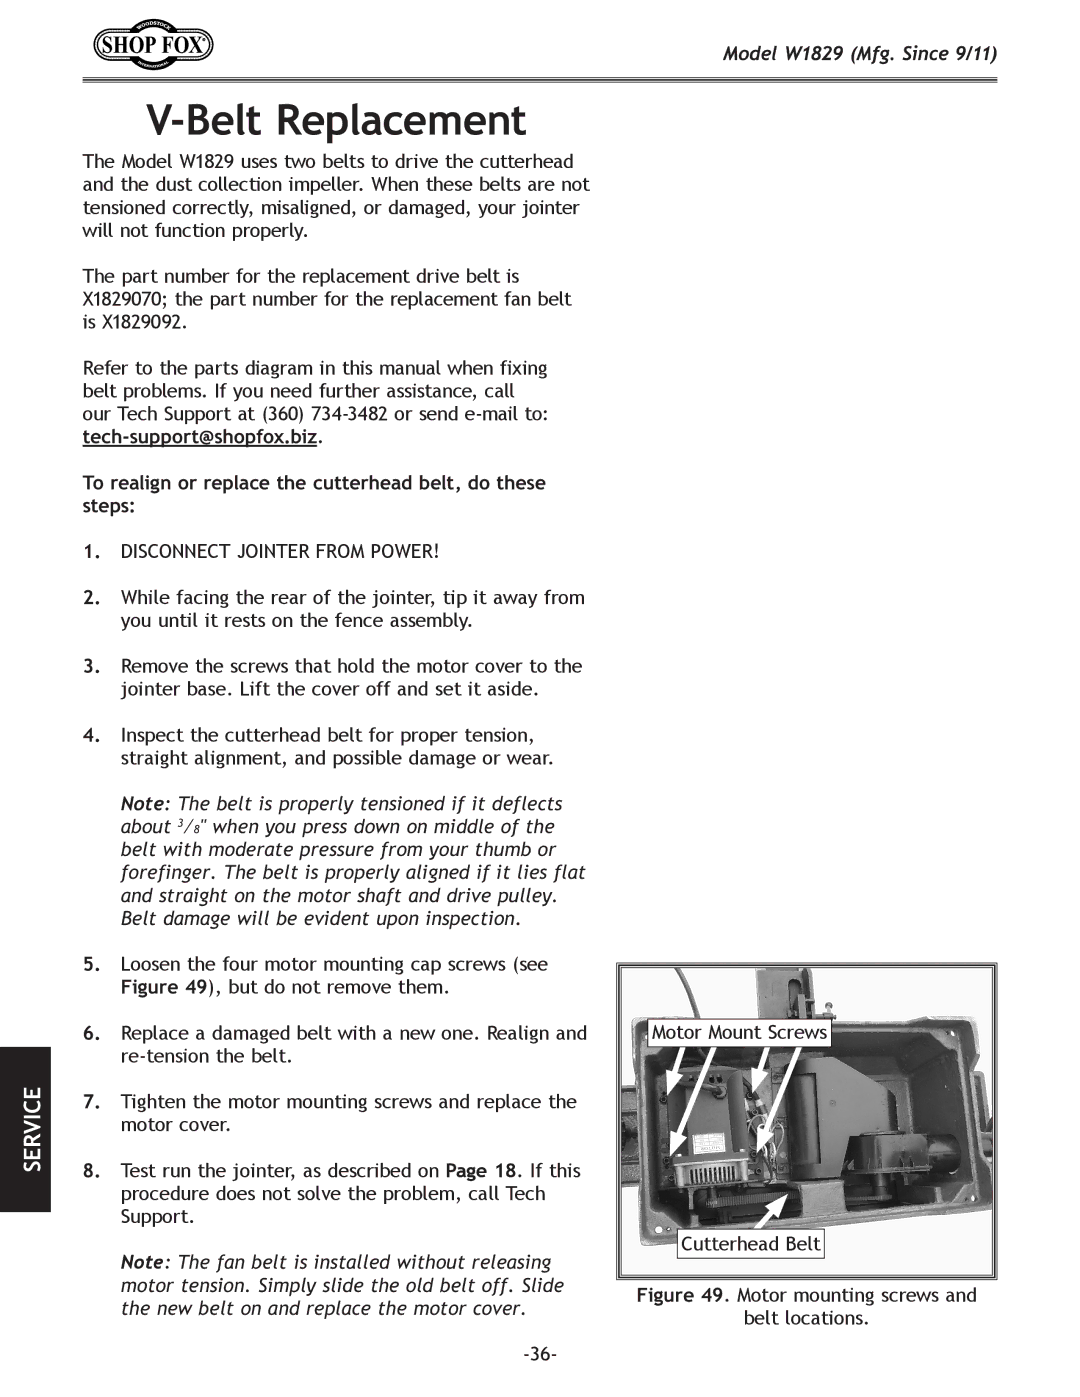
5.Loosen the four motor mounting cap screws (see Figure 49), but do not remove them.
6.Replace a damaged belt with a new one. Realign and
7.Tighten the motor mounting screws and replace the motor cover.
8.Test run the jointer, as described on Page 18. If this procedure does not solve the problem, call Tech Support.
Note: The fan belt is installed without releasing motor tension. Simply slide the old belt off. Slide the new belt on and replace the motor cover.
Motor Mount Screws
Cutterhead Belt