Installation
3.Lift the inverter and place the mounting holes in the rail directly over the mounting hooks on the panel and lower into place.
4.Install four
5.Lift the second inverter (if used) and place the mounting holes in the rail directly over the mounting hooks on the panel and lower into place.
6.Install four
7.Next, lift the Long AC Conduit Box and place the mounting hole in the rail directly over the mounting hooks on the panel and lower into place.
Important: Ensure the mounting hooks are visible through the holes in the mounting rails. If you can not see the hooks, the unit is not installed properly and will not be secure to the wall.
8.Push the Long AC Conduit Box as close to the inverter(s) as it will possibly go and secure it to the panel using four of the
9.Tighten the mounting screws on the inverter(s) to the panel. Torque to 76
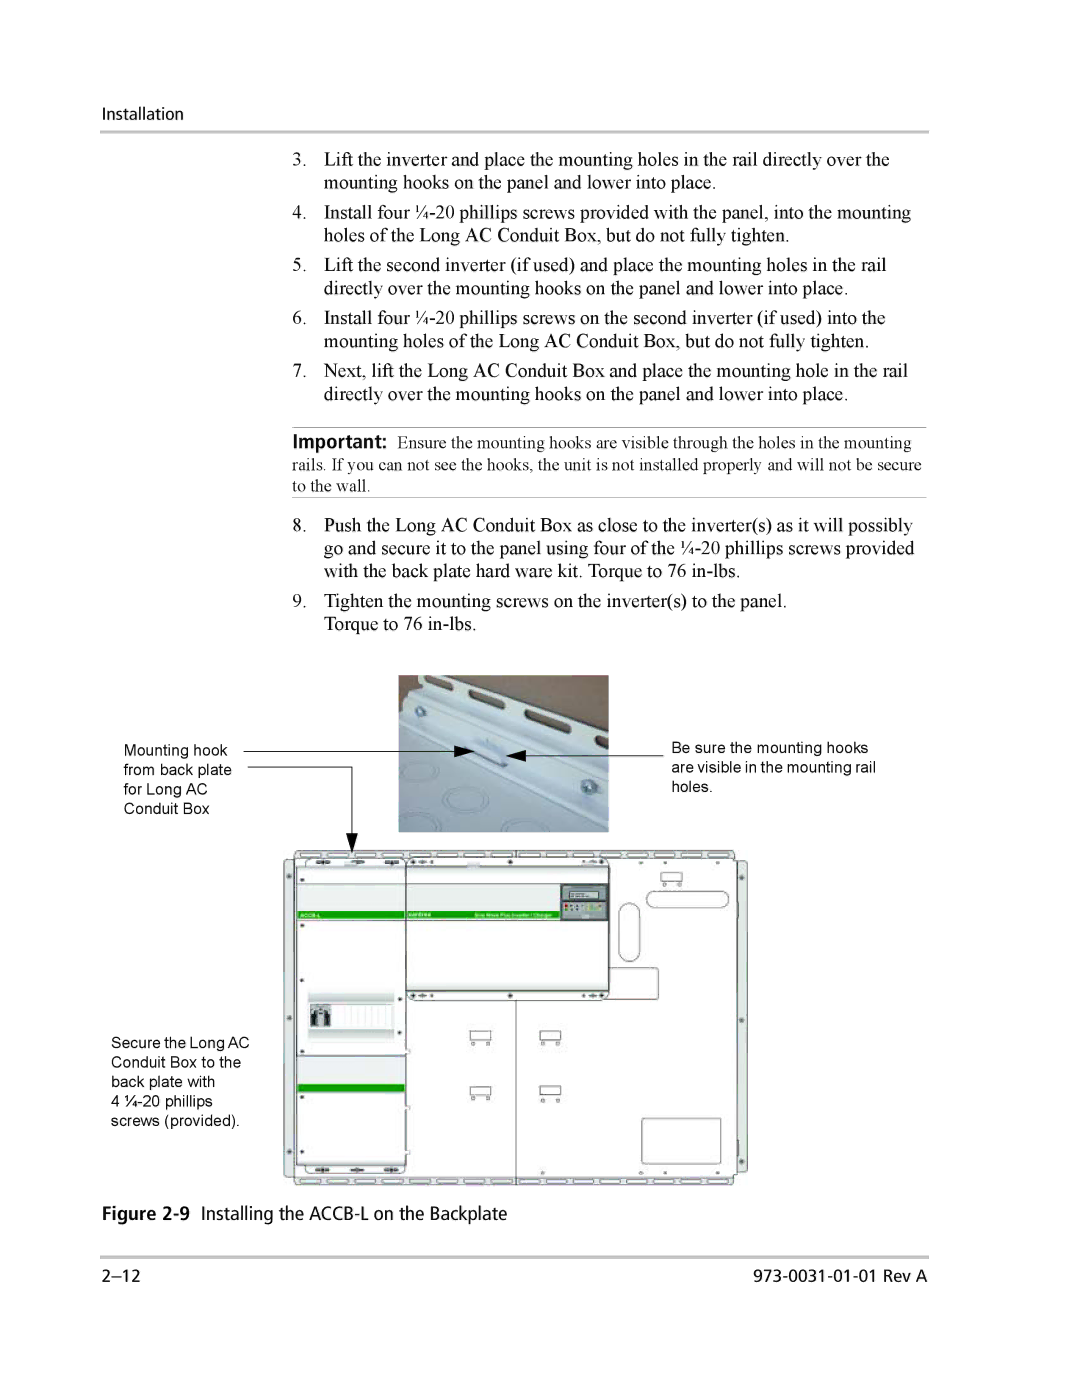
Mounting hook from back plate for Long AC Conduit Box
Secure the Long AC Conduit Box to the back plate with
4
Be sure the mounting hooks are visible in the mounting rail holes.