ES-4024A Series Switch Support Notes
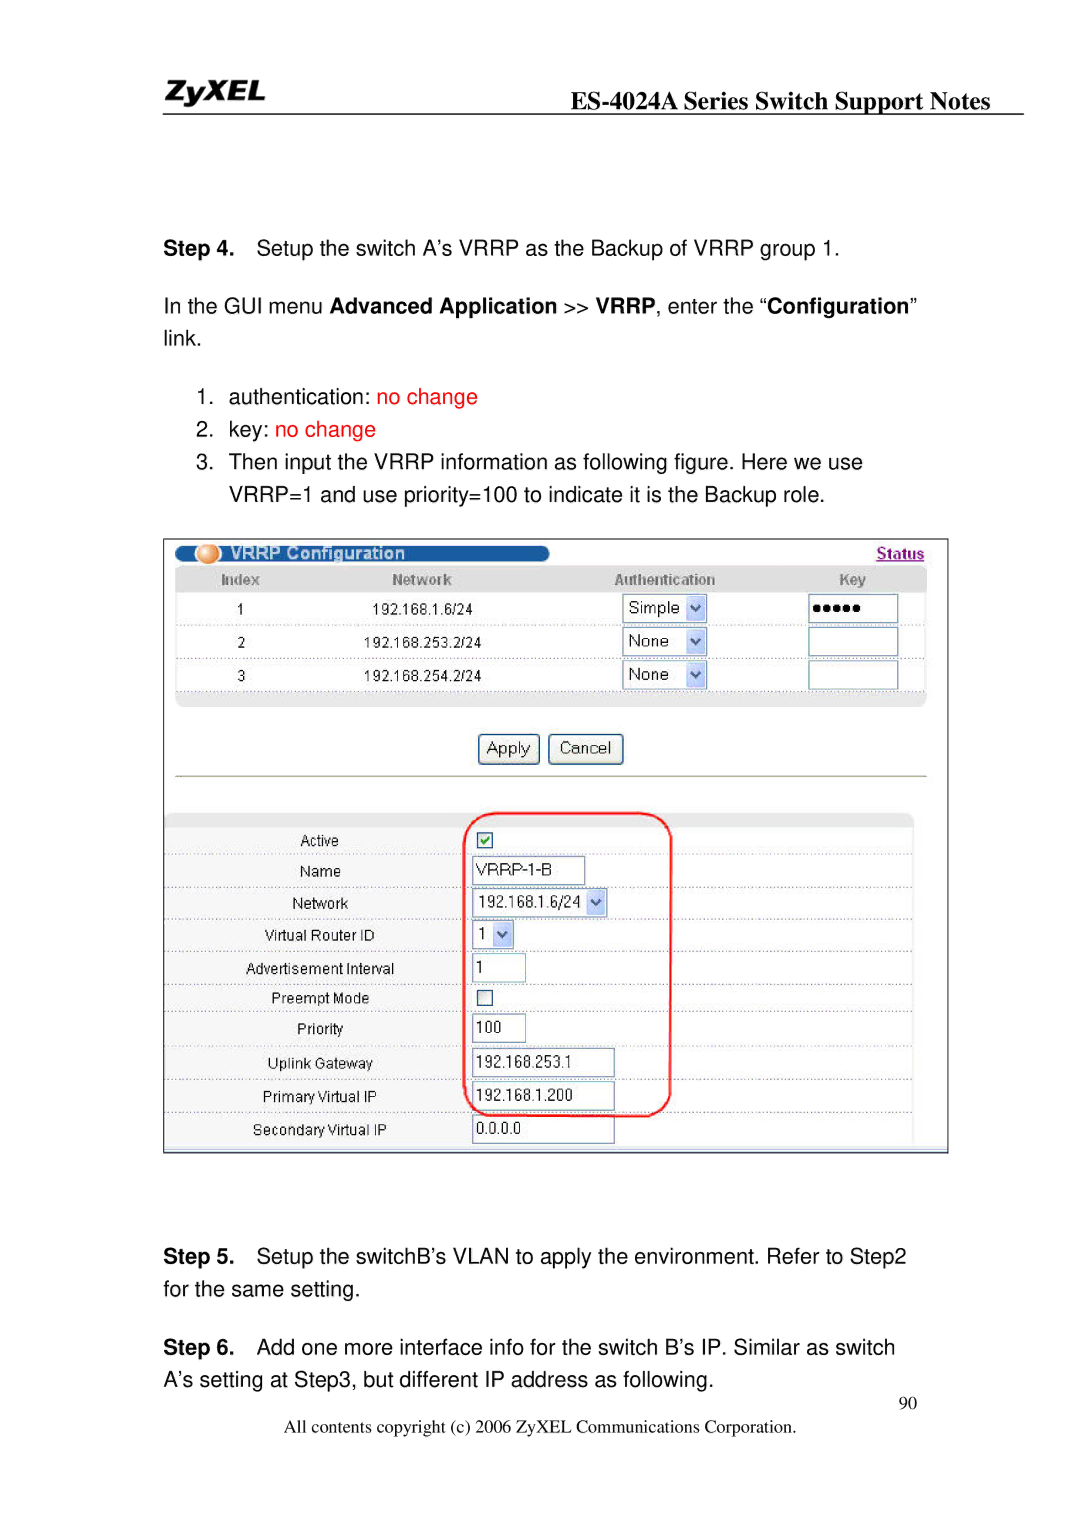
Step 4. Setup the switch A’s VRRP as the Backup of VRRP group 1.
In the GUI menu Advanced Application >> VRRP, enter the “Configuration” link.
1.authentication: no change
2.key: no change
3.Then input the VRRP information as following figure. Here we use VRRP=1 and use priority=100 to indicate it is the Backup role.
Step 5. Setup the switchB’s VLAN to apply the environment. Refer to Step2 for the same setting.
Step 6. Add one more interface info for the switch B’s IP. Similar as switch A’s setting at Step3, but different IP address as following.
90
All contents copyright (c) 2006 ZyXEL Communications Corporation.