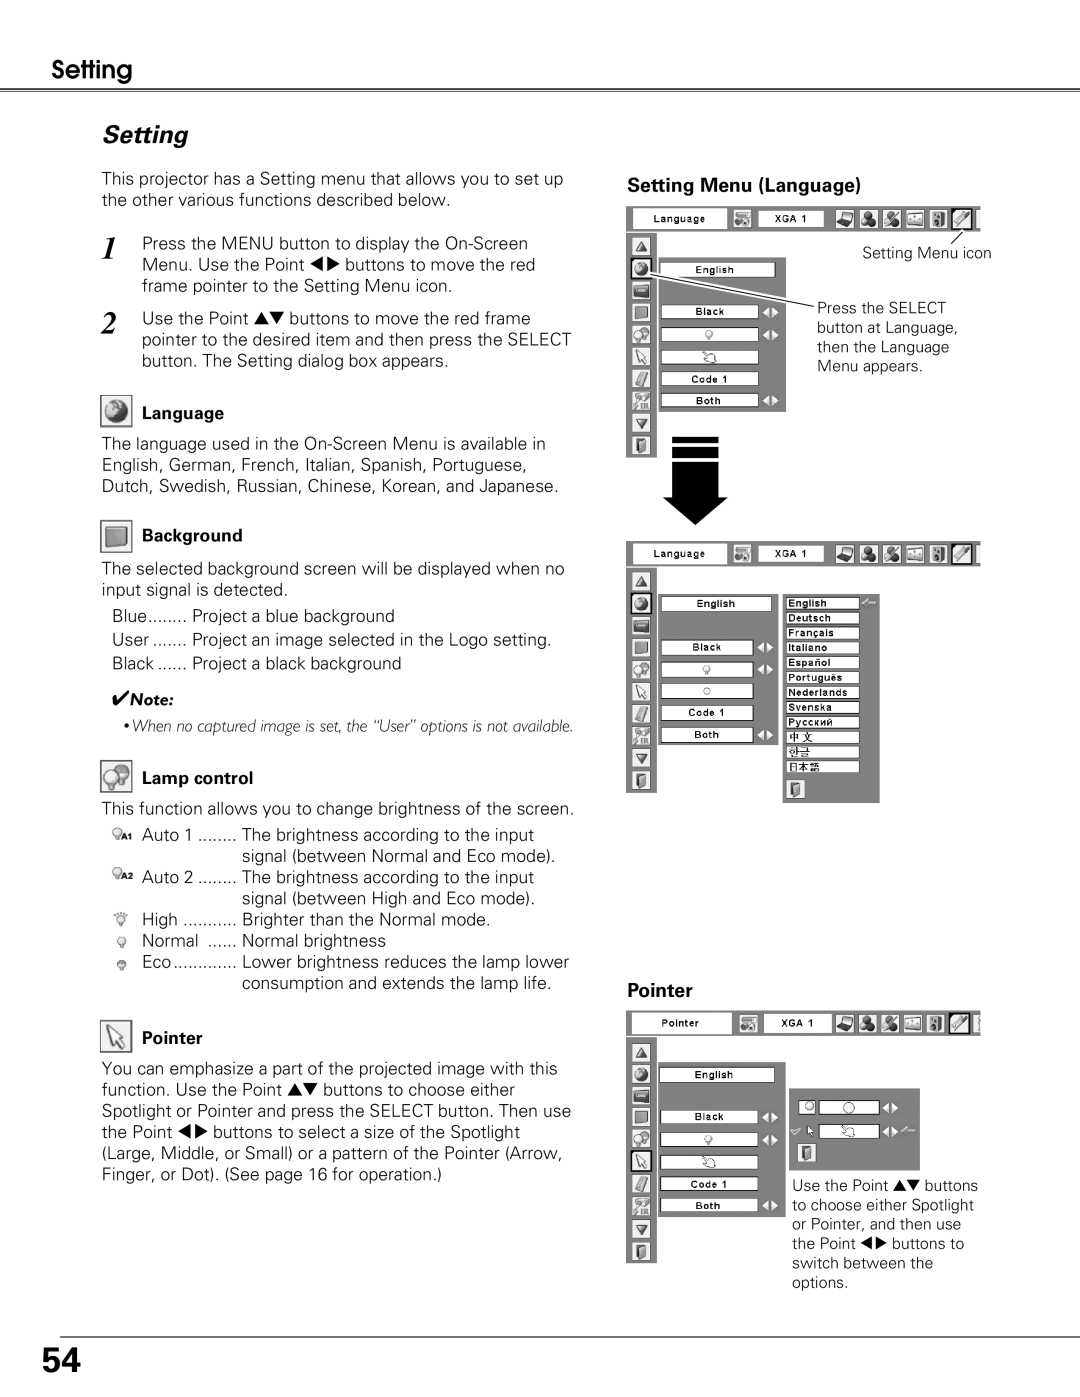
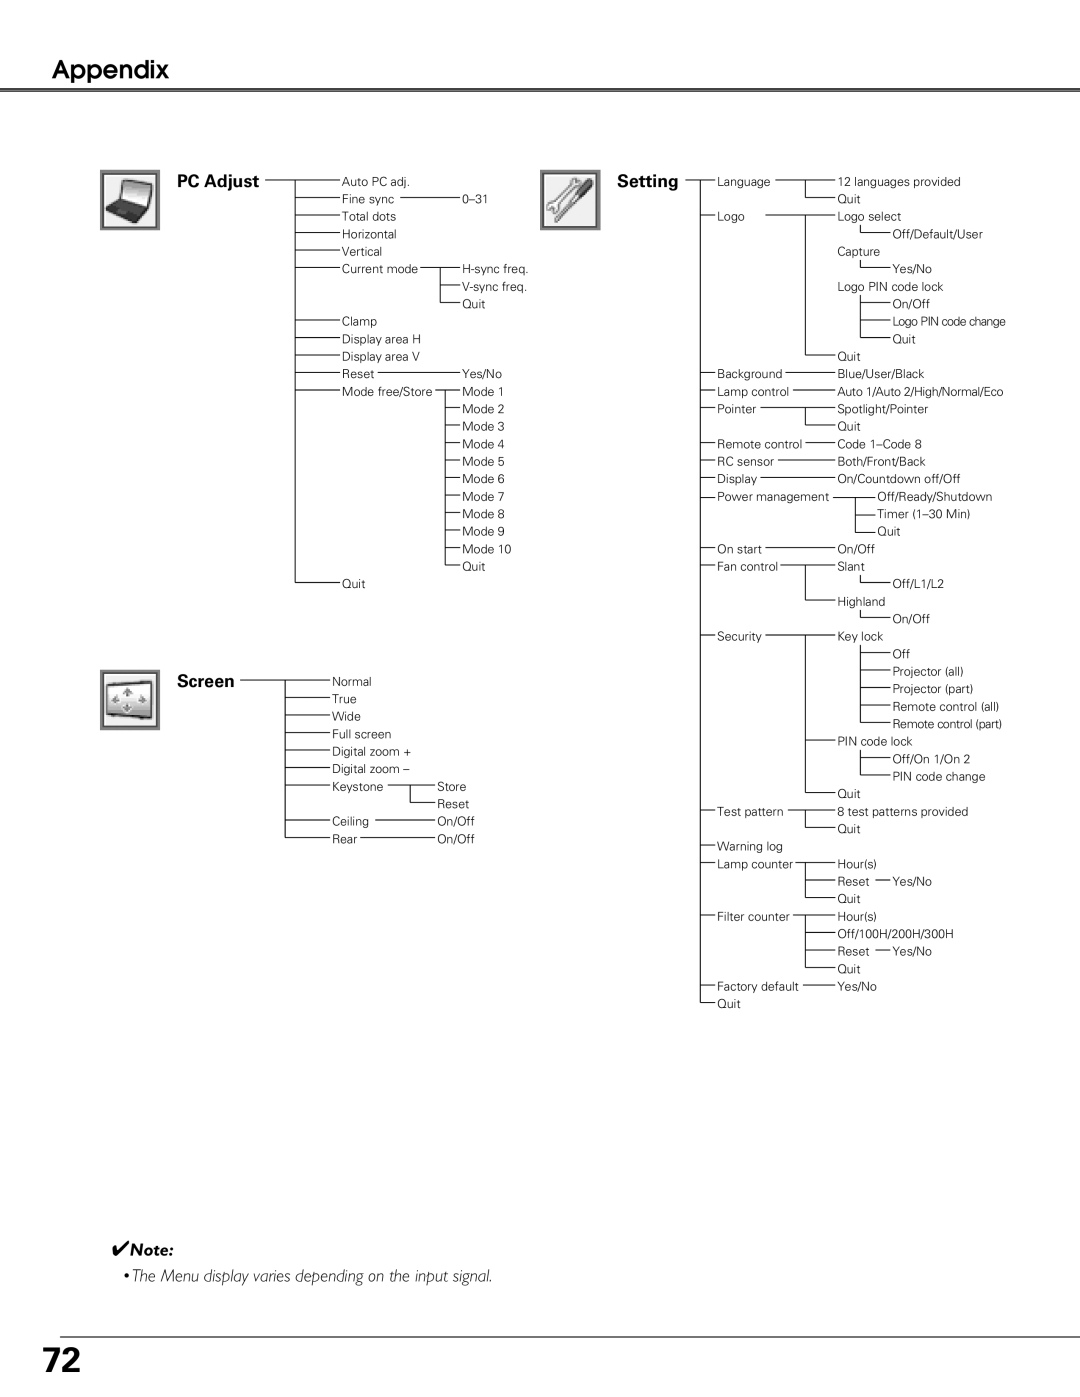
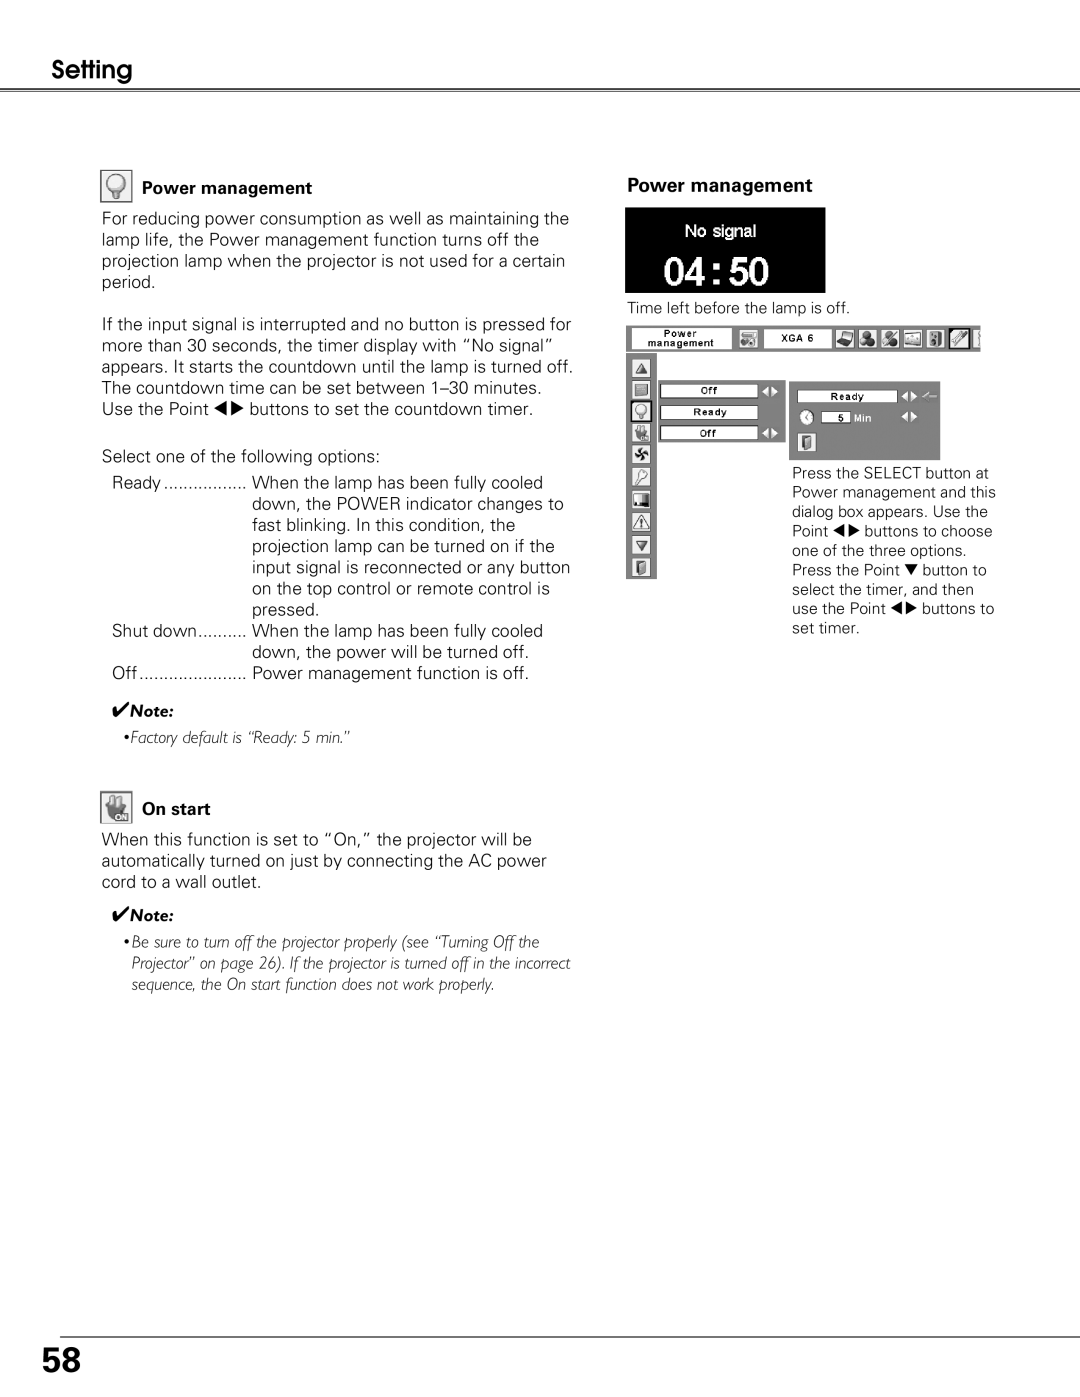
Sanyo PLC-XT20K, PLC-XT25K, PLC-XT20L* owner manual Fan control, Key lock

Page 59

Setting

Fan control

This function is used to set the cooling fans’ operation to the projector’s setting environment. Set this function properly in accordance with the projector’s installation method.

Otherwise, the cooling fans will not work properly and that causes malfunctions of the projector and decreases the lamp life.

Slant

Select the projector’s installation condition from the following options:

Off

When using the projector within the range of the


upward/ downward inclination of 20 degrees to


the horizontal plane.

L1

When using the projector within the range of the


upward inclination of over 20 degrees to the


horizontal plane.

L2

When using the projector with downward


inclination of over 20 degrees to the horizontal


plane.

Highland

Set this function according to the ground elevation under which you use the projector. When using the projector in high altitudes (about 1,200 meters or more above the sea level) where the fans have less cooling effect, set this function to “On.”

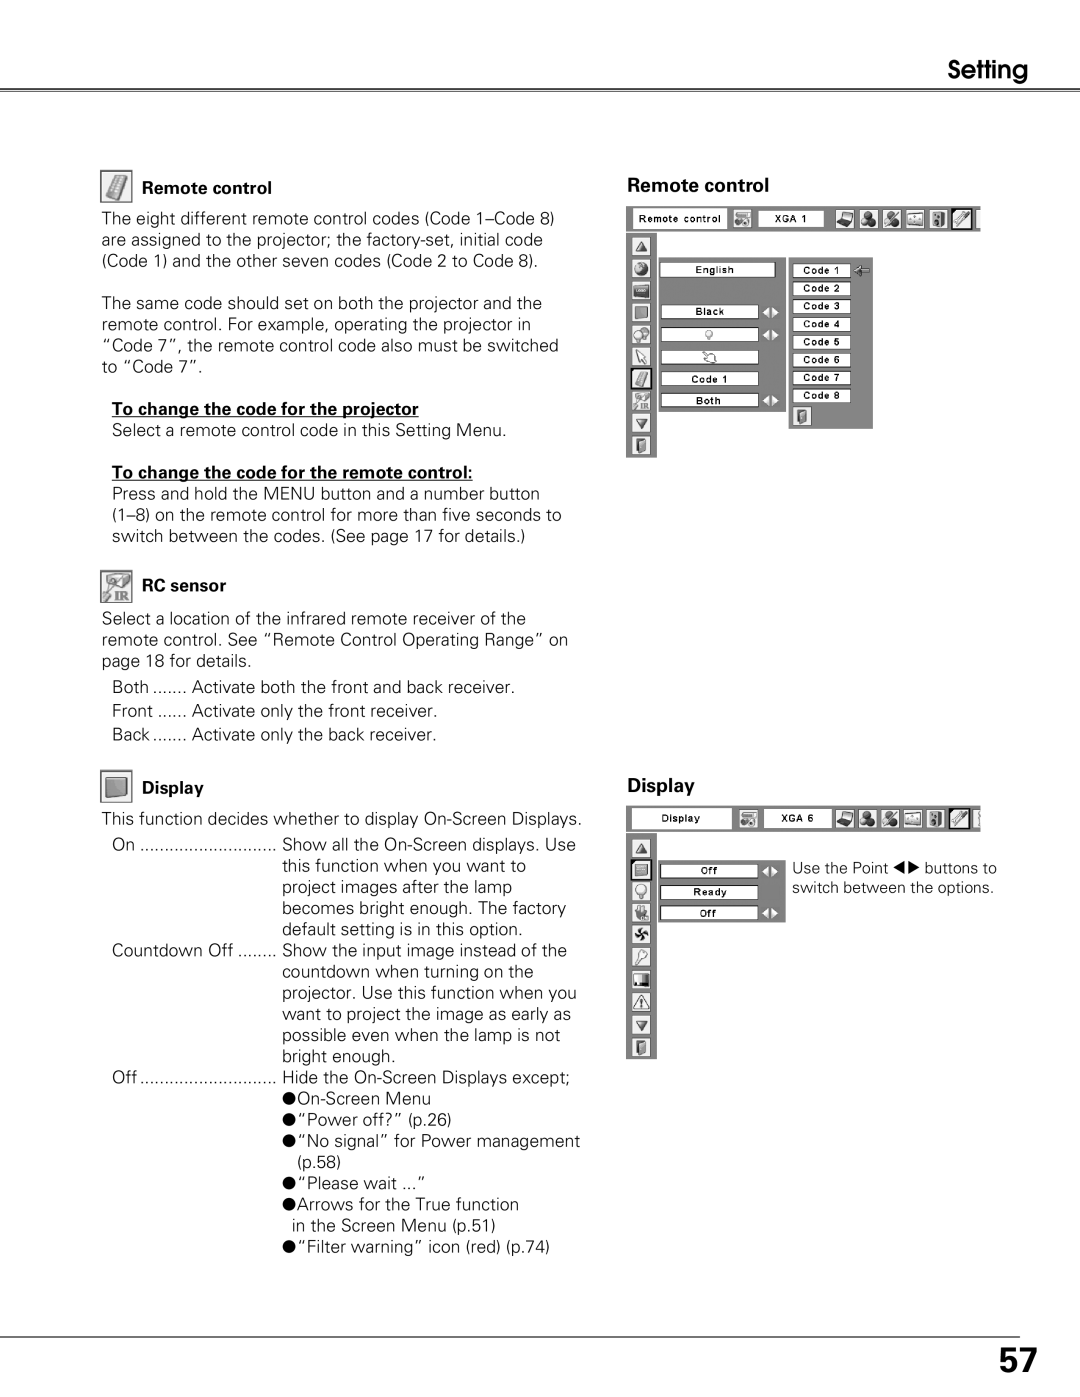
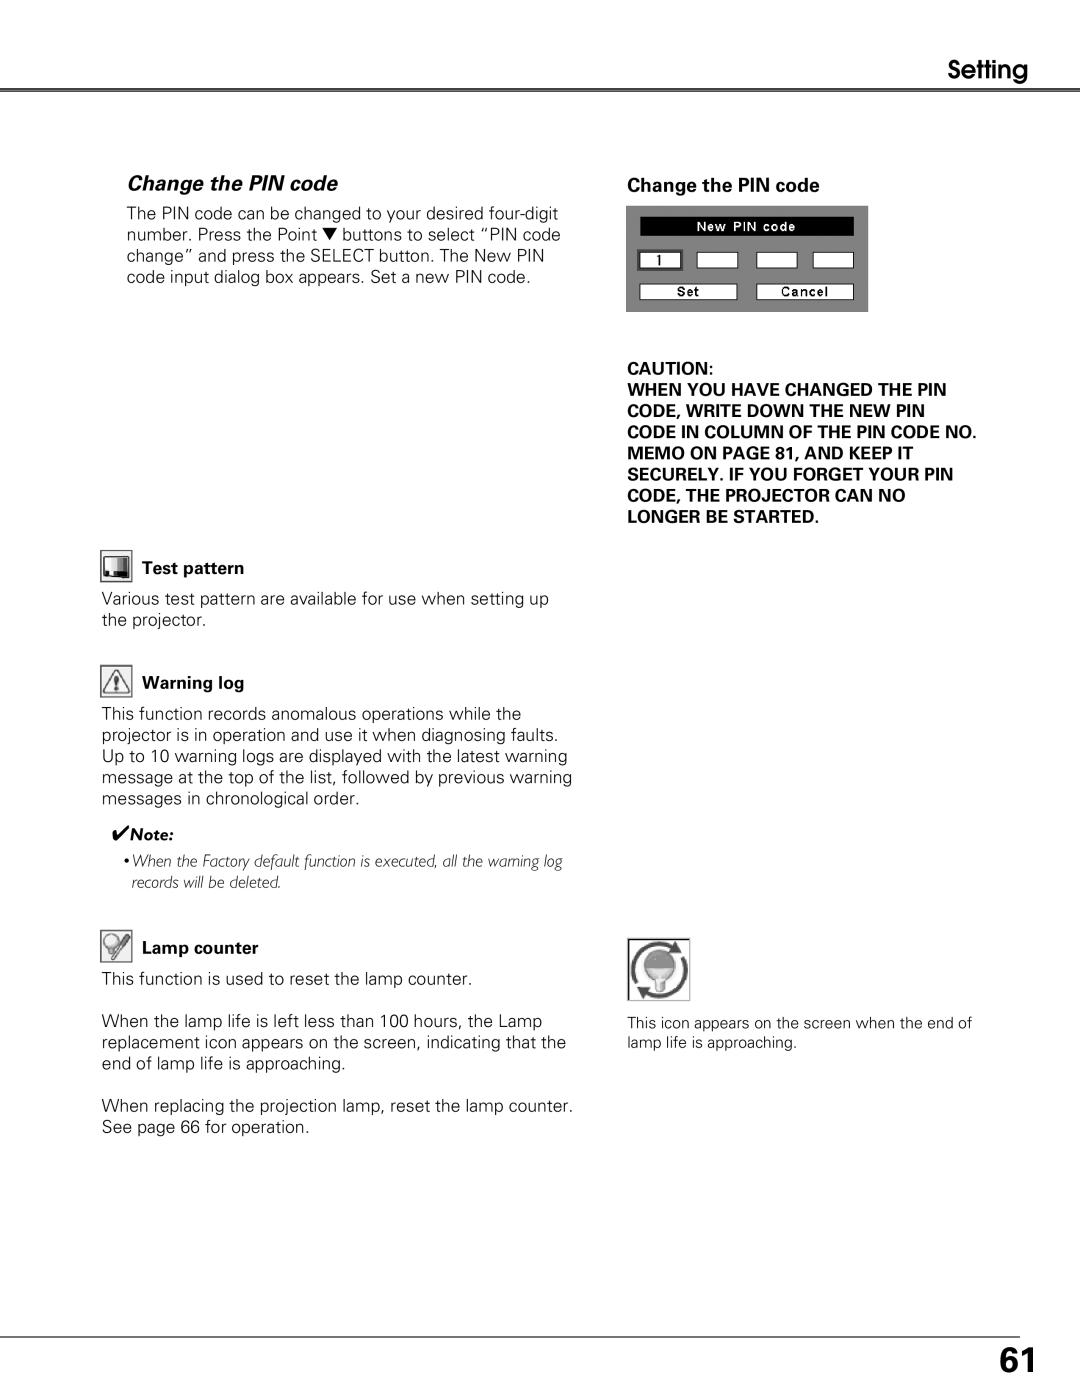
Security (Key lock and PIN code lock settings)

This function allows you to use the Key lock and PIN code lock function to set the security for the projector operation.

Key lock

This function locks the top control and remote control buttons to prevent operation by unauthorized persons.

...... Unlocked

...... Lock all the top control buttons

...... Lock the top control buttons except for the

ON/STAND-BY, INPUT, and INFO. buttons. To unlock, use the remote control.

...... Lock all the remote control buttons. To

unlock, use the top control.

...... Lock the remote control buttons except

for the ON, STAND-BY, INPUT 1–3, AUTO PC, FREEZE, and INFO. buttons.

If the top control accidentally becomes locked and you do not have the remote control nearby or there is something wrong with your remote control, contact the dealer where you purchased the projector or the service center.

Fan control

Press the SELECT button at Fan control and this dialog box appears. Use the Point ed buttons to choose Slant or Highland. Use the Point 78 buttons to switch between the options.

Key lock

Select Key lock. Use the Point ed buttons to choose one of the options and select [Yes] to activate it.

59

Image 59
Contents Multimedia Projector Compact Design Power Management Features and DesignTable of Contents Risk of Electric Shock Do not Open To the OwnerSafety Instructions Top Control Air CirculationPositioning Precautions Installing the Projector in Proper DirectionsTransporting the Projector Moving the ProjectorCompliance AC Power Cord for the United States and CanadaAC Power Cord for the United Kingdom Front Back Bottom Part Names and FunctionsRear Terminal 4INFRARED Remote Receiver Back Reset buttonTop Control Remote Control 5D.ZOOM button 4P-TIMER button9RESET/ON/ALL-OFF switch 3MENU buttonSpotlight Pointer Laser Pointer FunctionPointer Function Remote Control Code Wireless Mouse OperationAdjustable Feet Remote Control Battery InstallationRemote Control Receivers and Operating Range Attaching the lens to the projector InstallationLens Installation Removing the lensMoving the Lens Positioning the Projector for PLC-XT25/XT25K/XT21/XT20/XT20KProjector side AC outlet side Connecting the AC Power CordCables used for connection Connecting to a Computer Digital and Analog RGBConnecting to Video Equipment Video, S-Video Connecting to Video Equipment Component and RGB Scart PIN Code Input Dialog Box Basic OperationTurning On the Projector Selected Input Source and Lamp ControlTurning Off the Projector On-Screen Menu How to Operate the On-Screen MenuRemote Control Menu Bar Information Operating with Projector ControlLens Operation Menu Operation Sound AdjustmentDirect Operation Operating with Remote Control Keystone button Timer buttonNo Show button Input Selection Top Control Operation Remote Control OperationRemote Control button operation InputVideo Component Input Source SelectionInput Menu RGB PC analog RGB Scart RGB PC digitalAV System Menu Video or S-Video Video System SelectionVideo or S-Video ComponentHelpful Hints Computer AdjustmentPC System Menu Computer System SelectionSelecting Computer System Manually Auto PC Adj Auto PC AdjustmentPC Adjust Menu To store adjustment parametersManual PC Adjustment To store the adjusted data To clear the adjusted dataMemo Image Mode Selection Image Menu Image Mode SelectionImage Adjustment Image Adjust Menu Image AdjustmentProgressive SharpnessGamma Noise reductionTo reset the adjusted data, select Reset and press Screen Adjustment Keystone Screen AdjustmentScreen Menu Screen Size Adjustment Computer Signals Screen Size Adjustment Video, Component Signals Setting Pointer SettingSetting Menu Language Capture Logo Logo and Logo PIN code lock settingsLogo Capture Logo select Logo PIN code lock Change the Logo PIN code lock setting Enter a Logo PIN code Change the Logo PIN codeRemote control Display On start Power managementPower management Key lock Fan controlPIN code lock Change the PIN code lock settingEnter a PIN code Lamp counter Change the PIN codeTest pattern Filter counter Factory defaultFactory default Filter counterRecommendation Maintenance and Filter CleaningPage Model No. of your projector Lamp ReplacementReplacement Lamp Type No. POA-LMP105 Service Parts No 330 Reset the lamp counterLamp counter Resetting the Lamp CounterThen check the matters below Projector is shut down and all five indicators are blinkingCleaning the Projector Cabinet Cleaning the Projection LensAppendix TroubleshootingAppendix Information Input Menu TreeInput Setting PC Adjust ScreenProjector Condition Indicators and Projector ConditionOr replace the filter see below Lamp Replace indicatorON-SCREEN Resolution Compatible Computer Specifications31.47 59.94 Technical Specifications Optional Parts AccessoriesPJ Link Notice Terminal Mini DIN 8-PIN Configurations of TerminalsUSB Connector Series B Terminal Analog RGB Mini D-sub 15 pinLogo PIN Code Lock No PIN Code Number MemoDimensions MZ7A-B