


Appendix
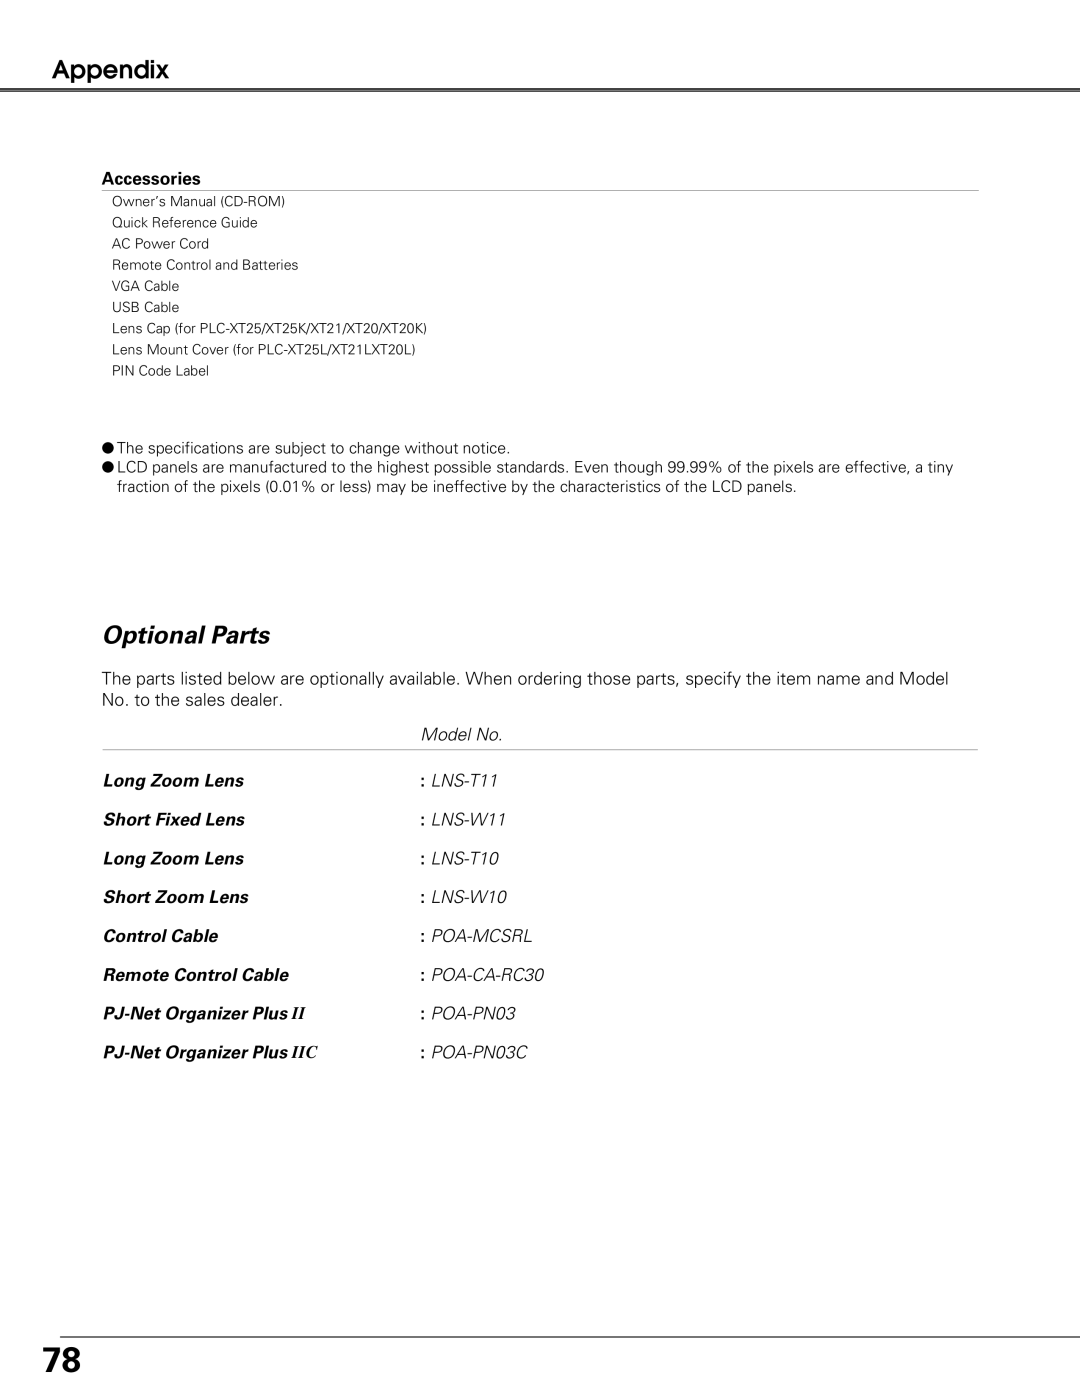
Accessories
Owner’s Manual
Quick Reference Guide
AC Power Cord
Remote Control and Batteries
VGA Cable
USB Cable
Lens Cap (for
Lens Mount Cover (for
PIN Code Label
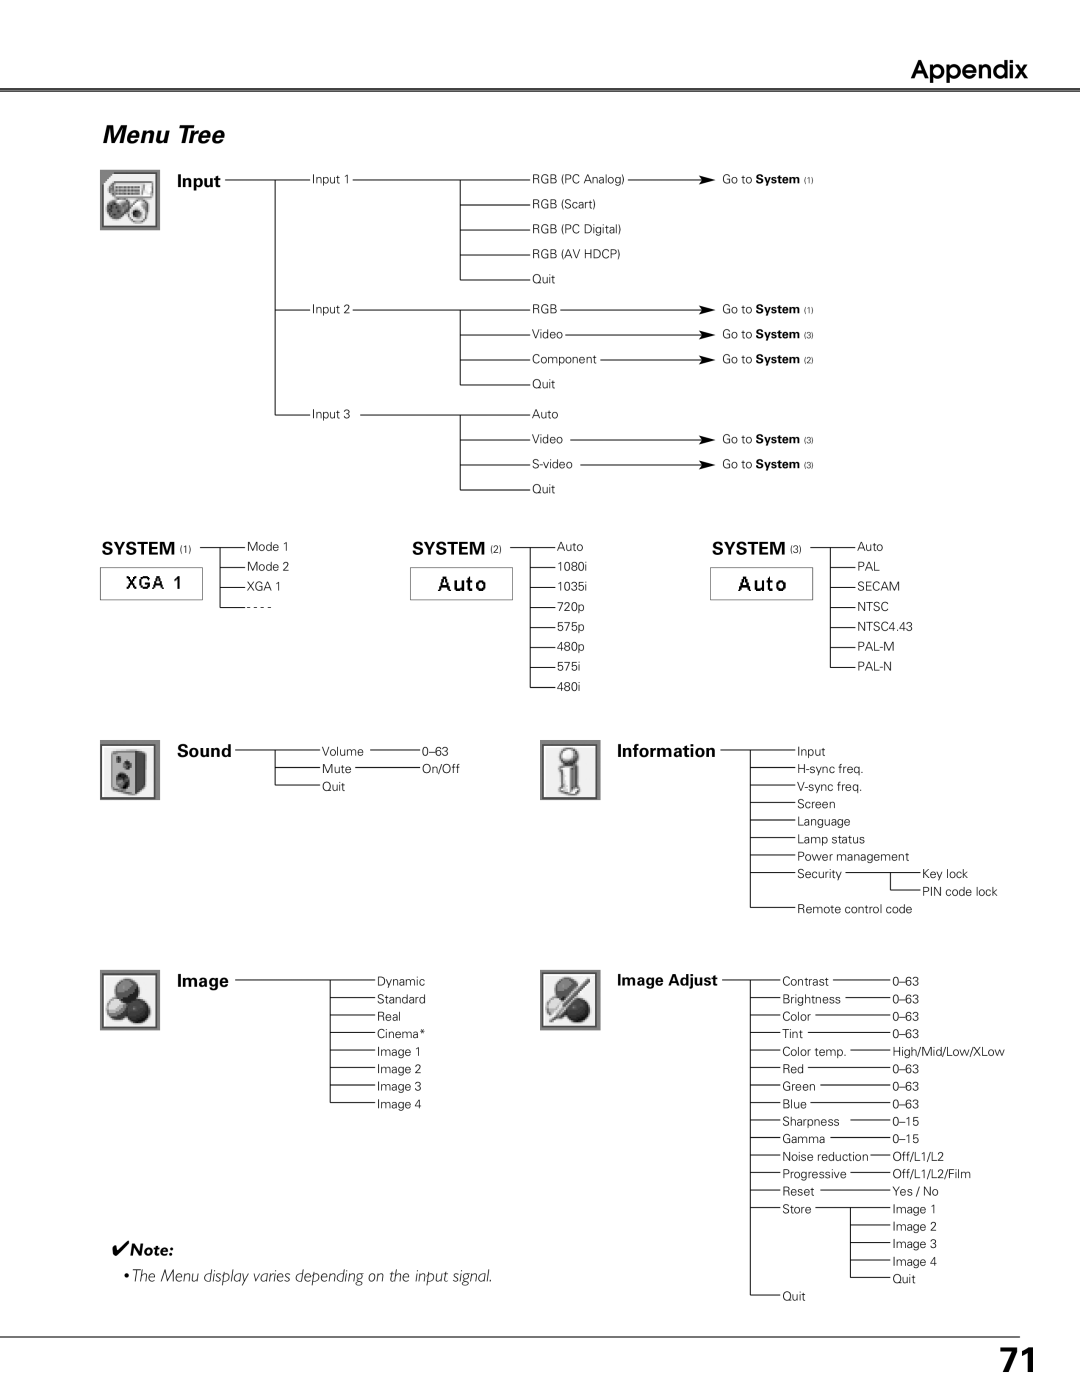
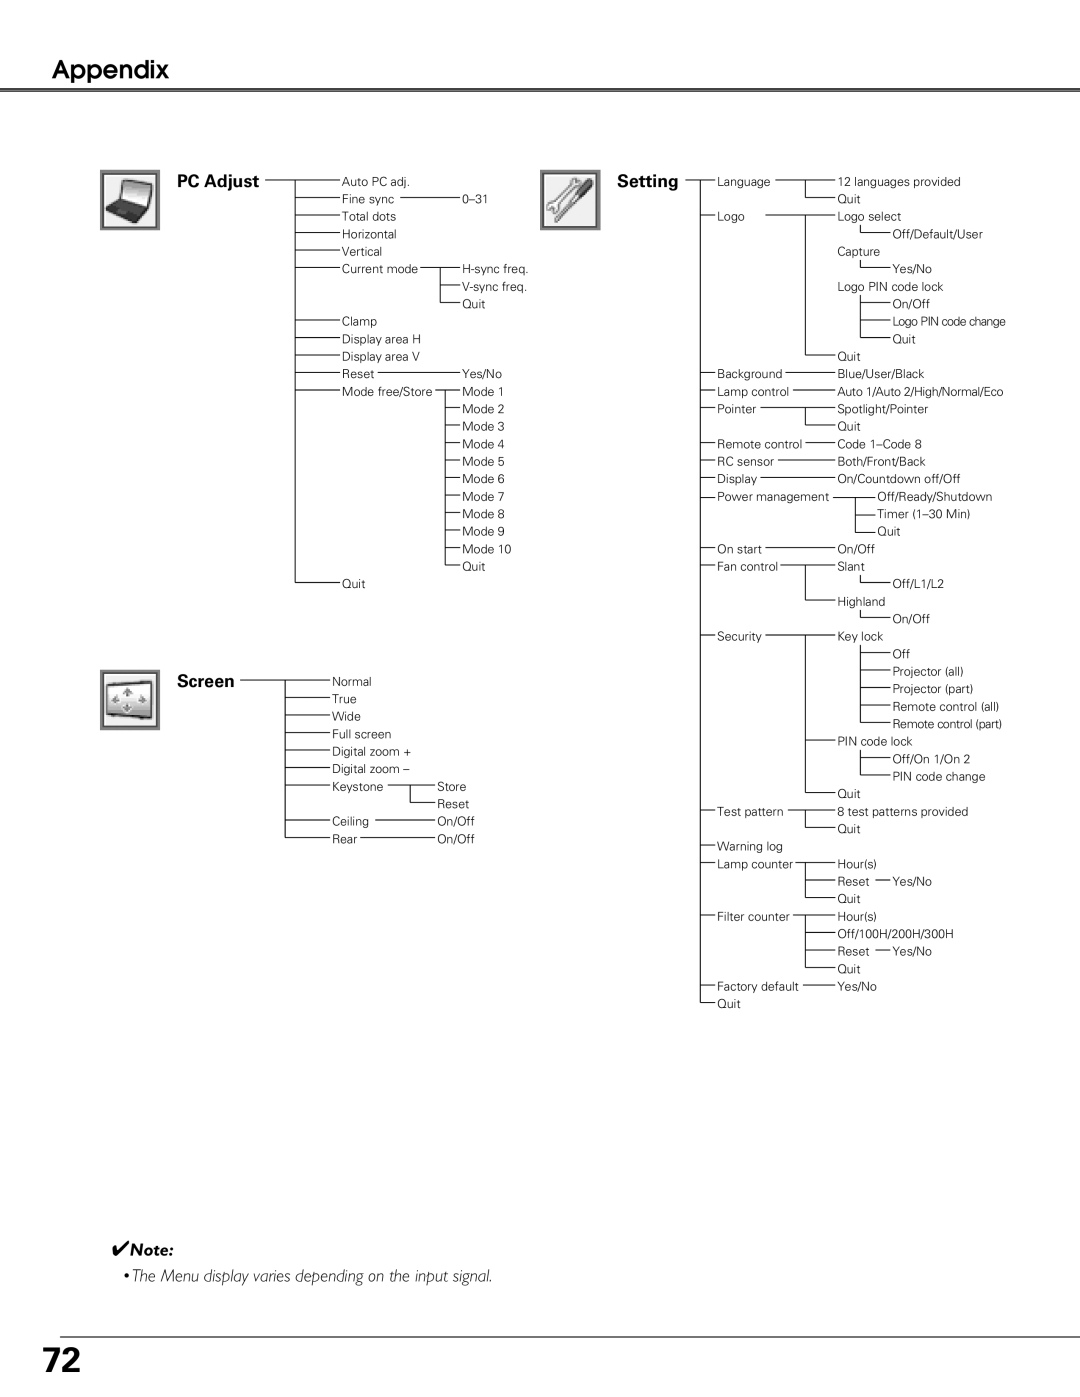
●The specifications are subject to change without notice.
●LCD panels are manufactured to the highest possible standards. Even though 99.99% of the pixels are effective, a tiny fraction of the pixels (0.01% or less) may be ineffective by the characteristics of the LCD panels.
Optional Parts
The parts listed below are optionally available. When ordering those parts, specify the item name and Model No. to the sales dealer.
| Model No. |
Long Zoom Lens | : |
Short Fixed Lens | : |
Long Zoom Lens | : |
Short Zoom Lens | : |
Control Cable | : |
Remote Control Cable | : |
: | |
: |
78