Lexmark 350d manual Photoconductor kit end-of-life, Ordering a photoconductor kit

Page 39

Maintaining the printer

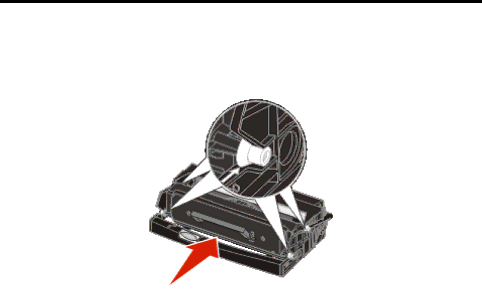
6Install the new toner cartridge by aligning the white rollers on the toner cartridge with the white arrows on the tracks of the photoconductor and pushing the toner cartridge in as far as it will go. The toner cartridge clicks into place when correctly installed.

7Close the front door.

8Turn the printer back on.

Photoconductor kit end-of-life

To ensure print quality and to avoid damage to the printer, the printer stops operating after the photoconductor kit has reached a maximum of 110% of its life. The message 84 Replace Photoconductor is displayed when the printer reaches this point. If the Toner Alarm setting is set to Single or Continuous (default is Off), the printer automatically notifies you before the photoconductor kit reaches this point and displays the message 84 Photoconductor Life Warning. To avoid having the printer stop operating, replace the photoconductor kit when you first receive the 84 Photoconductor Life Warning message. While the printer may continue to function properly after the photoconductor kit has reached its official end-of-life (approximately 30,000 pages), print quality begins to significantly decrease until the photoconductor stops operating at the maximum of 110% of its life. Once the photoconductor kit has been replaced, and the counter has been reset, normal printer operation resumes. For more information, see the instruction sheet that came with your photoconductor kit.

Ordering a photoconductor kit

When the 84 Photoconduct life warning message appears, you should order a new photoconductor kit. You can print a few hundred pages after the 84 Replace Photoconductor message appears.

Photoconductor kit end-of-life

39

Image 39
Contents E350d and E352dn EditionJune Contents Contents Printer overview Learning about the printerLearning about the printer PostScript Menu Understanding the control panel Button or control panel item FunctionStatus Indicates What types of print media can be loaded? Understanding print media guidelinesUnderstanding print media guidelines Paper characteristicsSelecting print media PaperSmoothness Unacceptable paperSelecting preprinted forms and letterhead Understanding print media guidelines Selecting paperTransparencies Understanding print media guidelines Printing on letterheadSelecting transparencies Labels EnvelopesCard stock Storing print mediaAvoiding jams Loading the 250-sheet tray PrintingPrinting Printing Extending the tray for legal-size or folio-size paper Printing Attaching the dust cover Loading the manual feeder Sending a job to print Linking traysCanceling a job from the taskbar Canceling a print jobCanceling a job from the printer control panel Canceling a job from a computer running WindowsPrinting the menu settings Canceling a job from a Macintosh computerCanceling a job from a Macintosh computer running Mac OS Printing a font sample list Printing a network setupAccessing the system board Installing optionsInstalling options Installing options Adding a memory card Adding a flash memory card Installing an optional 250-sheet drawer or 550-sheet drawer Click File à Properties Click the Install Options tab Recognizing installed optionsOrdering supplies Maintaining the printerStoring supplies Conserving suppliesMaintaining the printer Part number DescriptionAverage cartridge yield Changing a toner cartridge Ordering a toner cartridgeMaintaining the printer Ordering a photoconductor kit Photoconductor kit end-of-lifeChanging a photoconductor kit Maintaining the printer Part numbers Maintenance kitRecycling Lexmark products Machine voltageMessage Clearing jamsIdentifying jams Understanding jam messagesClearing jams Clearing a jamClearing jams Clearing jams Clearing jams Clearing a jam in the manual feeder Clearing jams Lexmark Status Messenger Utility TroubleshootingOnline customer support Calling for service Checking an unresponsive printerSolution Solving printing problemsTroubleshooting SymptomTurning on Reduced Curl mode Solving option problems OptionAction Symptom Cause Solution Solving service message issuesSolving paper feed problems ProblemSolving print quality problems Entire page is white Streaks appear on Printing is too dark Problem Action Driver option Menu selectionPurpose ValuesCleaning the printhead lens Close the front door Turn the printer on Administrative support Disabling control panel menusEnabling control panel menus Administrative support Restoring factory default settingsSelecting printer operating mode Setting security using the Embedded Web Server EWSUsing the secure Embedded Web Server Setting the system passwordLocking the control panel menus Industry Canada compliance statement Conventions Electronic emission noticesEuropean Community EC directives conformity Product energy consumption Noise emission levelsLaser notice Statement of Limited Warranty for Lexmark E350d and E352dnLimited warranty service Additional rights Numerics IndexIndex