Lexmark 350d manual Printing

Page 19

Printing

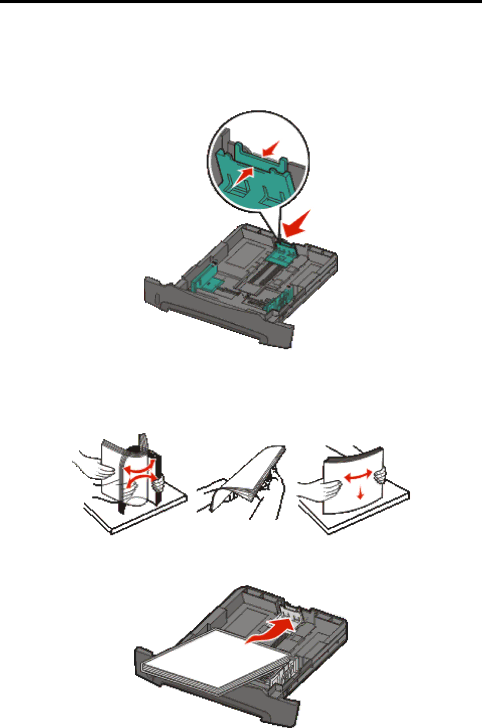
2Adjust the rear paper guide, to the correct position for the size print media you are loading. Note: There should be a slight gap between the rear paper guide and the paper stack.

3Flex the sheets back and forth to loosen them, then fan them. Do not fold or crease the print media. Straighten the edges of the paper stack on a level surface.

4Insert the paper stack.

Note: Make sure the paper stack is laying flat in the tray and is not above the maximum paper fill indicators. Improper loading may cause jams.

Note: For simplex printing load letterhead paper with the design side facing down. The top edge of the sheet with the logo should be placed at the front of the tray. For duplex printing load letterhead paper with the design side facing up.

Loading the 250-sheet tray

19

Image 19
Contents E350d and E352dn EditionJune Contents Contents Printer overview Learning about the printerLearning about the printer PostScript Menu Understanding the control panel Function Button or control panel itemStatus Indicates What types of print media can be loaded? Understanding print media guidelinesUnderstanding print media guidelines Paper characteristicsSelecting print media PaperSmoothness Unacceptable paperSelecting preprinted forms and letterhead Understanding print media guidelines Selecting paperUnderstanding print media guidelines Printing on letterhead TransparenciesSelecting transparencies Labels EnvelopesCard stock Storing print mediaAvoiding jams Loading the 250-sheet tray PrintingPrinting Printing Extending the tray for legal-size or folio-size paper Printing Attaching the dust cover Loading the manual feeder Sending a job to print Linking traysCanceling a job from the taskbar Canceling a print jobCanceling a job from the printer control panel Canceling a job from a computer running WindowsCanceling a job from a Macintosh computer Printing the menu settingsCanceling a job from a Macintosh computer running Mac OS Printing a font sample list Printing a network setupAccessing the system board Installing optionsInstalling options Installing options Adding a memory card Adding a flash memory card Installing an optional 250-sheet drawer or 550-sheet drawer Click File à Properties Click the Install Options tab Recognizing installed optionsOrdering supplies Maintaining the printerStoring supplies Conserving suppliesPart number Description Maintaining the printerAverage cartridge yield Changing a toner cartridge Ordering a toner cartridgeMaintaining the printer Ordering a photoconductor kit Photoconductor kit end-of-lifeChanging a photoconductor kit Maintaining the printer Part numbers Maintenance kitRecycling Lexmark products Machine voltageMessage Clearing jamsIdentifying jams Understanding jam messagesClearing jams Clearing a jamClearing jams Clearing jams Clearing jams Clearing a jam in the manual feeder Clearing jams Lexmark Status Messenger Utility TroubleshootingOnline customer support Calling for service Checking an unresponsive printerSolution Solving printing problemsTroubleshooting SymptomTurning on Reduced Curl mode Option Solving option problemsAction Symptom Cause Solution Solving service message issuesSolving paper feed problems ProblemSolving print quality problems Entire page is white Streaks appear on Printing is too dark Problem Action Driver option Menu selectionPurpose ValuesCleaning the printhead lens Close the front door Turn the printer on Disabling control panel menus Administrative supportEnabling control panel menus Administrative support Restoring factory default settingsSelecting printer operating mode Setting security using the Embedded Web Server EWSUsing the secure Embedded Web Server Setting the system passwordLocking the control panel menus Industry Canada compliance statement Conventions Electronic emission noticesEuropean Community EC directives conformity Product energy consumption Noise emission levelsLaser notice Statement of Limited Warranty for Lexmark E350d and E352dnLimited warranty service Additional rights Numerics IndexIndex